
Single Sign-On with Google
This guide provides step-by-step instructions on setting up Google (G-Suite) as a SAML IdP for your Cloudsmith Organization.
Adding Cloudsmith to Google (G-Suite)
Cloudsmith is not yet an integrated application in Google (G-Suite). You'll have to add Cloudsmith manually so you can configure SSO.
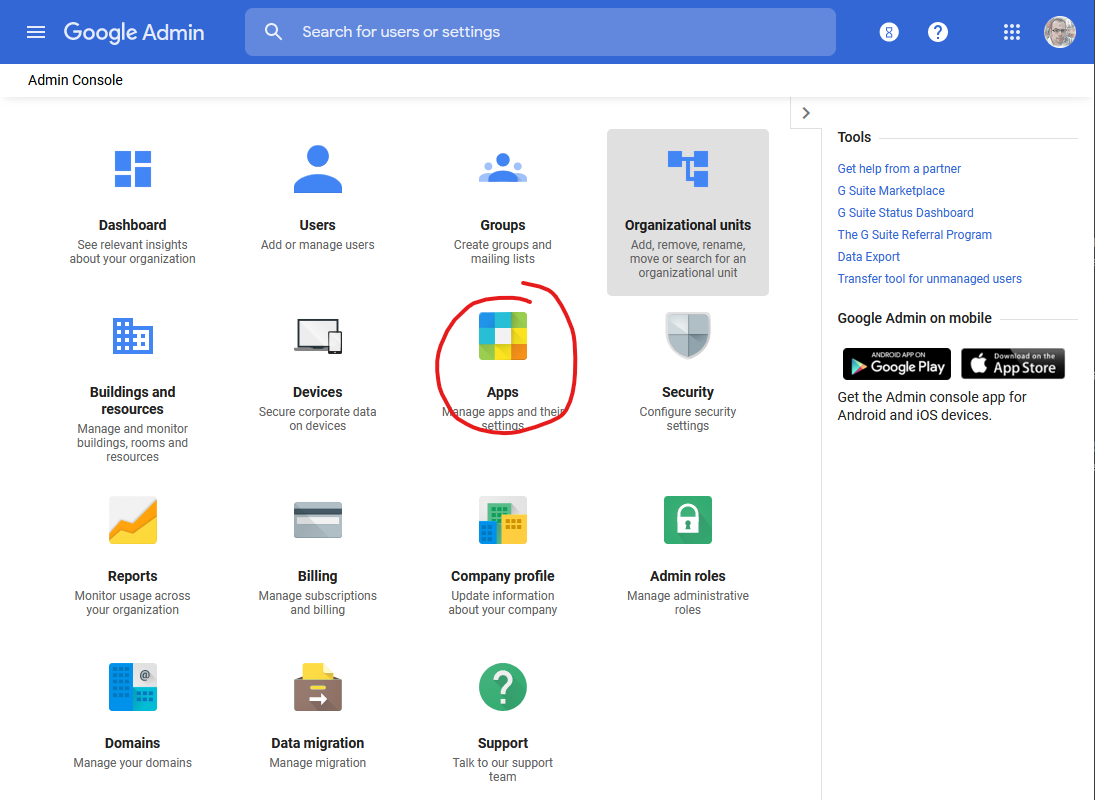
Log into the Google (G-Suite) Admin Console and click Apps:
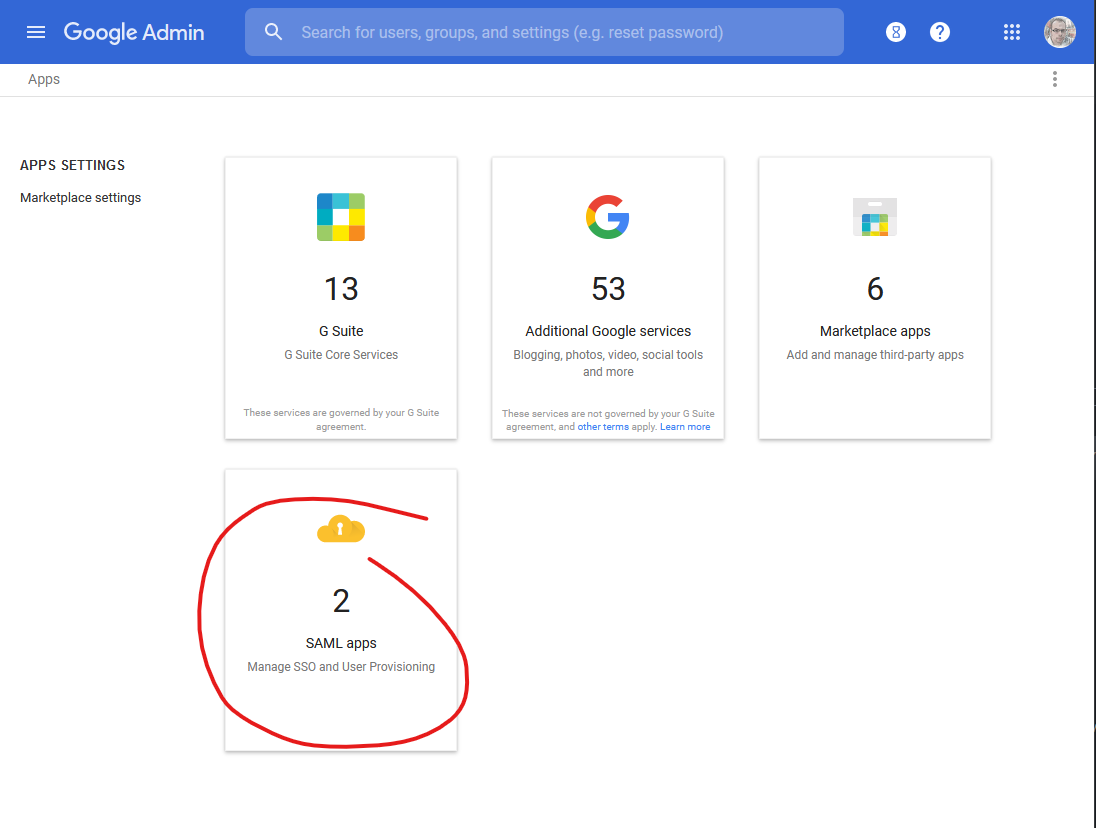
Click on the SAML apps panel:
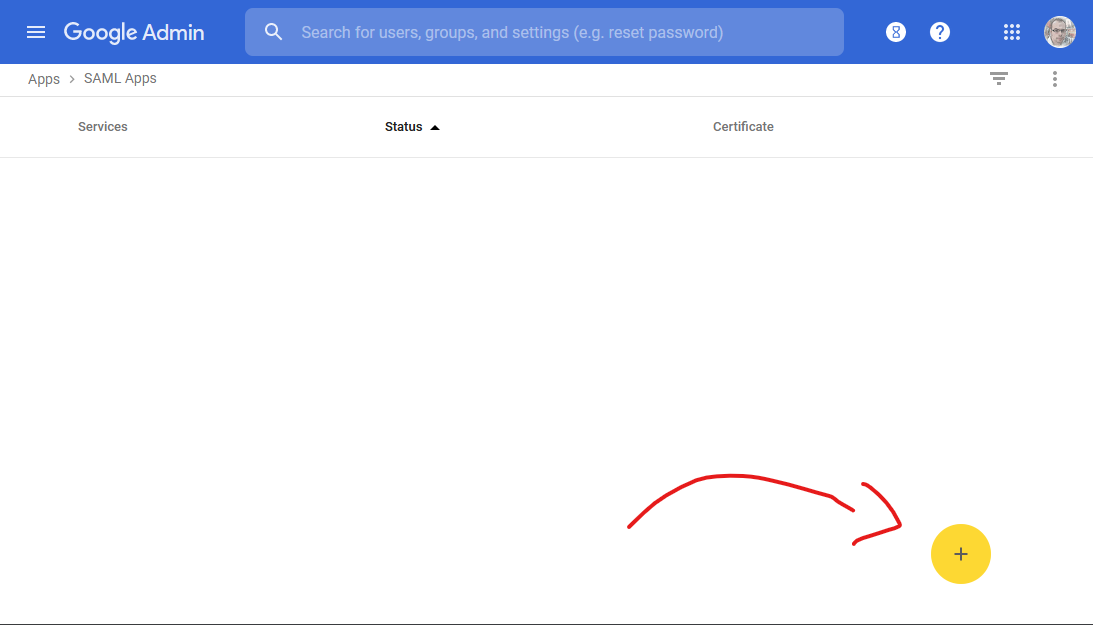
Click the yellow plus (+) button in the bottom right to add a new SAML application:
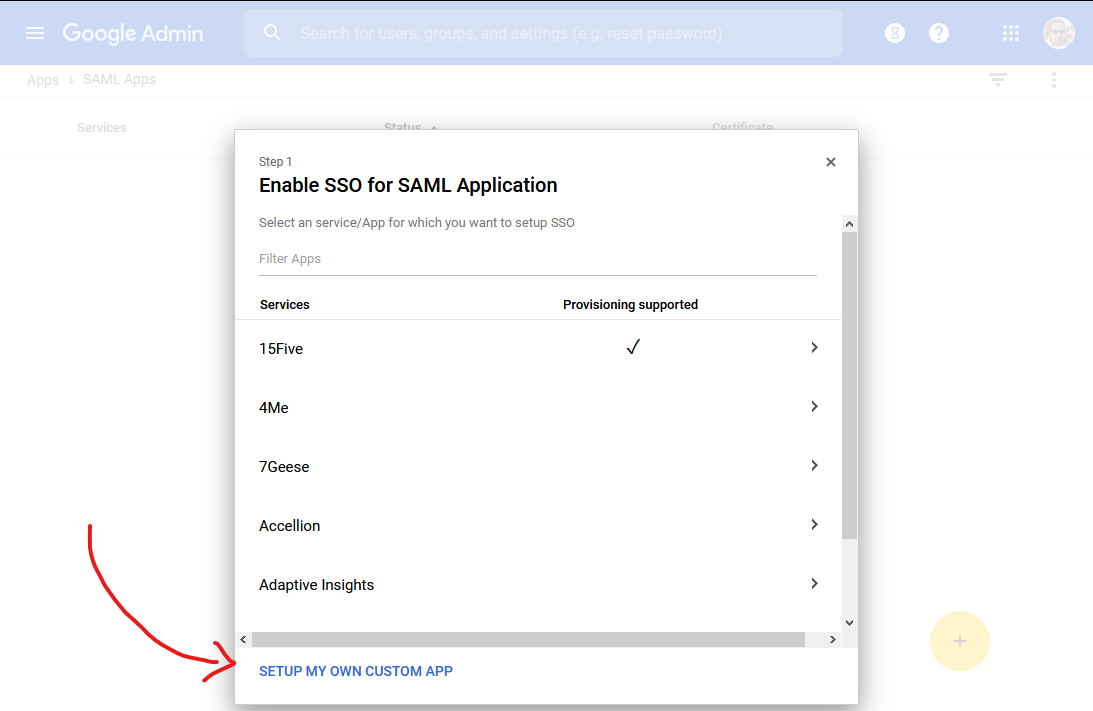
You should then see a modal window pop up where we can begin to enter our application's details.
A new modal dialog pops up. In Step 1, Enable SSO for SAML Application, click on SETUP MY OWN CUSTOM APP at the bottom:
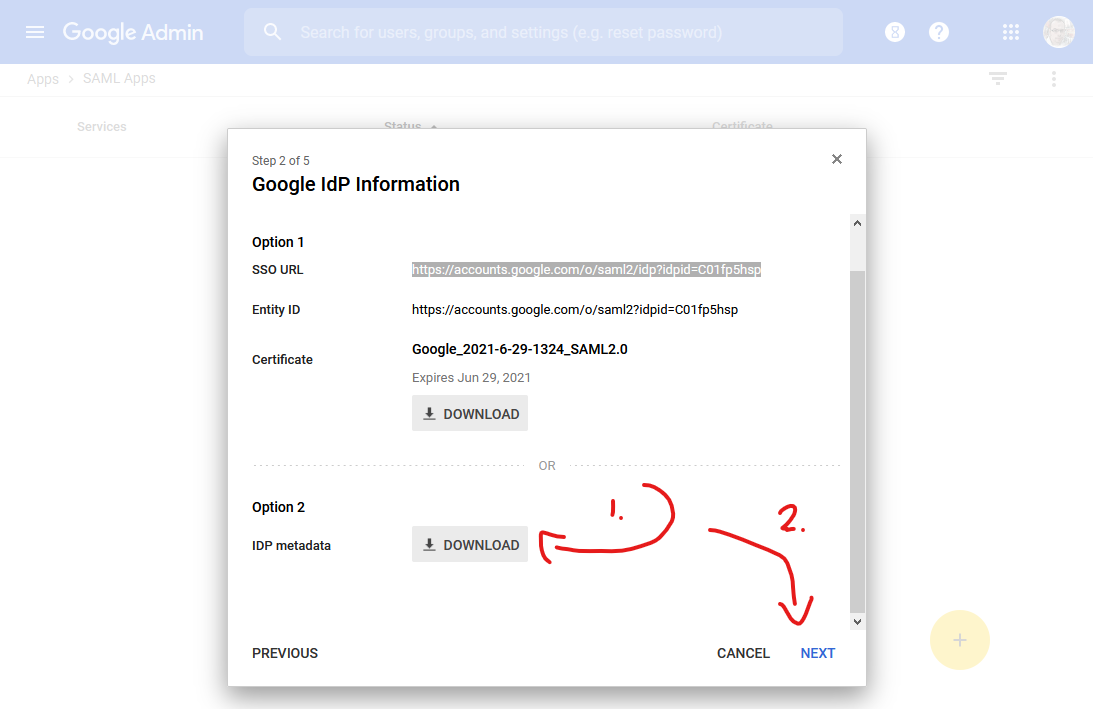
In Step 2, Google IdP Information, click on the DOWNLOAD button beside IDP metadata and save this file, then click NEXT:
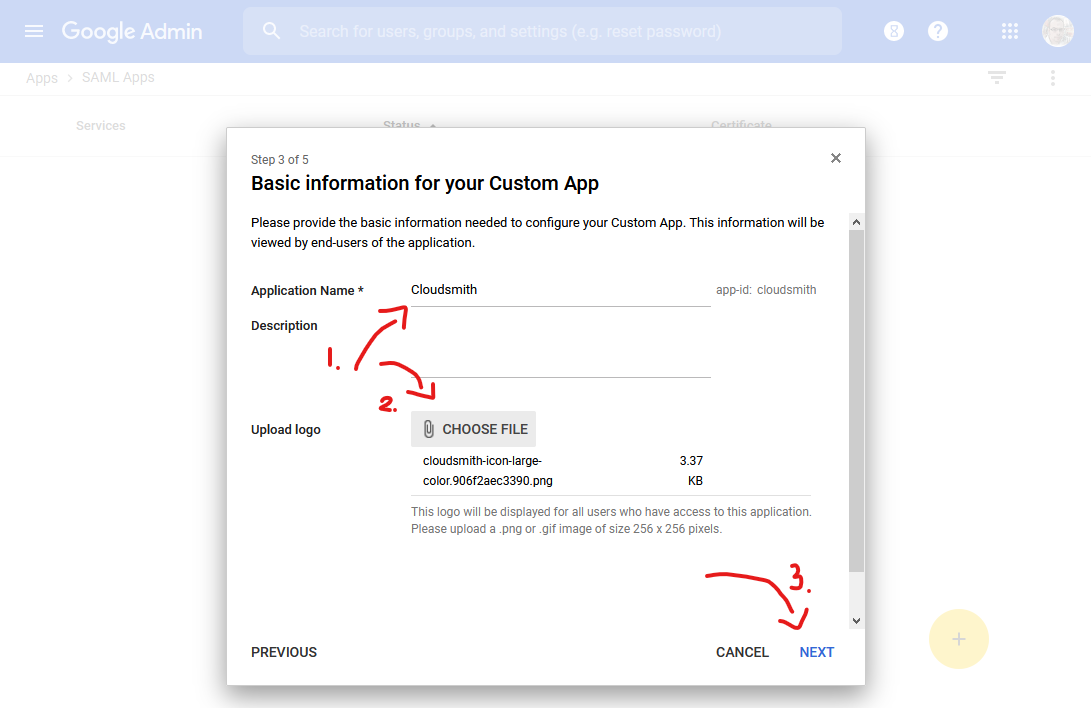
In Step 3, Basic information for your Custom App, enter "Cloudsmith" (without quotes) as the Application Name. (You can optionally add the Cloudsmith logo too for easier visibility, you can find hi-res versions of the logo here):
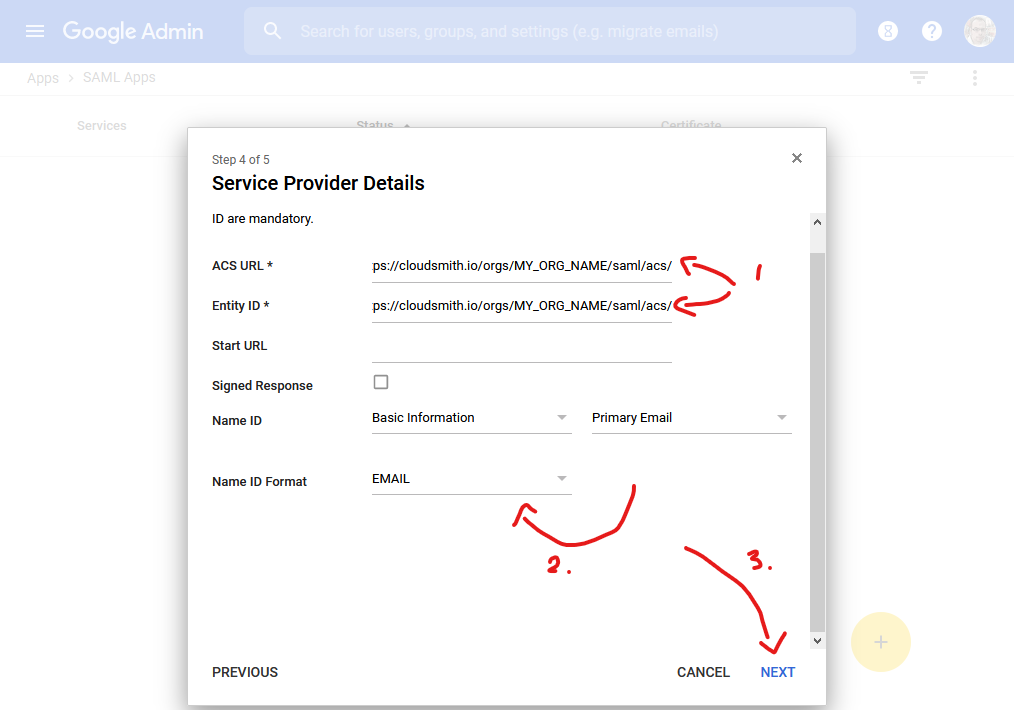
In Step 4, Service Provider Details, enter: "https://cloudsmith.io/orgs/MY_ORG_NAME/saml/acs/" (without quotes) as the ACS URL and Entity ID, where "MY_ORG_NAME" is replaced with your organization's slug (i.e. what your normally see in the URL bar for your organization).
Leave the Signed Response checkbox unchecked (this is very important). Then for the Name ID Format, ensure that "EMAIL" is chosen from the dropdown list. Then click on NEXT on the bottom right:
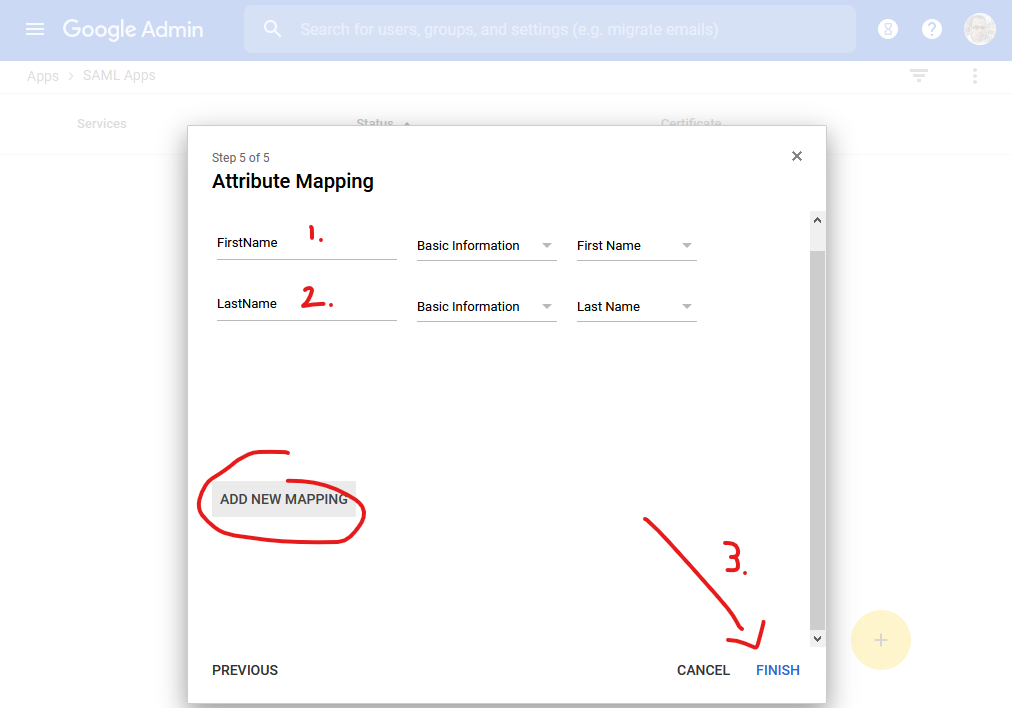
Next, we'll configure Google (G-Suite) to also send name details to Cloudsmith. Create two mappings. The first is "FirstName" as the value, mapped from Basic Information / First Name. The second is "LastName" as the value, mapped from Basic Information / Last Name. Then click on FINISH:
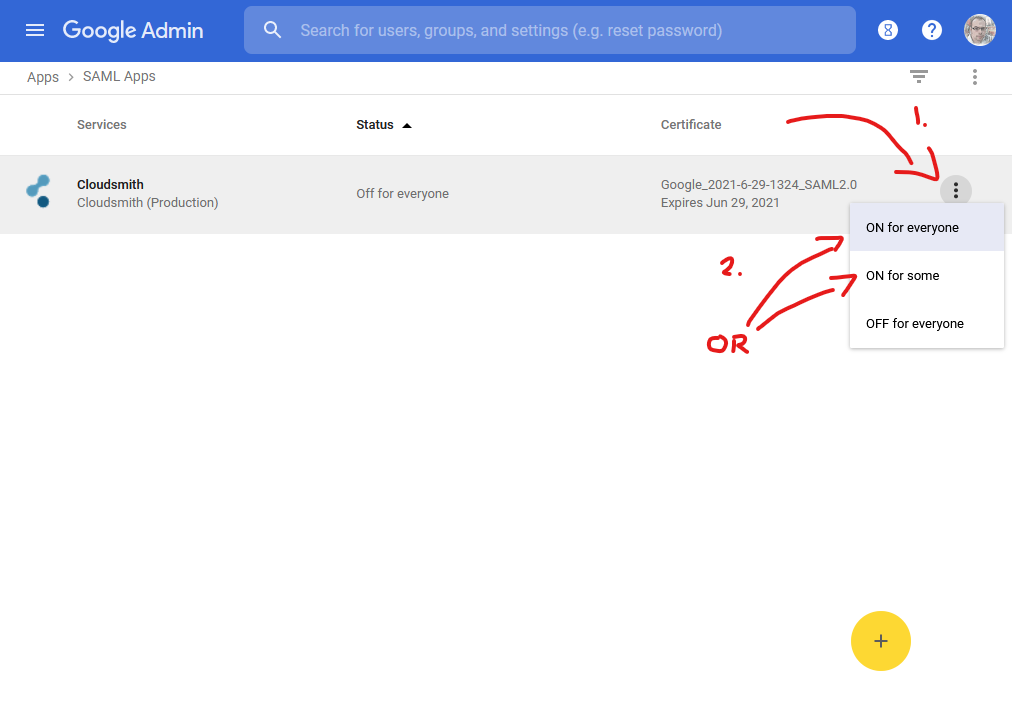
Finally, you'll need to enable the Cloudsmith SAML application for all or some member's of your Google (G-Suite) organization. Go back to the SAML apps dashboard (as in step 2). Then, click the three dots to the right of the Cloudsmith application, and select either ON for everyone (to enable for all users), or ON for some (to enable for a subset of users):
Your application is now configured on Google (G-Suite)! Google states that it may take upto 24 hours before the application is active on your domain, but in our experience it takes much less than this.
Adding SAML configuration to Cloudsmith
Once configured as above, you'll need to add the IdP Metadata XML to the SAML Settings for your Cloudsmith organization.
When you have added your IdP Metadata XML to your organization SAML settings and enabled SAML Authentication, you will be able to access the landing page of your organization at the following URL:
https://cloudsmith.io/orgs/ORG/saml/login/
Where ORG is your organization's slug/identifier (what you would normally see in the URL when accessing your organization within Cloudsmith).
Updated 6 months ago