Package Move
We provide two ways to move a package from one repository to another:
- Move via the API using tools/integrations (such as the Cloudsmith CLI)
- Move via the website UI.
Move via the Cloudsmith CLI
Identify a Package
To move a package using the Cloudsmith CLI, you first need to identify the package you wish to move. See Package Identification for full instructions on identifying packages.
Move a Package
Once you have identified the package, you use the cloudsmith move command to move it:
cloudsmith move OWNER/SOURCE_REPO/UNIQUE_ID DESTINATION_REPOFor example:
cloudsmith move demo/examples-repo-public/IGgZrwGFAkyU examples-repoIn the above example, we identified that the package we wished to move had the UniqueID "IGgZrwGFAkyU", and we moved it from the source repository "examples-repo-public" to the destination repository "examples-repo":

Move package CLI example
Move via Website UI
You can move a package via the Website UI:
- Via the repository packages list
- Via the package detail page
Move via Repositories Packages List
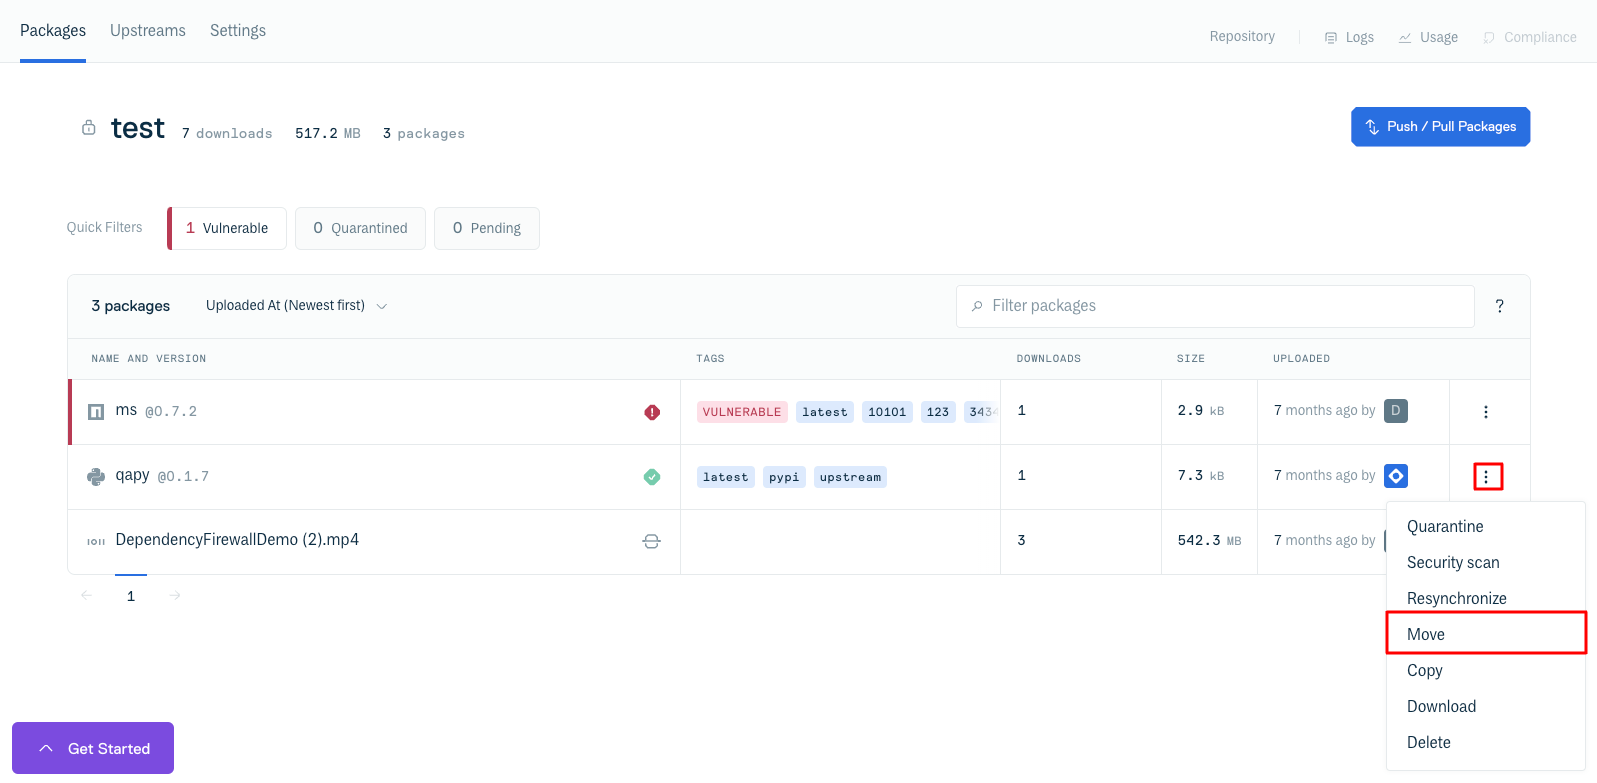
To move a package via the repository packages list, click the traffic light button to the right of the package name, then click "Move" in the dropdown menu:

Move via Package Detail page
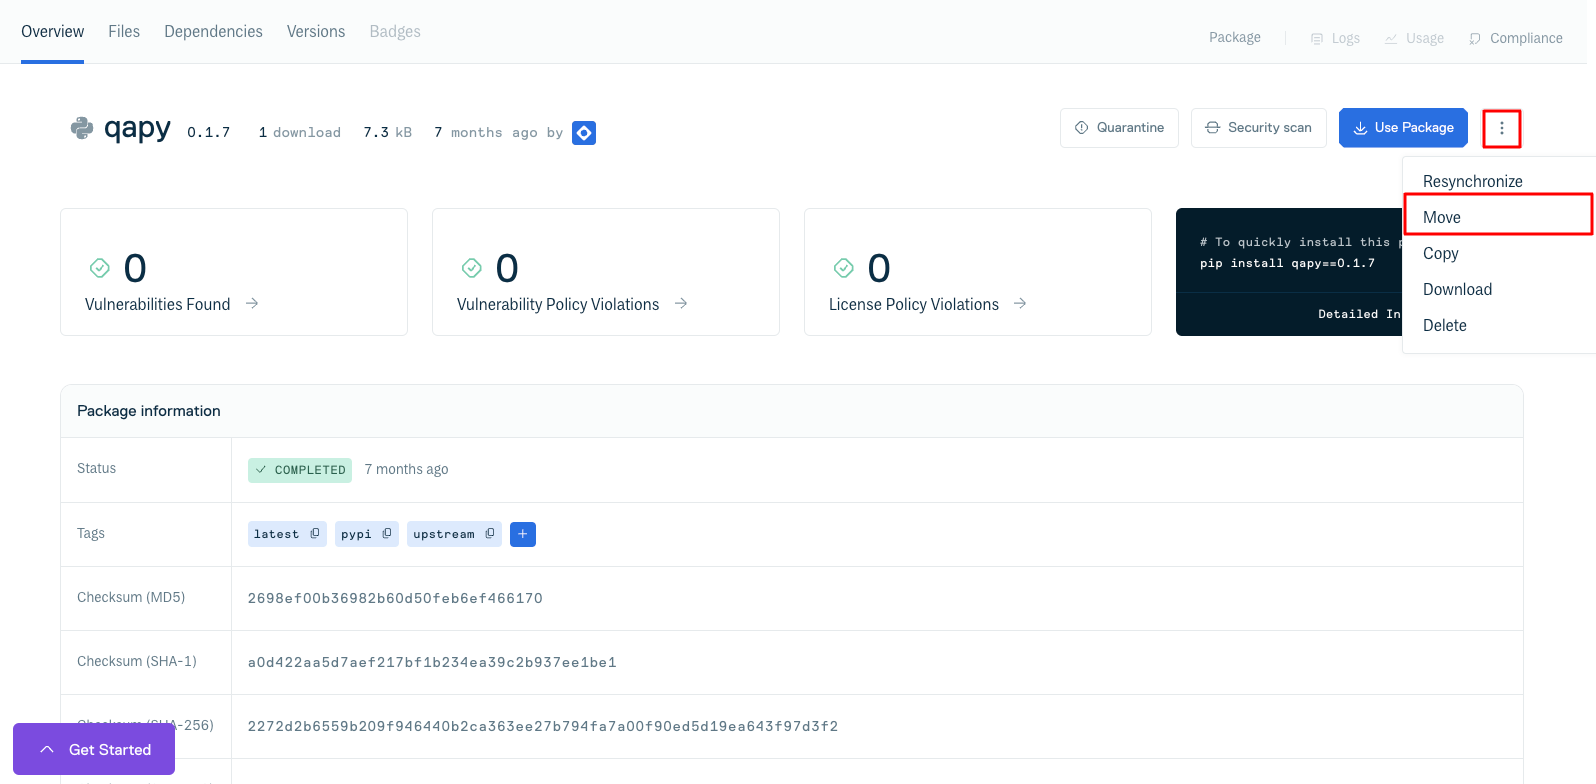
To move a package via the package detail page, click the traffic light button next to the "Use Package" button in the upper right hand corner, then click the "Move" button to the right of the package name:

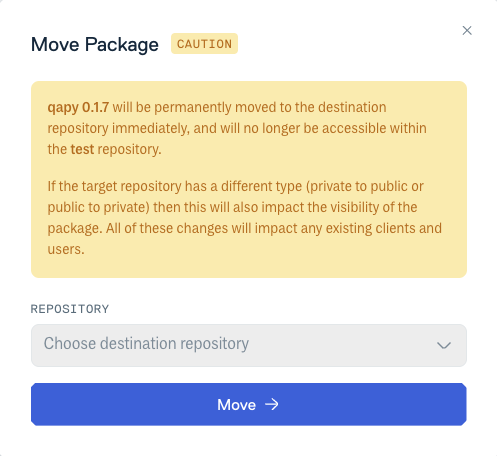
After clicking a move button you will be presented with the Move Package form. Select the destination repository from the drop-down menu and click "Move" to complete the package move:

You will then get an on-screen message confirming the successful package move.
Bulk Package Move
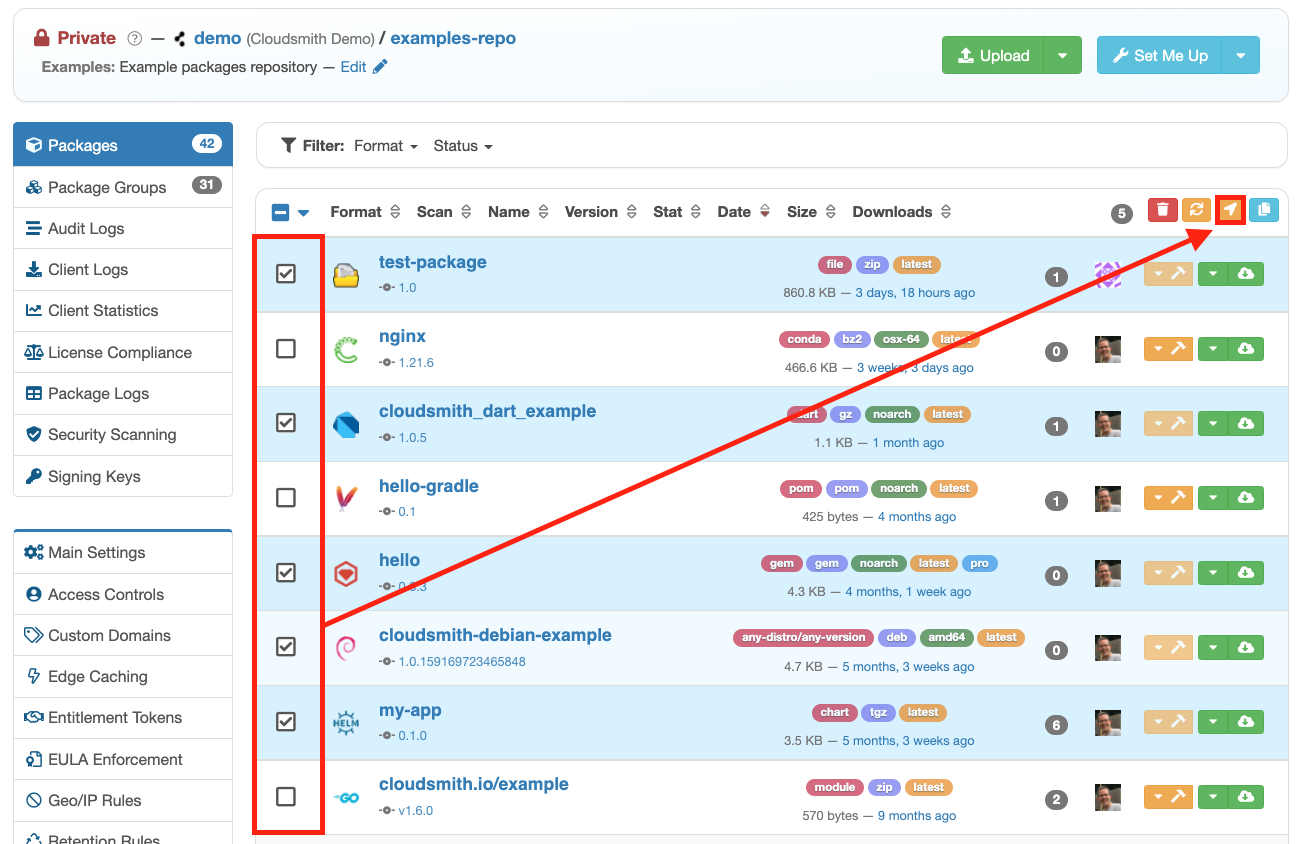
To move more than one package to another repository, use the checkboxes beside the package names and then click the orange "move package" button that appears at the top of the package list:

Bulk Package Move
If you have selected a checkbox beside a package name, then package operations under the orange 'tool' button will be disabled as you are now in bulk operation mode.
Updated 5 months ago
