
Create a Repository
You can create a new repository in three ways:
- Via the Cloudsmith CLI
- Via the Website UI
- Via the Cloudsmith API
Via the Cloudsmith CLI
In the following examples:
Identifier | Description |
|---|---|
OWNER | A Cloudsmith organization / workspace / namespace account name |
REPO-NAME | A name for your repository. Maximum 50 characters. |
REPO-DESC | Description for your Repository |
REPO-TYPE | The type of repository - "Public" or "Private" |
| REPO-IDENTIFIER | (Optional) A unique identifier for the repository, also referred to as a 'slug'. This will form part of the URI for your repository. It can only contain lowercase alphanumeric characters, hyphens, and underscores and must be a minimum of 2 characters. |
NOTEIf you do not specify a repository identifier, we will generate one for you. We will try to base this on the repository name where possible but may also append some characters to it. If you require a specific repository identifier, we recommend that you do specify one.
Create a REPO-CONFIG.json file with the following:
{
    "name": "REPO-NAME",
    "description": "REPO-DESC",
    "repository_type_str": "REPO-TYPE",
    "slug": "REPO-IDENTIFIER"
}
You can create then a repository via the Cloudsmith CLI using the following command:
cloudsmith repos create OWNER REPO-CONFIG.jsonExample
example-repo-config.json file:
{
    "name": "Example Repository",
    "description": "Example packages repository",
    "repository_type_str": "Private",
    "slug": "example-repo1"
}
Create repository command:
cloudsmith repos create demo example-repo-config.json
cloudsmith repos create command
Via the Website UI
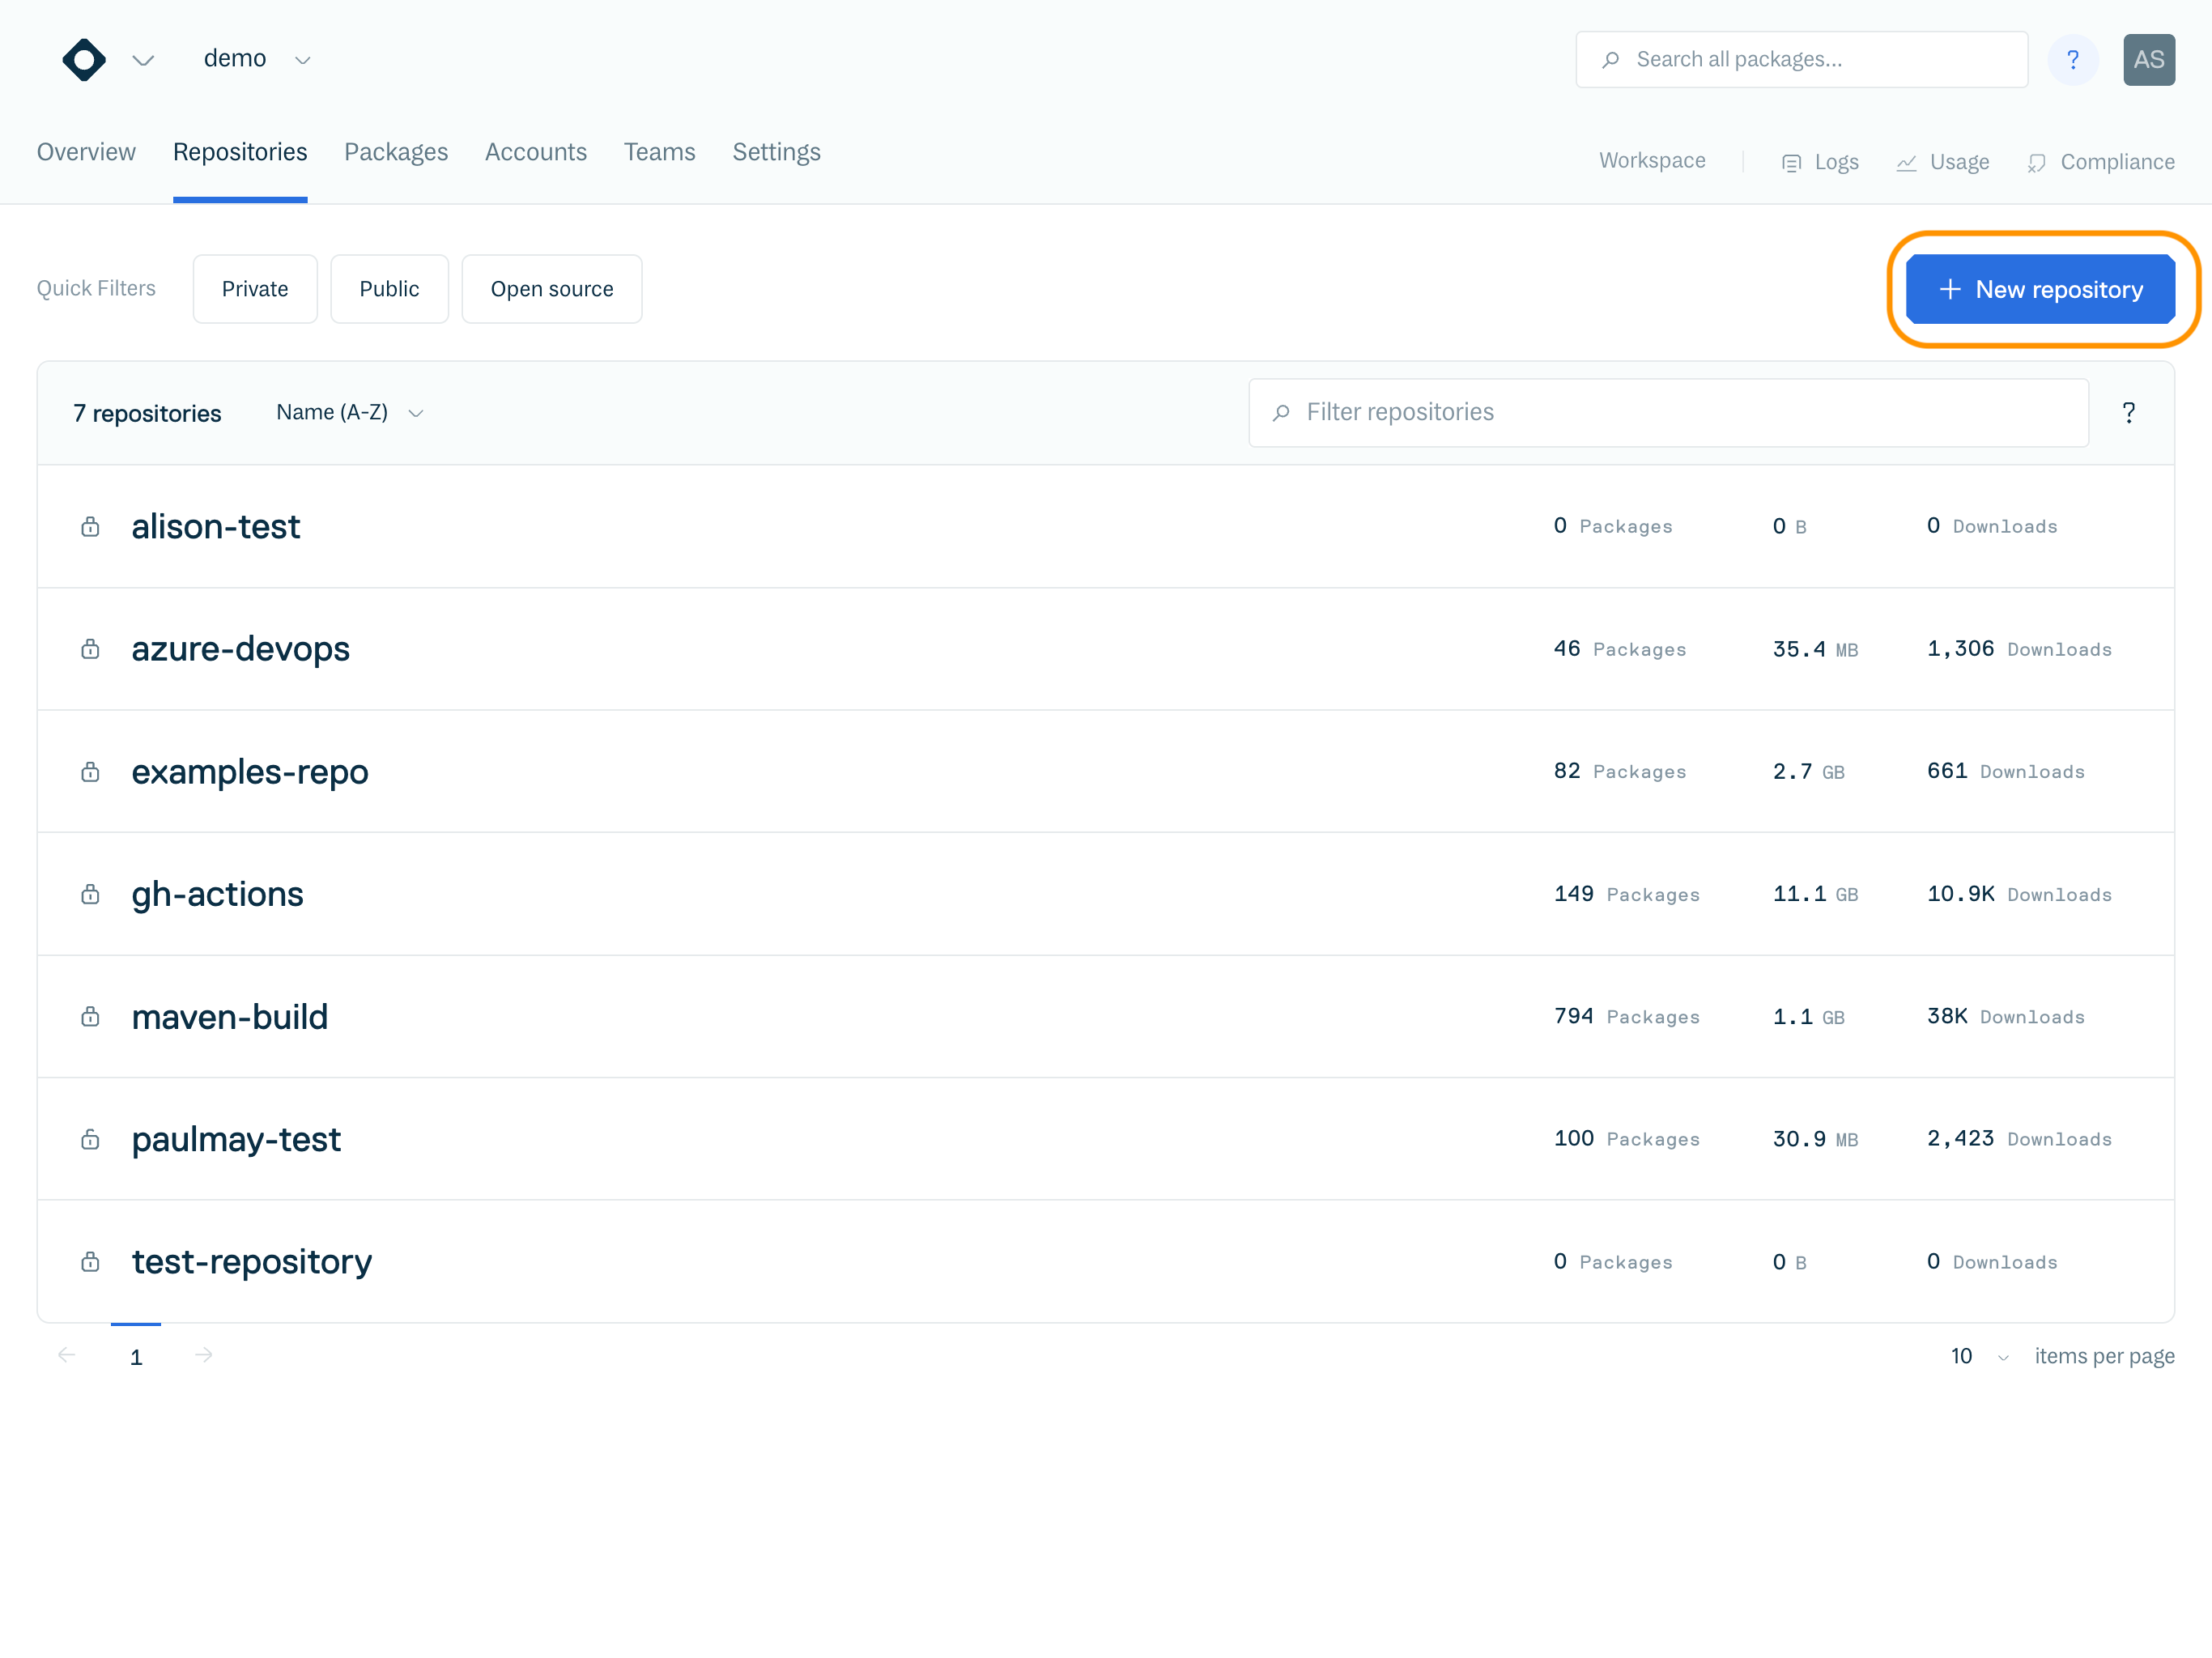
You can create a repository by navigating to the Repositories overview and clicking the "New repository" button.
That will take you to the "Create a new Repository" form:
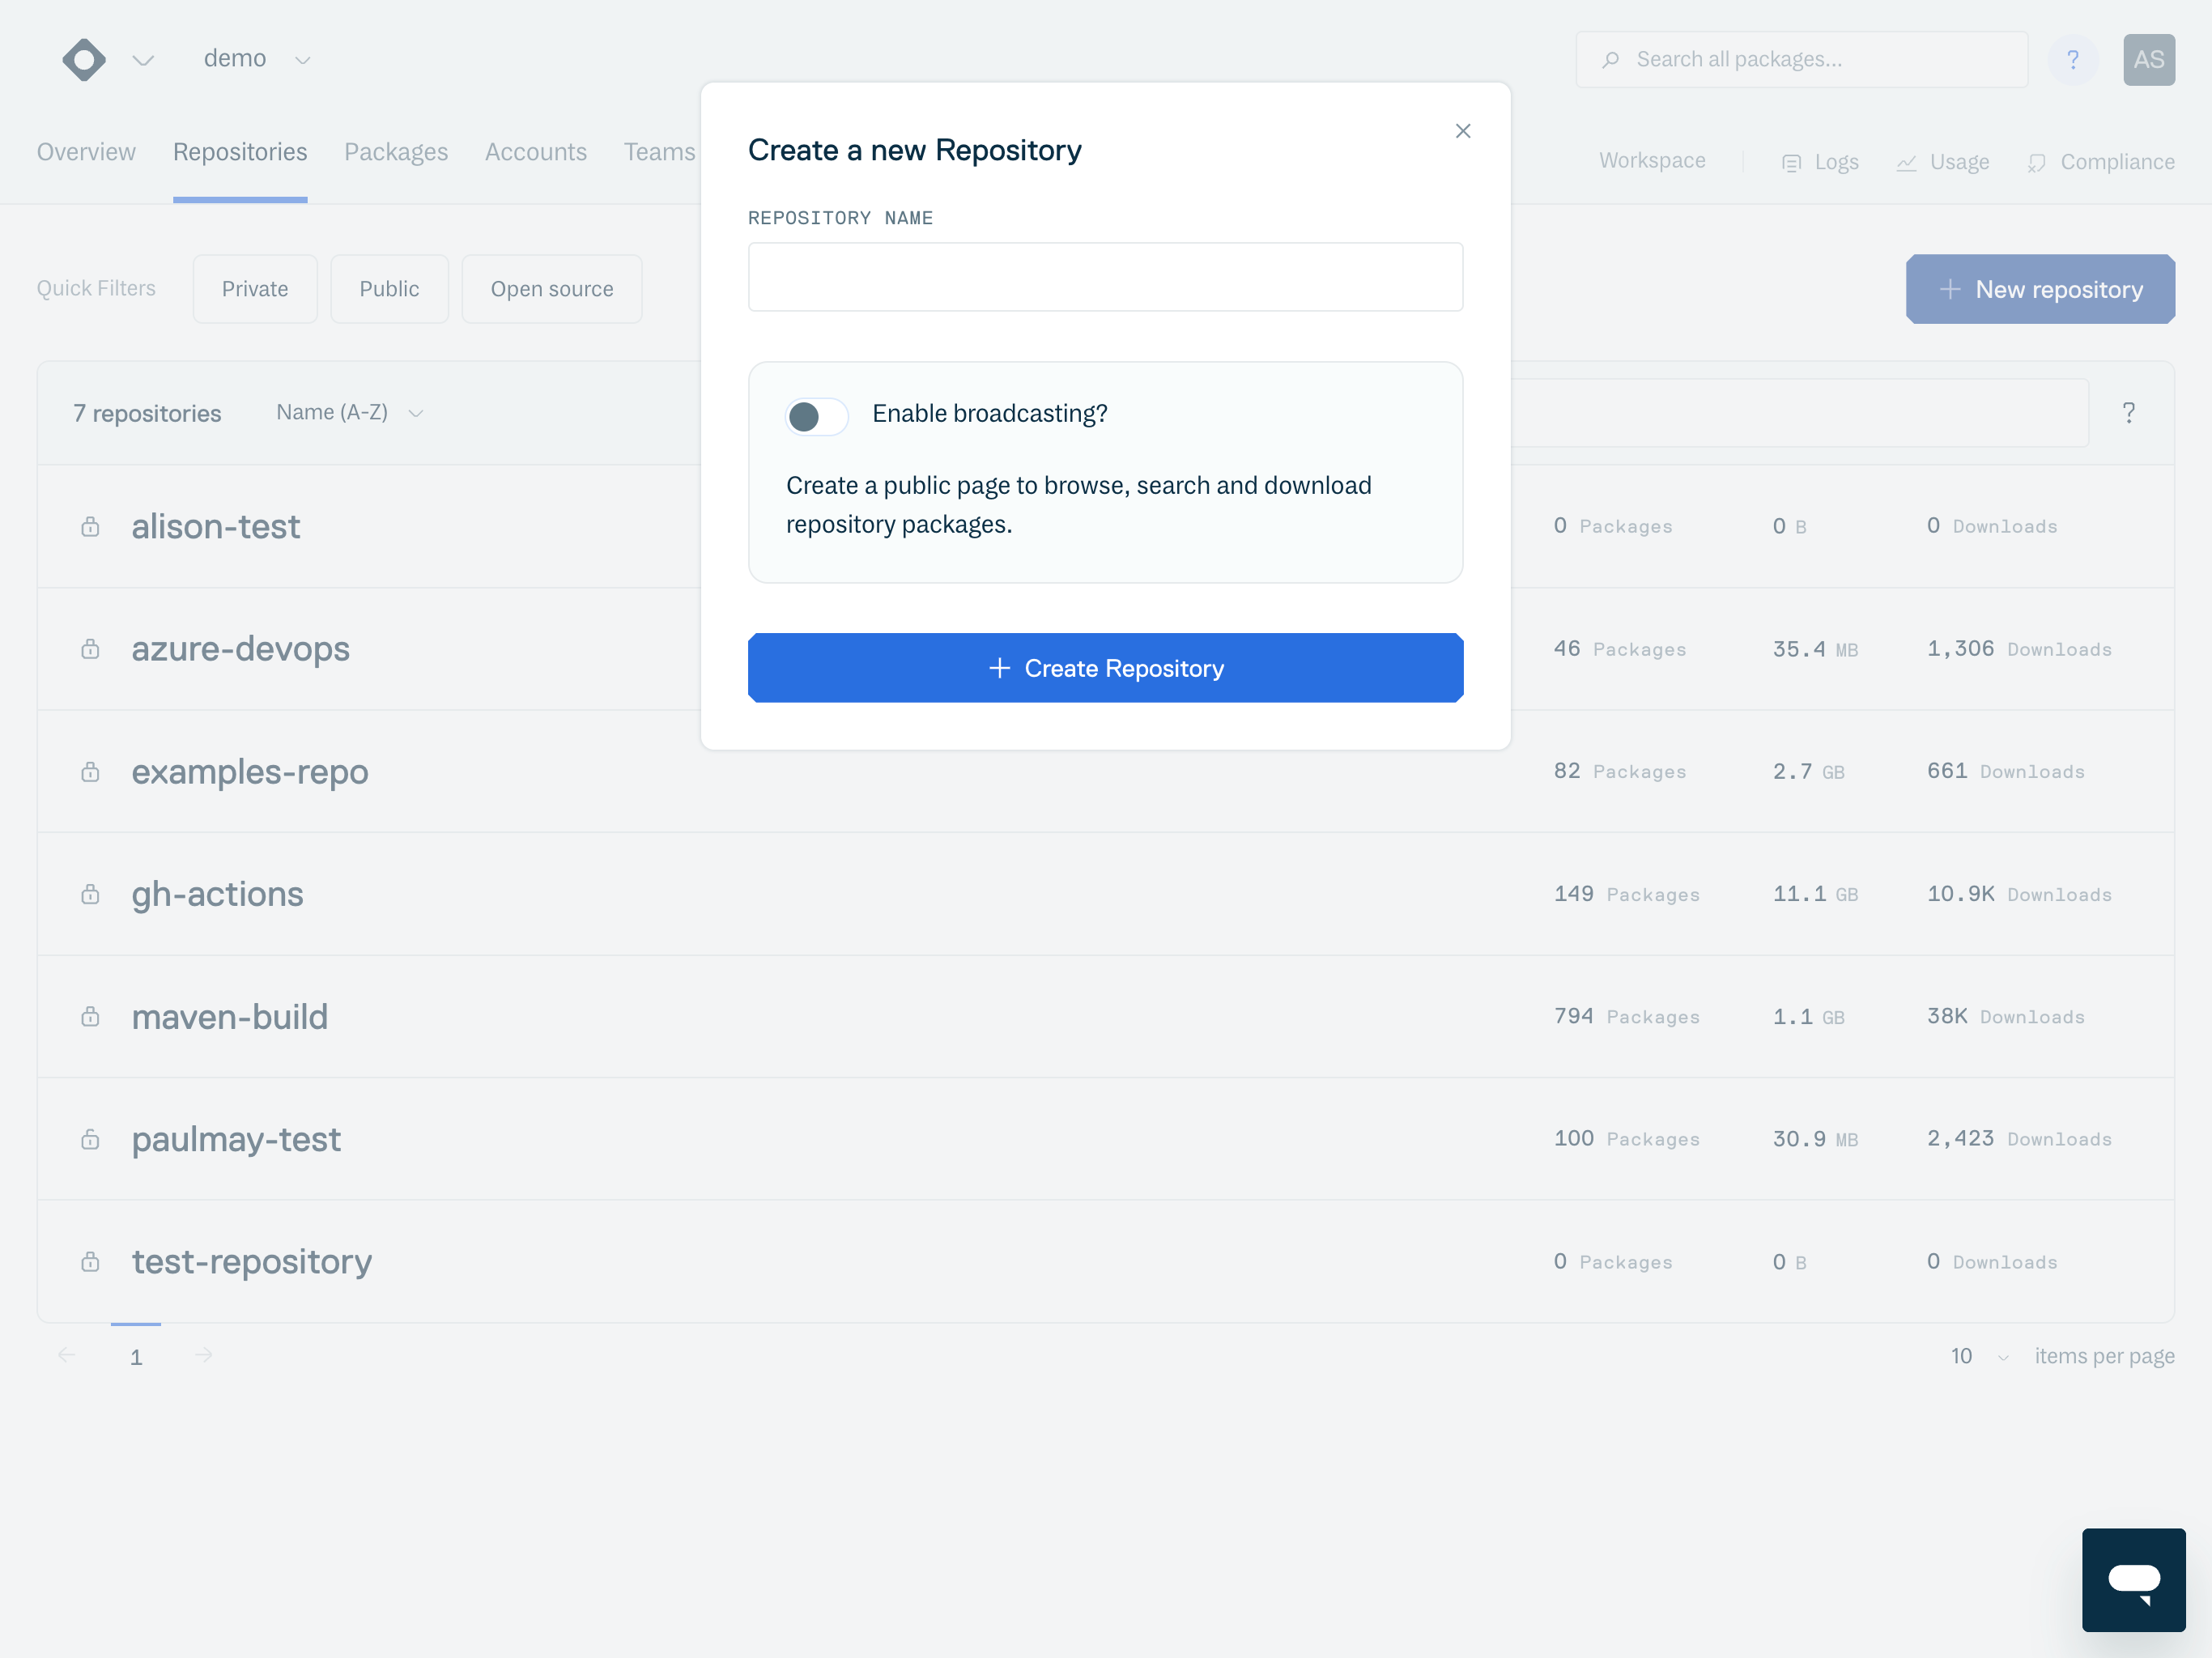
Here, you simply name your repository and click "Create Repository," and you will create a new private repository.
Multi-Format RepositoriesAll Cloudsmith repositories are multi-format. This means you can store artifacts of different formats in the same logical grouping. A Maven package can sit beside a Debian package, a Ruby Gem or a Python package!
You can manage your Repository by navigating to your new repository and selecting Settings.
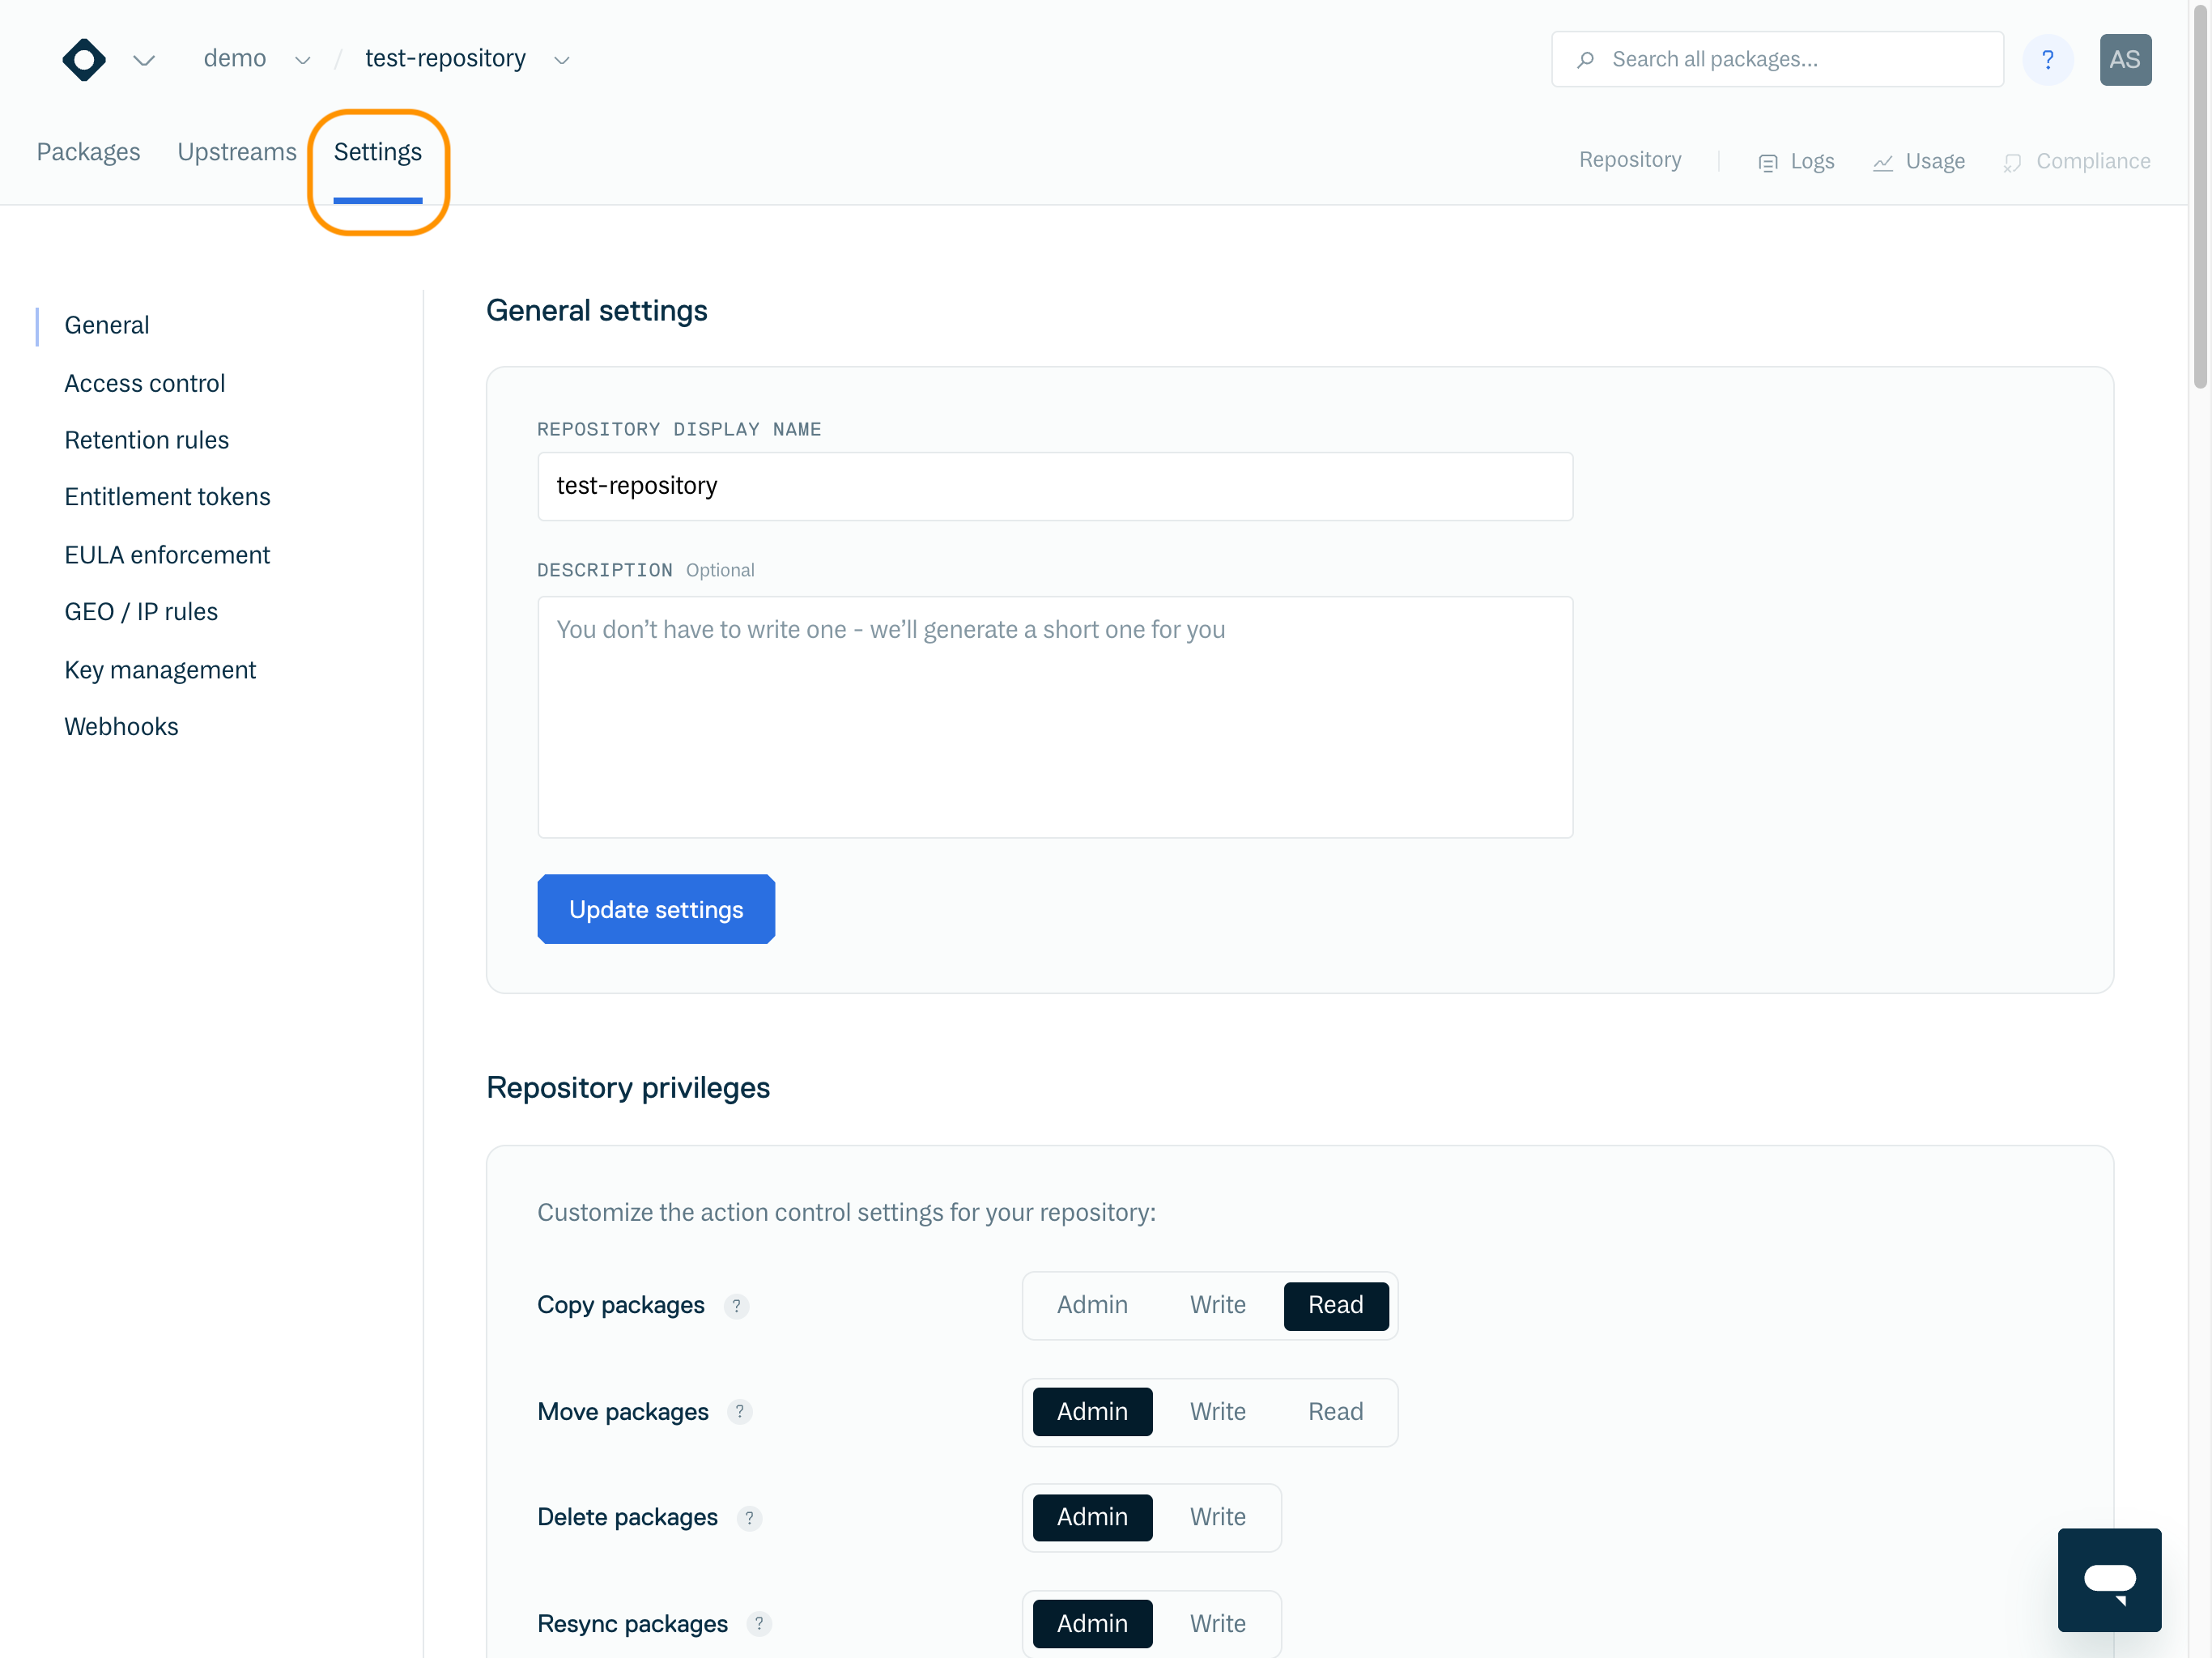
From there, you can manage:
- General settings
- Access control
- Retention rules
- EULA enforcement
- GEO / IP rules
- Key management
- Webhooks
Changing Repository SettingsThe good thing about Cloudsmith is that you can change everything later. The name, slug, description, repository type can all be changed if necessary. Although once shared, if you change the settings or naming you may need to communicate this to all interested parties.
Private Repositories
All paid accounts come with unlimited Private repositories.
Private repositories are private. If required, external access to any files in a private repository is controlled by our Entitlement system. See "How To: Sharing a Private Package" for more details.
Broadcasts
Early Access FeatureBroadcasts is currently an early access feature. If you would like to try this feature, please Contact Us.
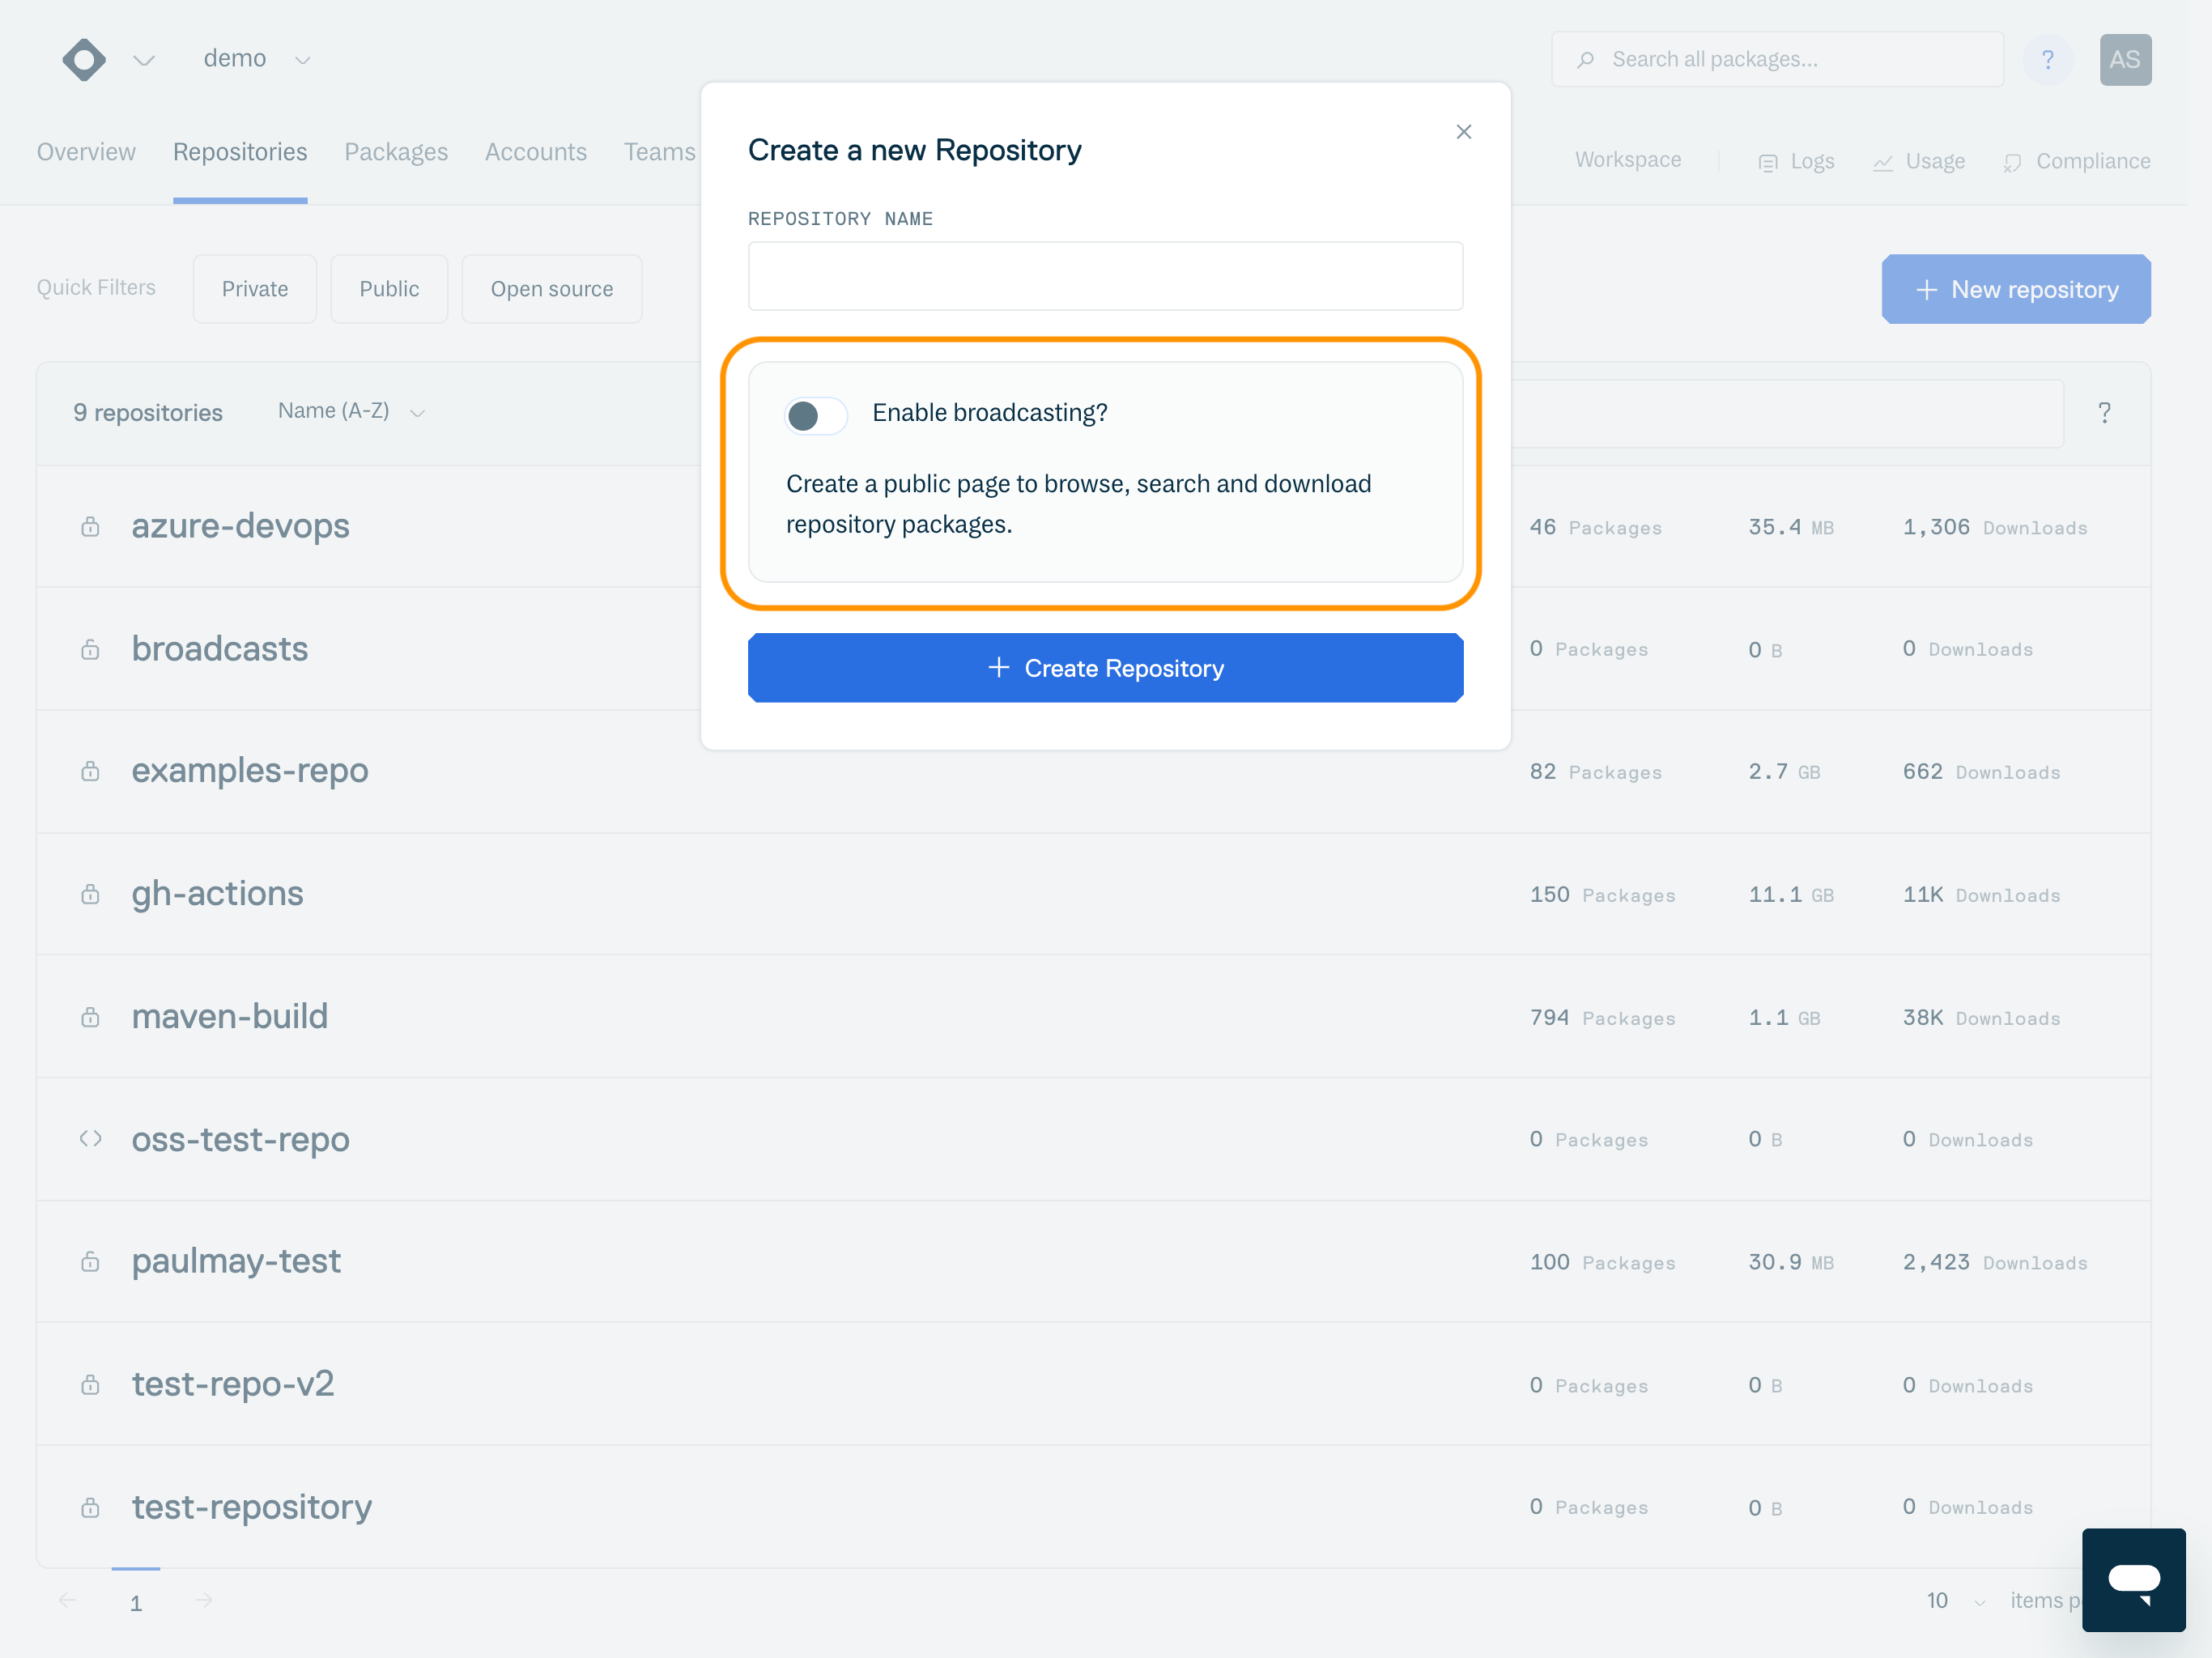
You can create a branded public repository using our new distribution feature, Broadcasts. Enabling broadcasting during repository creation creates a public page where users can browse, search, and download repository packages without requiring authentication. See Broadcasts for more information.
Via the Cloudsmith API
For details on how to create a repository via the Cloudsmith API, please see the "Create a Repository" section of the API Reference, including an interactive sandbox where you can test your API Calls.
NOTEIt is not currently possible to create Open Source repositories via the Cloudsmith API.
Updated 6 months ago