Buildkite
How to integrate Buildkite with Cloudsmith

Buildkite is a platform for running fast, secure, and scalable continuous integration pipelines on your own infrastructure. Use Buildkite to orchestrate and manage your own fleet of build hosts, from containers, to cloud instances, to bare metal servers.
Getting Started
Integrating Cloudsmith into your Buildkite pipeline is as simple as installing the Cloudsmith CLI during one of your pipeline steps and then using the cloudsmith push command to upload the artifacts from your pipeline to your Cloudsmith repository.
Adding your API Key to your Buildkite environment
For details on obtaining your Cloudsmith API-Key see:
In order to use the Cloudsmith CLI within a Buildkite pipeline, you'll need to configure the environment on your build host(s) with your Cloudsmith API Key. Your Cloudsmith API Key should be considered as a secret and should not be committed into any source repositories or stored as a plain text variable in the Buildkite pipeline.
One of the easiest ways to set up your environment is to use Buildkite environment hooks, the environment hooks are scripts on a build host that run before each command in a pipeline.
A simple example to set up your Cloudsmith API key would be:
set -euo pipefail
if [[ "$BUILDKITE_PIPELINE_SLUG" == "your-pipeline-name" ]]; then
       export CLOUDSMITH_API_KEY="abcdefghijklmnop1234567890"
fi
For more information on hooks, please see the Buildkite documentation here. There are several other methods of handling secrets in a Buildkite pipeline, you can find more details here
Adding the Cloudsmith CLI to your Buildkite pipeline
To add the Cloudsmith CLI to your pipeline, just add the following command to one of your pipeline steps in your pipeline.yml file:
  commands:
    - pip install cloudsmith-cli
An example of a setup step that installs Ruby, some tooling, and the Cloudsmith CLI would look like:
steps:
  - label: "PreBuild"
  commands:
      - sudo apt update
      - sudo apt-get install ruby ruby-dev rubygems build-essential python-pip -y
      - sudo gem install --no-document fpm
      - pip install cloudsmith-cli
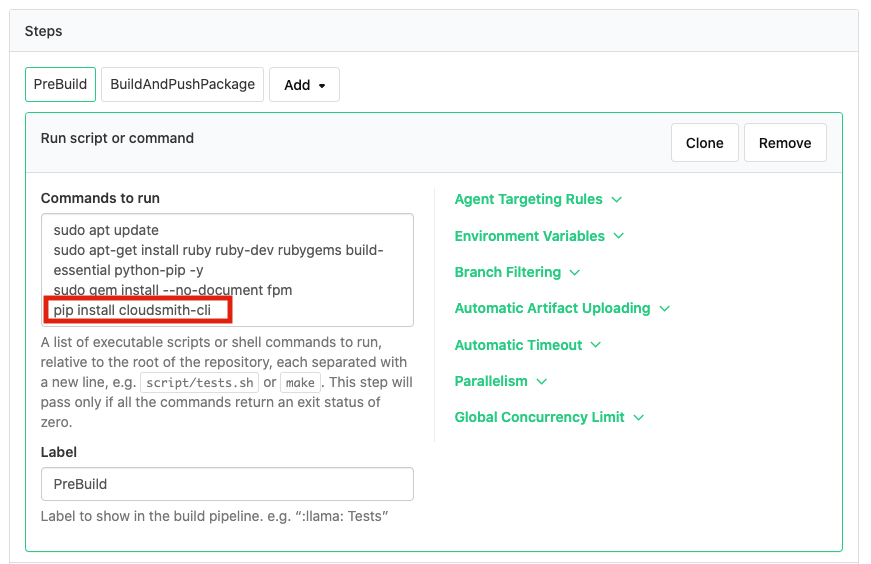
You can also add the pip install cloudsmith-cli command to a pipeline step using the Buildkite Web UI, if not using a pipeline.yml file:

Buildkite Web UI
Pushing a build artifact to a Cloudsmith repository
To push an artifact from your Buildkite pipeline to a Cloudsmith repository, you use the cloudsmith push command in one of your pipeline steps:
  commands:
    - cloudsmith push FORMAT OWNER/REPOSITORY FILENAME
Please see the Cloudsmith CLI documentation for more details of the syntax of the cloudsmith push command and the Supported Formats page for examples of the cloudsmith push command for each supported format.
An example of this command in a step that builds a Debian package would look like:
- label: "BuildAndPushPackage"
    commands:
      - make
      - fpm -f -s dir -t deb -v 1.0.0 -n cloudsmith-buildkite-test .
      - cloudsmith push deb demo/buildkite-demo/debian/buster cloudsmith-buildkite-test_1.0.0_amd64.deb
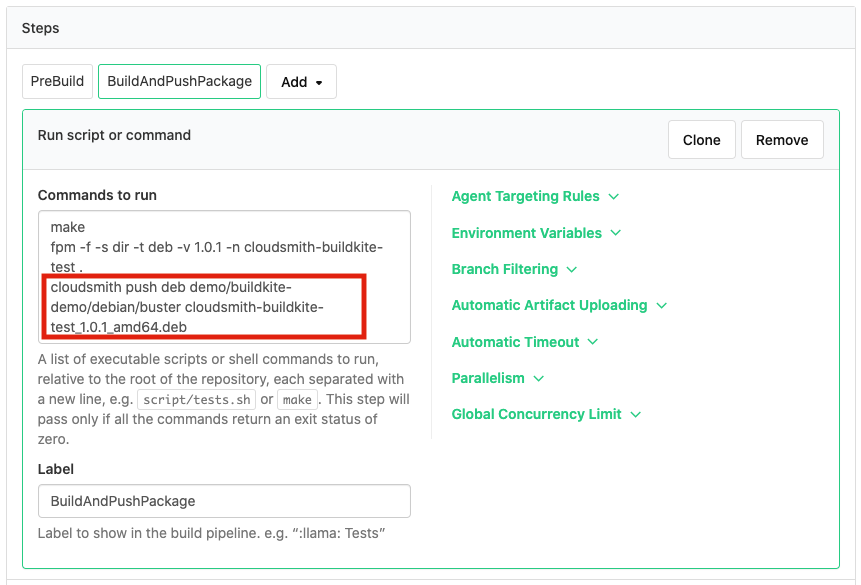
Again, you can also add the cloudsmith push command to a pipeline step using the Buildkite Web UI, if not using a pipeline.yml file:

Buildkite Web UI
Pipeline steps in Buildkite are stateless and as a result, if you have a fleet of agents then each step is not guaranteed to run on the same agent.
This means that if you build an artifact in one step, and want to push it to a Cloudsmith repository in a subsequent step, the artifact will need to be stored temporarily and then retrieved by the push step. Buildkite provides temporary artifact storage that you can use for this purpose (see here for more details).
Updated 5 months ago

