Single Sign-On with PingIdentity
This guide provides step-by-step instructions on setting up PingIdentity as a SAML IdP for your Cloudsmith Organization.
Add Cloudsmith Application
Login to your PingIdentity account and select the environment that you will be managing, then click "manage environment". Under the Applicationsheading on the left-hand menu, select "Applications", then the "Add application" plus icon on the top of the page.
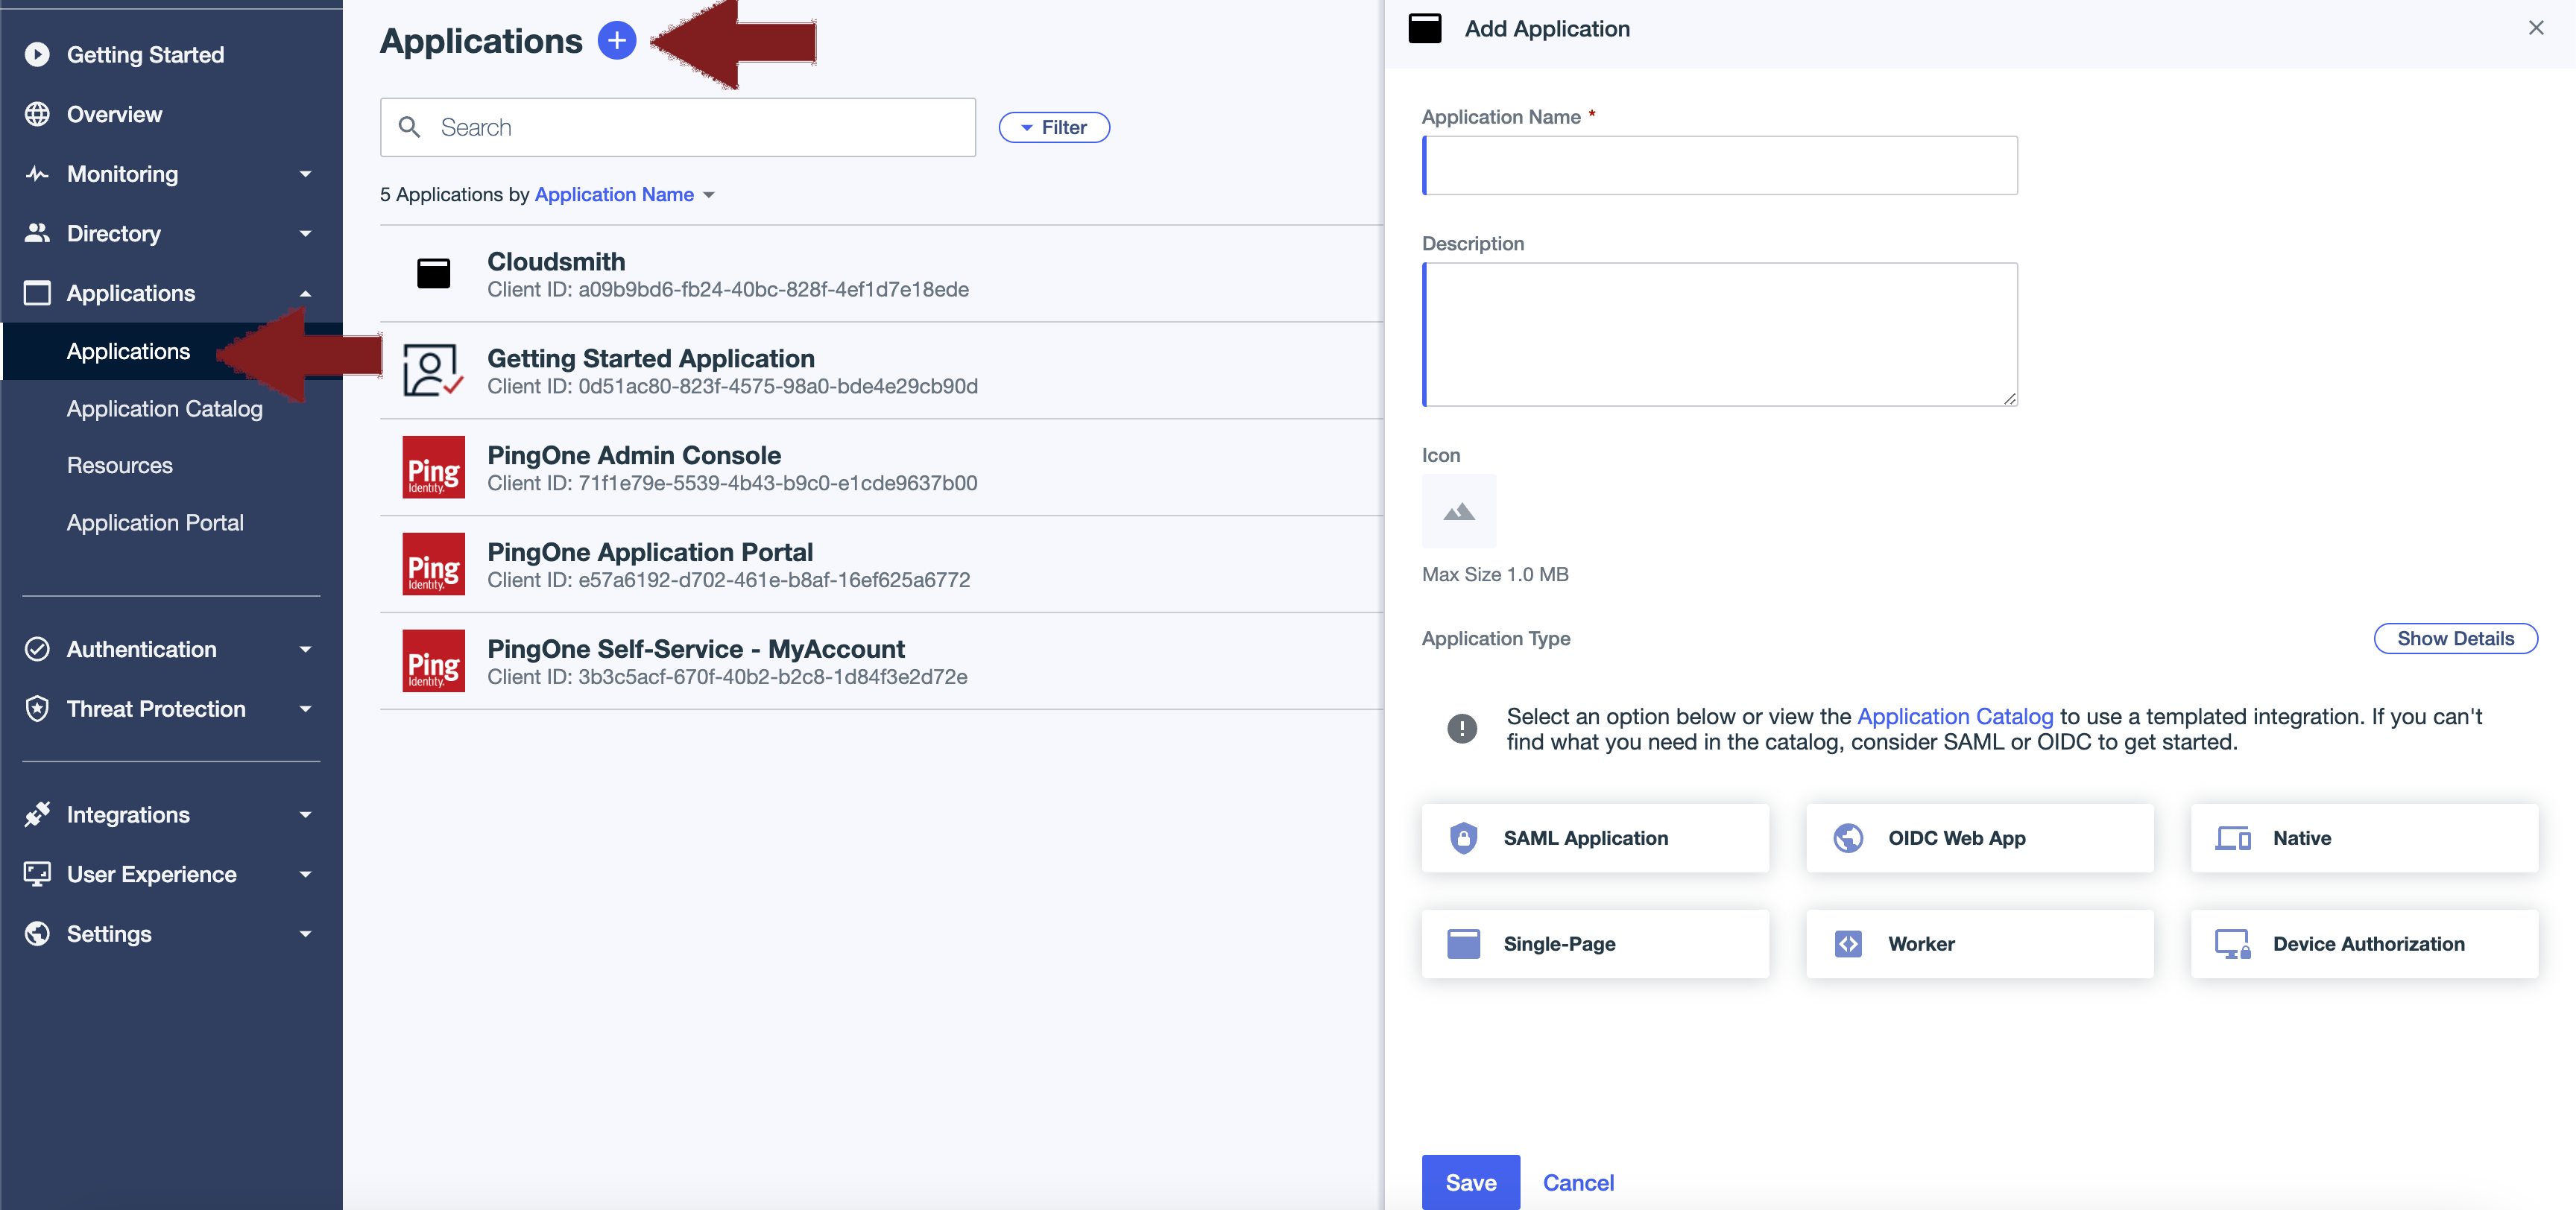
You can use the following settings:
- Application name: Cloudsmith
- Application Type: SAML Application
Then click "Configure" and choose "Manually Enter" for Provide Application Metadata. Use the following details:
ACS URLS:https://cloudsmith.io/orgs/<your organization slug>/saml/acs/ENTITY ID:https://cloudsmith.io/orgs/<your organization slug>/saml/acs/
Click Save. Click on the new application and select the "Configuration" tab. Use the following details to complete configuration.
- Ensure
Sign Assertionis selected under theSigning Keysection - Set
Subject Nameid Formatto be emailAddress,urn:oasis:names:tc:SAML:1.1:nameid-format:emailAddress
Click Save again. Next go to the "Attribute Mappings" tab and use the following attributes:
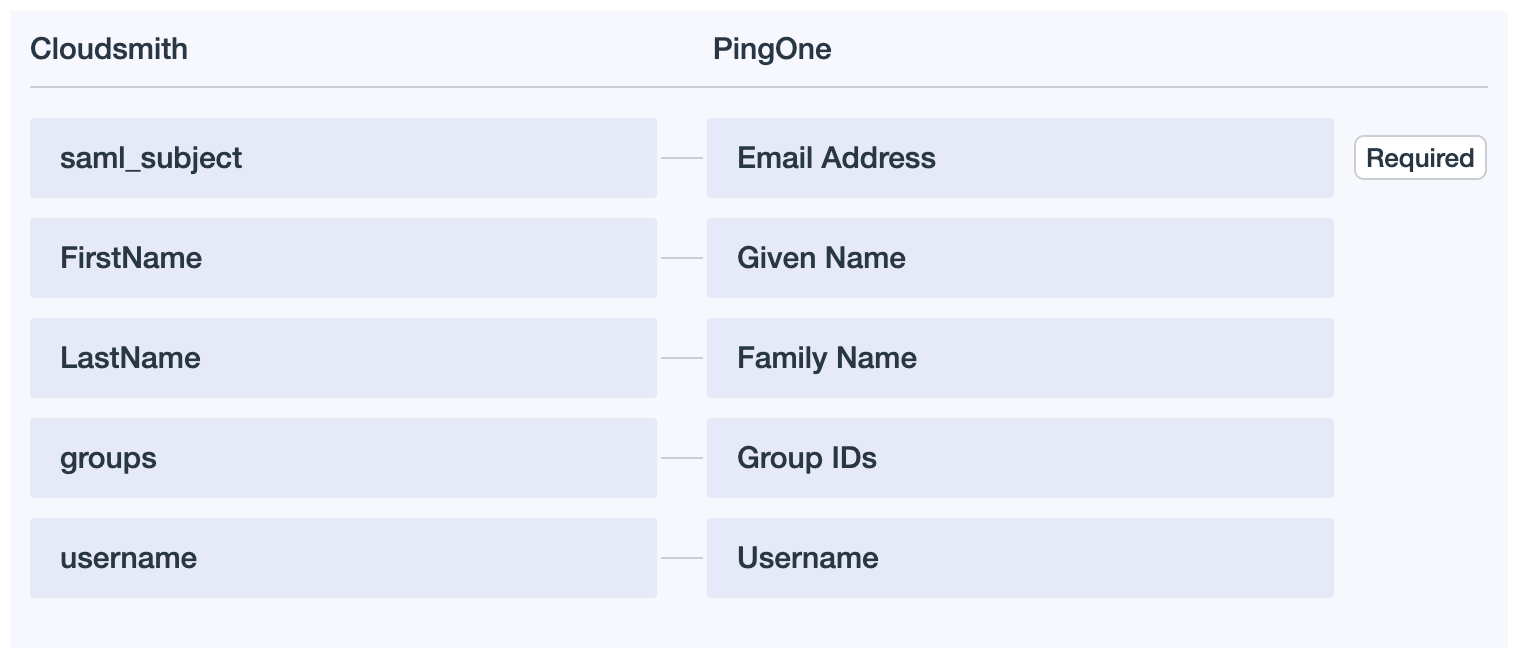
| Cloudsmith | PingOne |
|---|---|
| saml_subject | Email Address |
| FirstName | Given Name |
| LastName | Family Name |
| groups | Group IDs |
| username | Username |
Add a group
Under the Directory heading in the left hand menu, select "Groups" then the "Add group" plus icon at the top of the page.
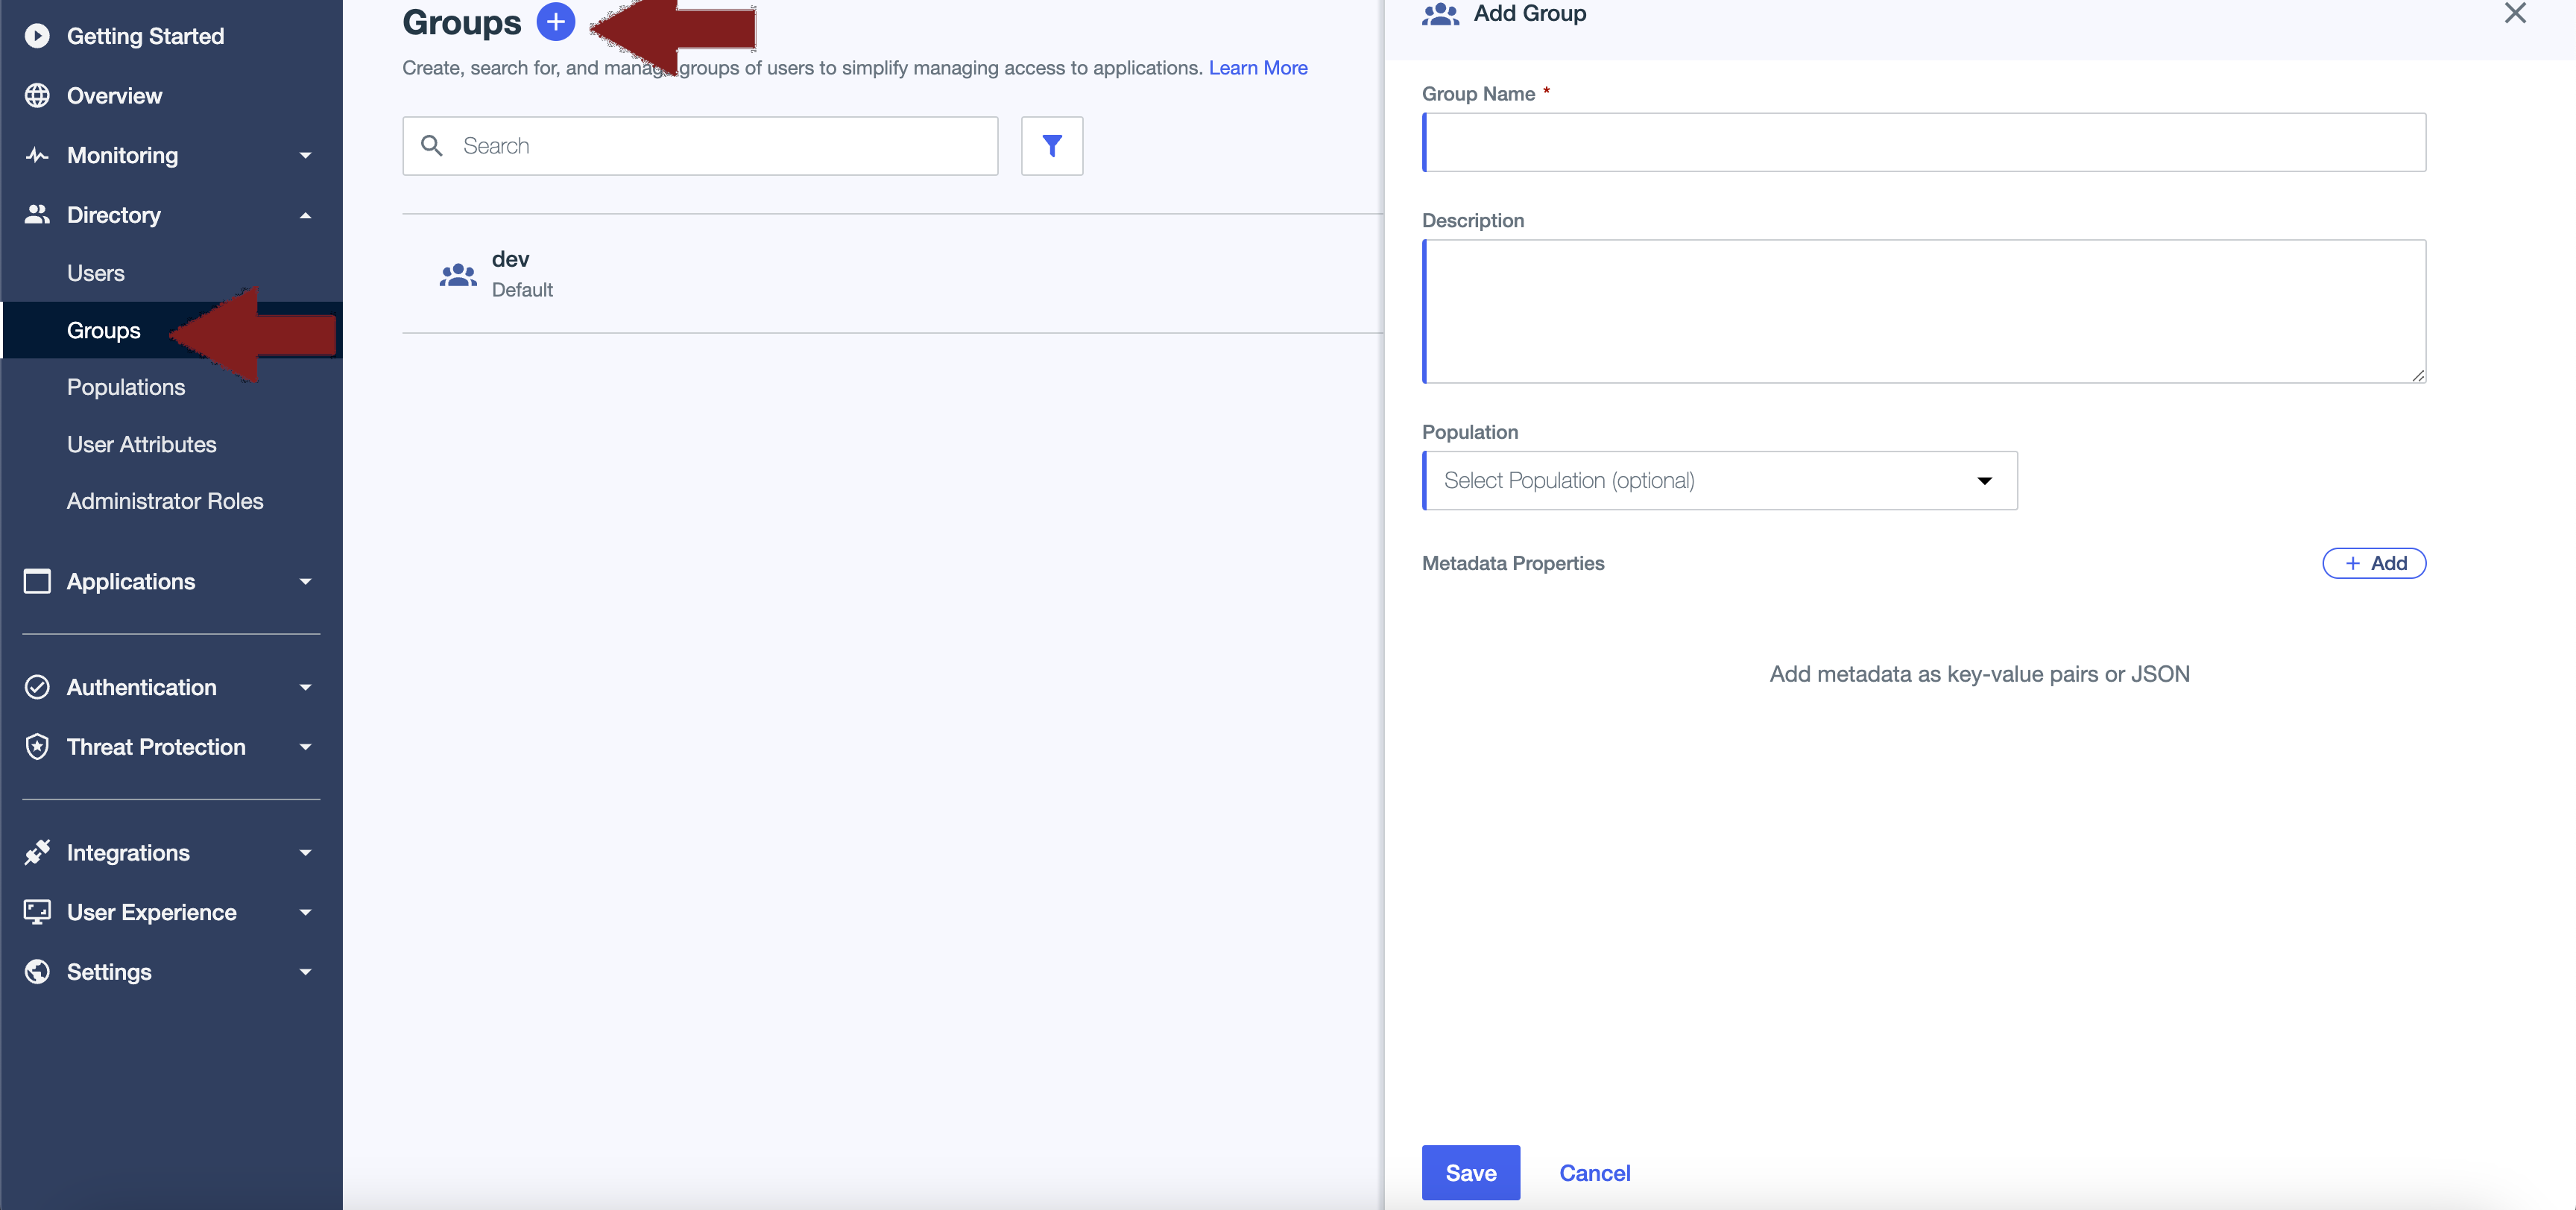
Enter your Group Name and click Save.
Under your application, select the "Access" tab and click the edit button.
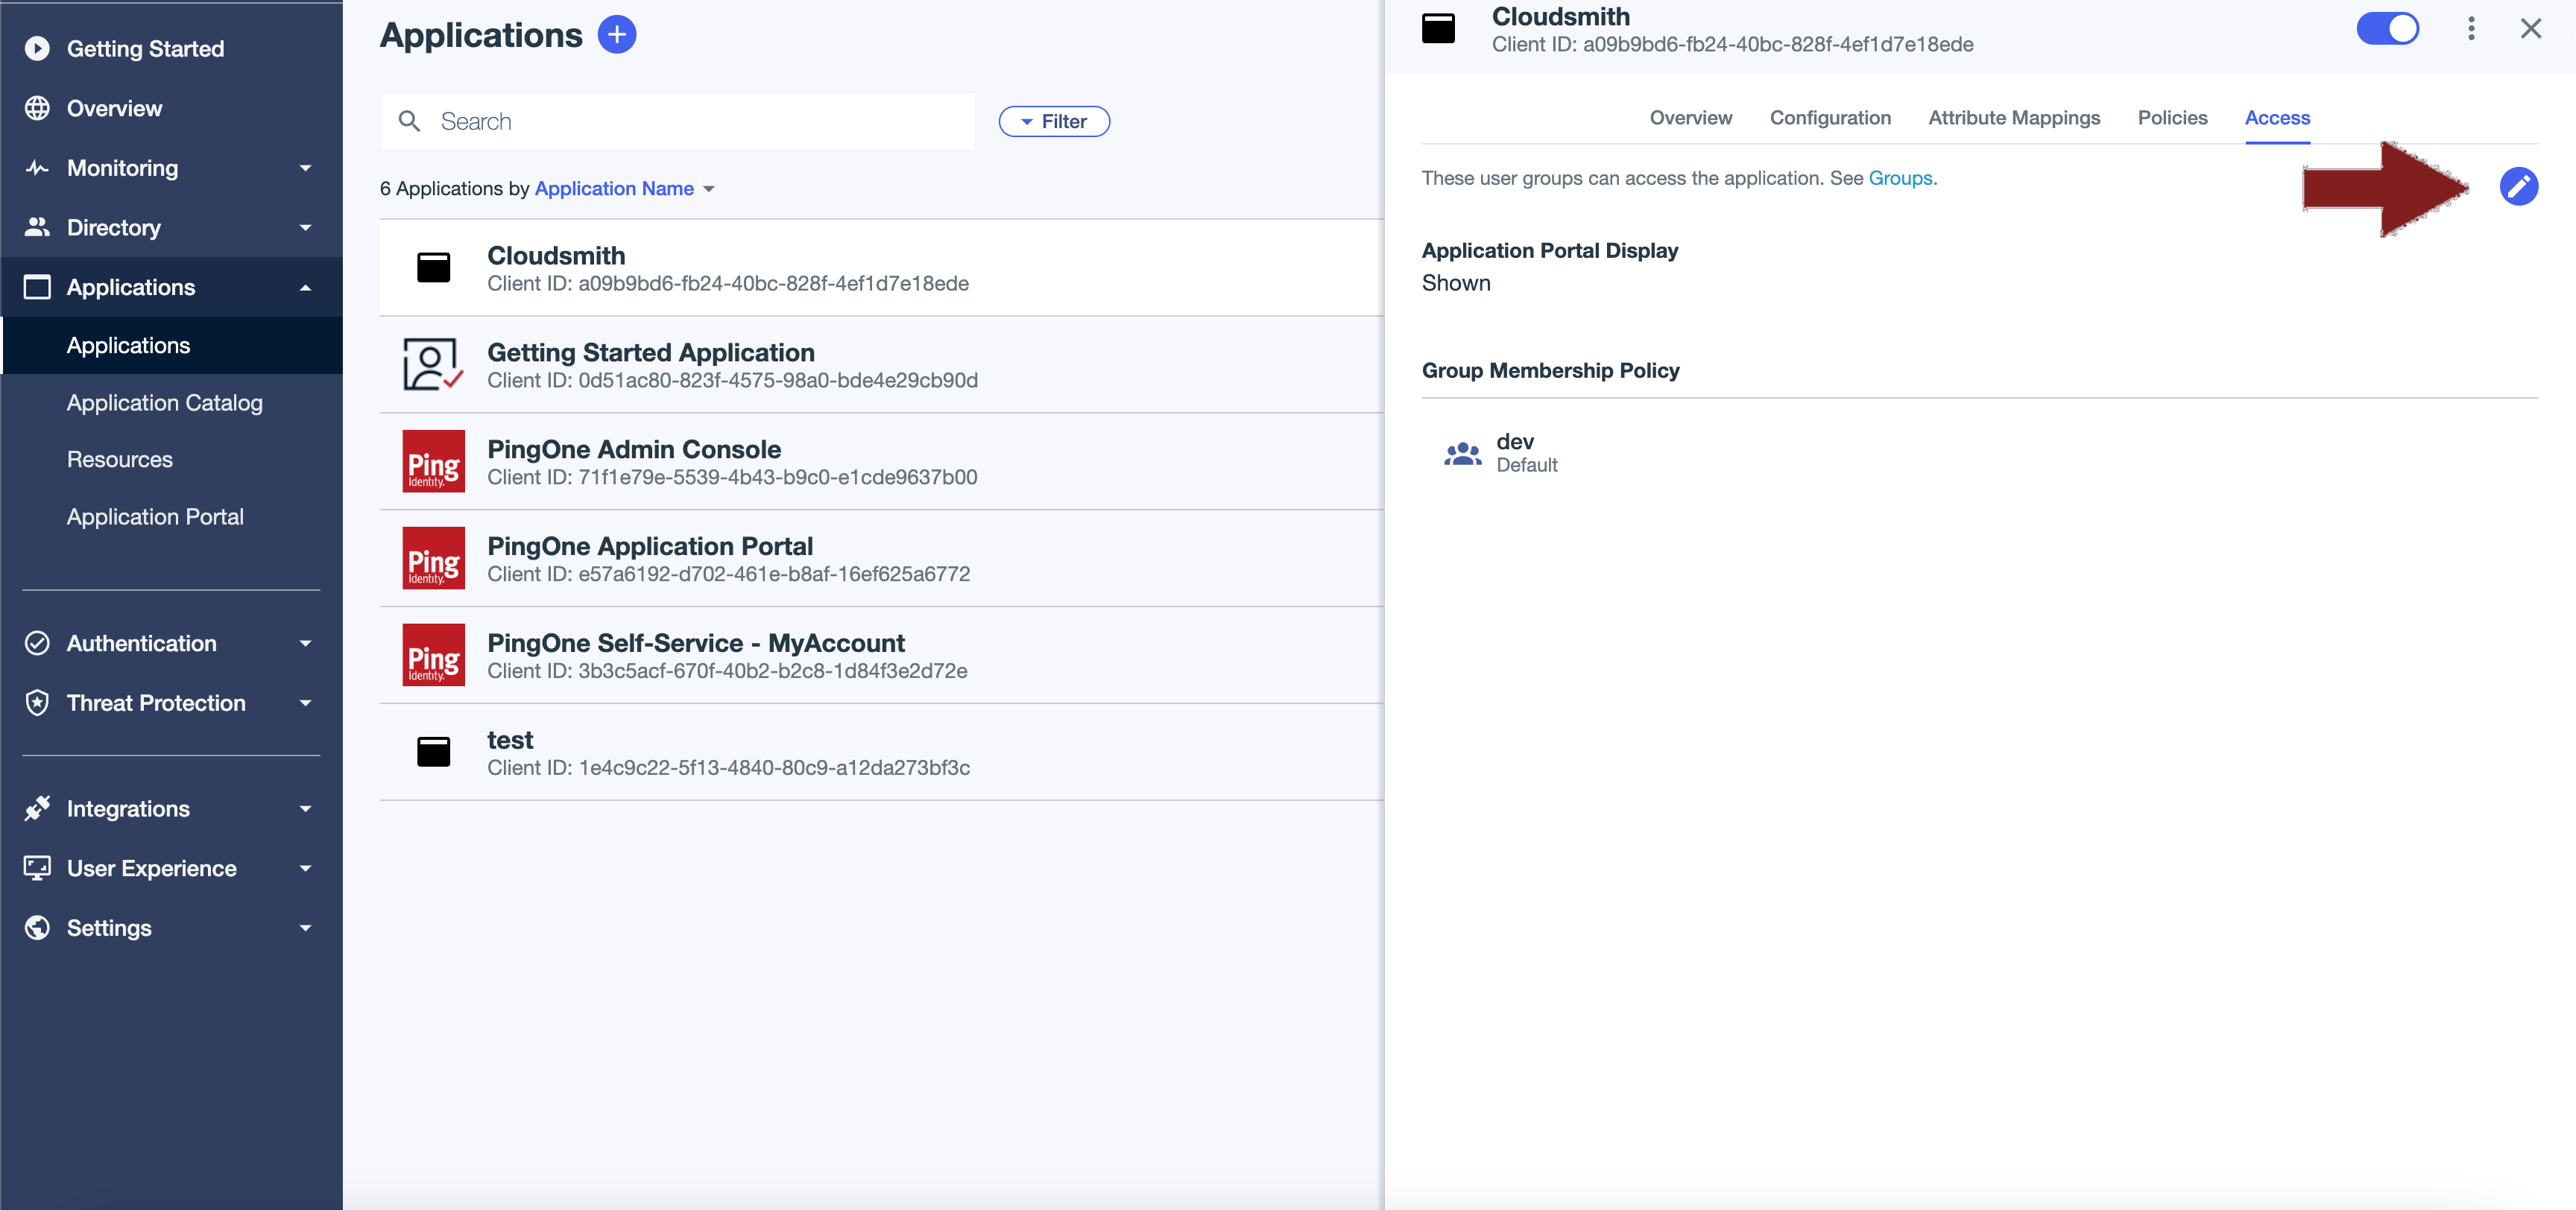
Check the box next to your newly created group and click Save.
Add your users
Under the Directory heading in the left hand menu, select "Users" then the "Add user" plus icon at the top of the page.
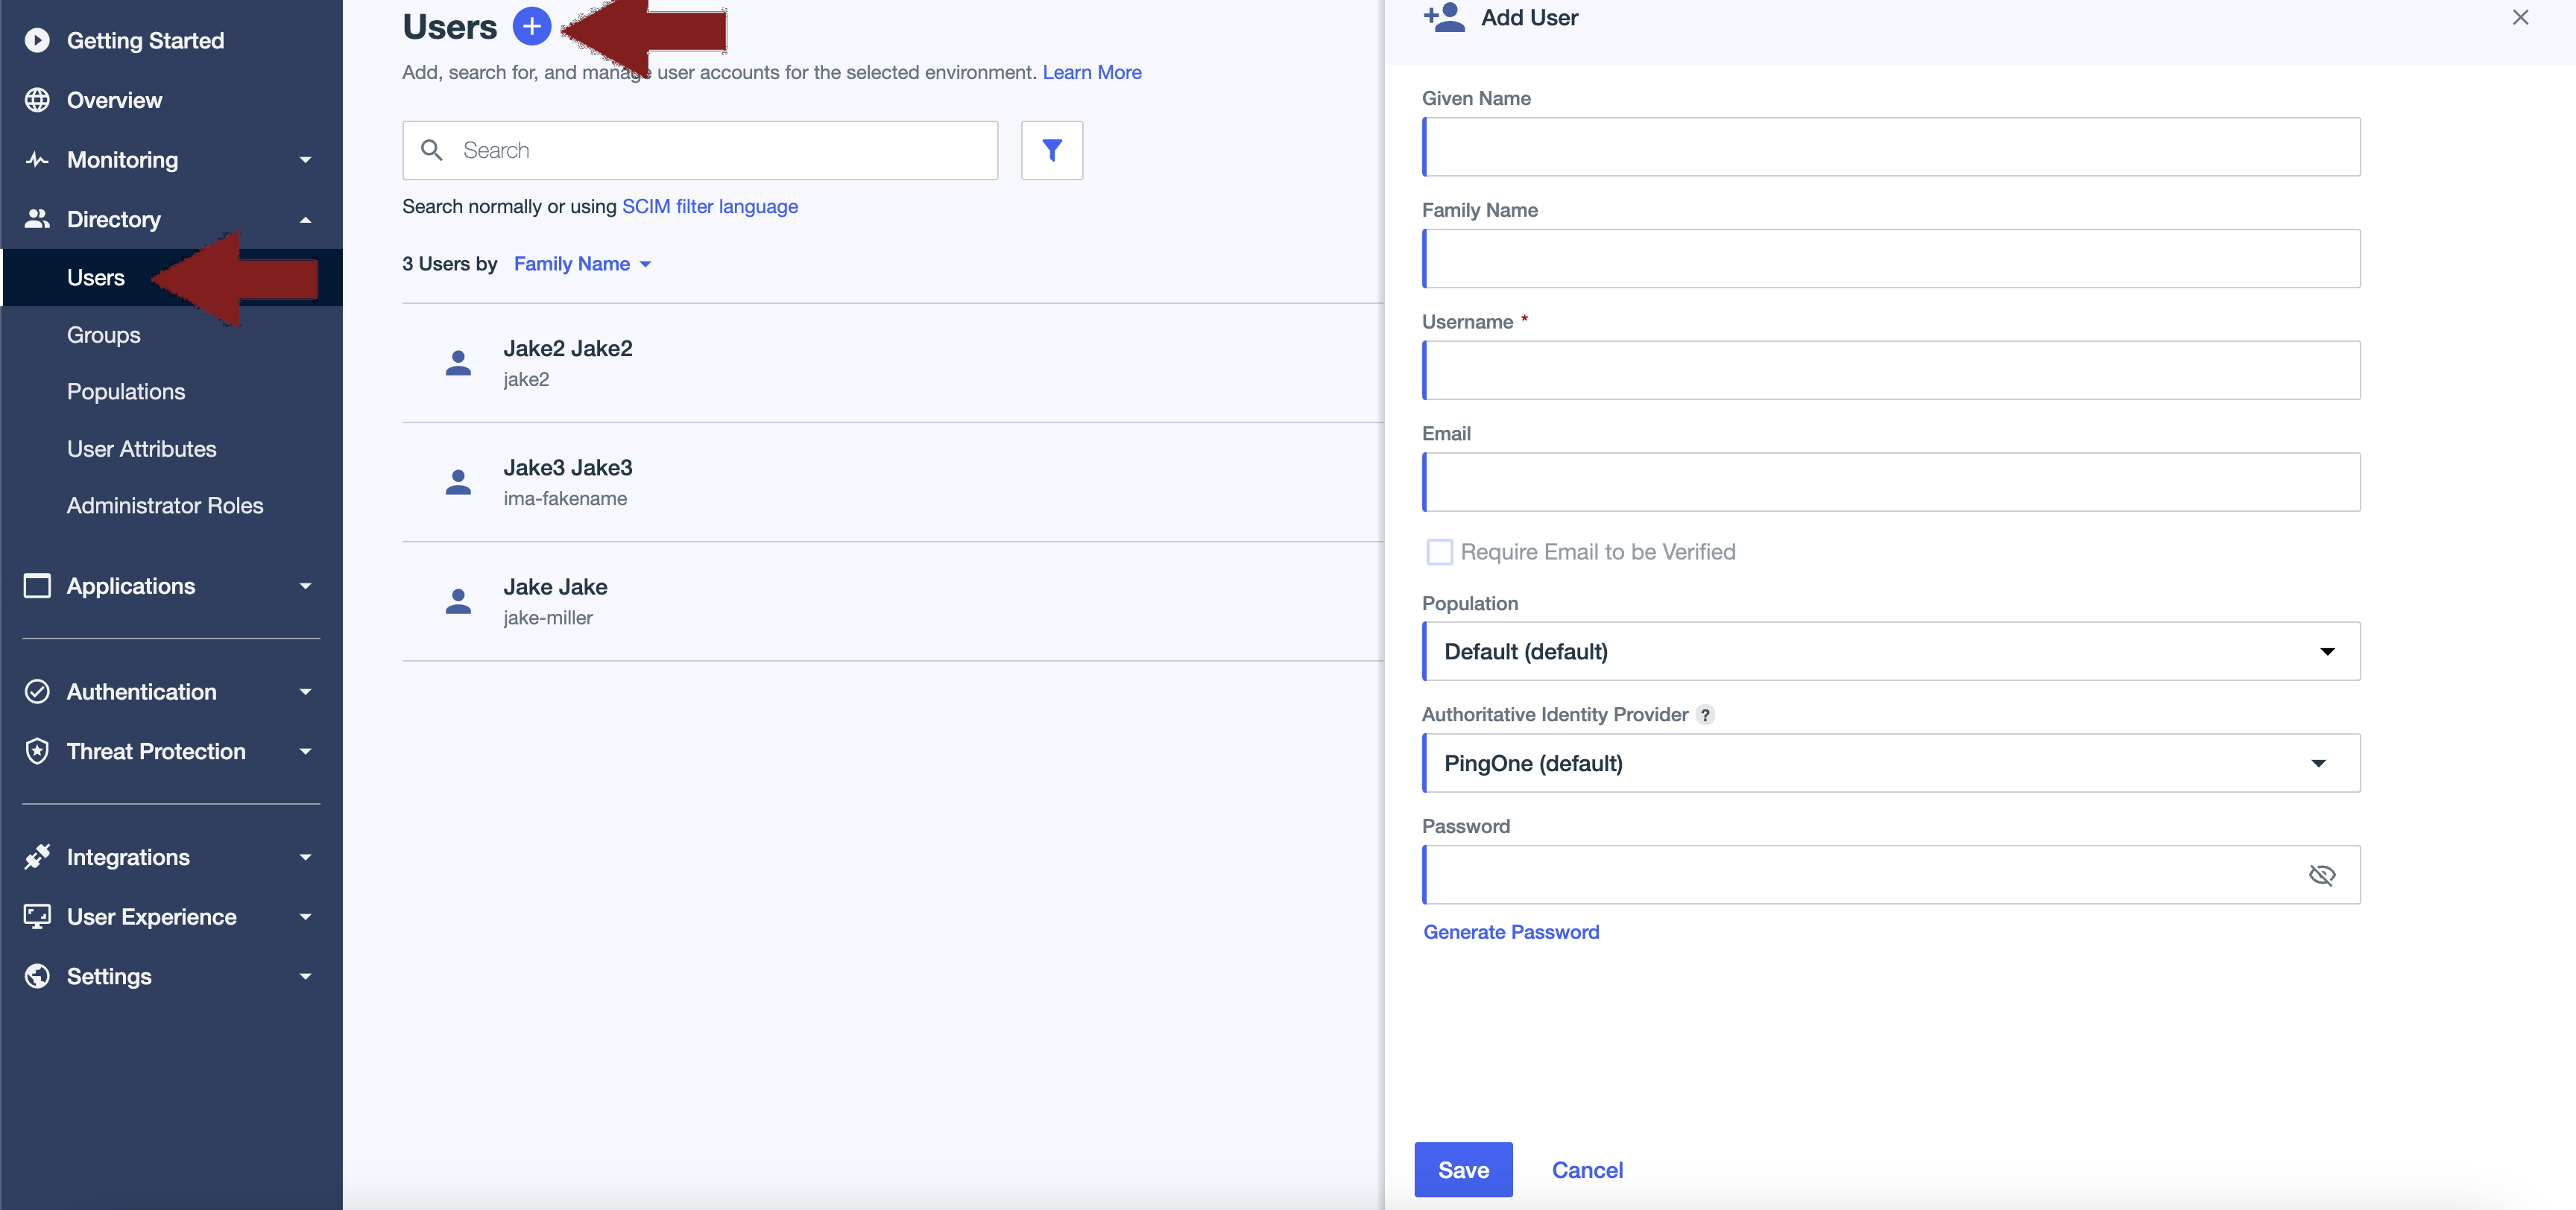
Enter the Given Name and Family Name of the new user. the Username and Email fields should match the details in Cloudsmith. Once completed click save.
Next, click on the newly created user and browse to the "Groups" tab. Click the edit icon and check the box next to the group that you created previously. Click save and the user will now be a part of that group.

Cloudsmith configuration
SAML authentication
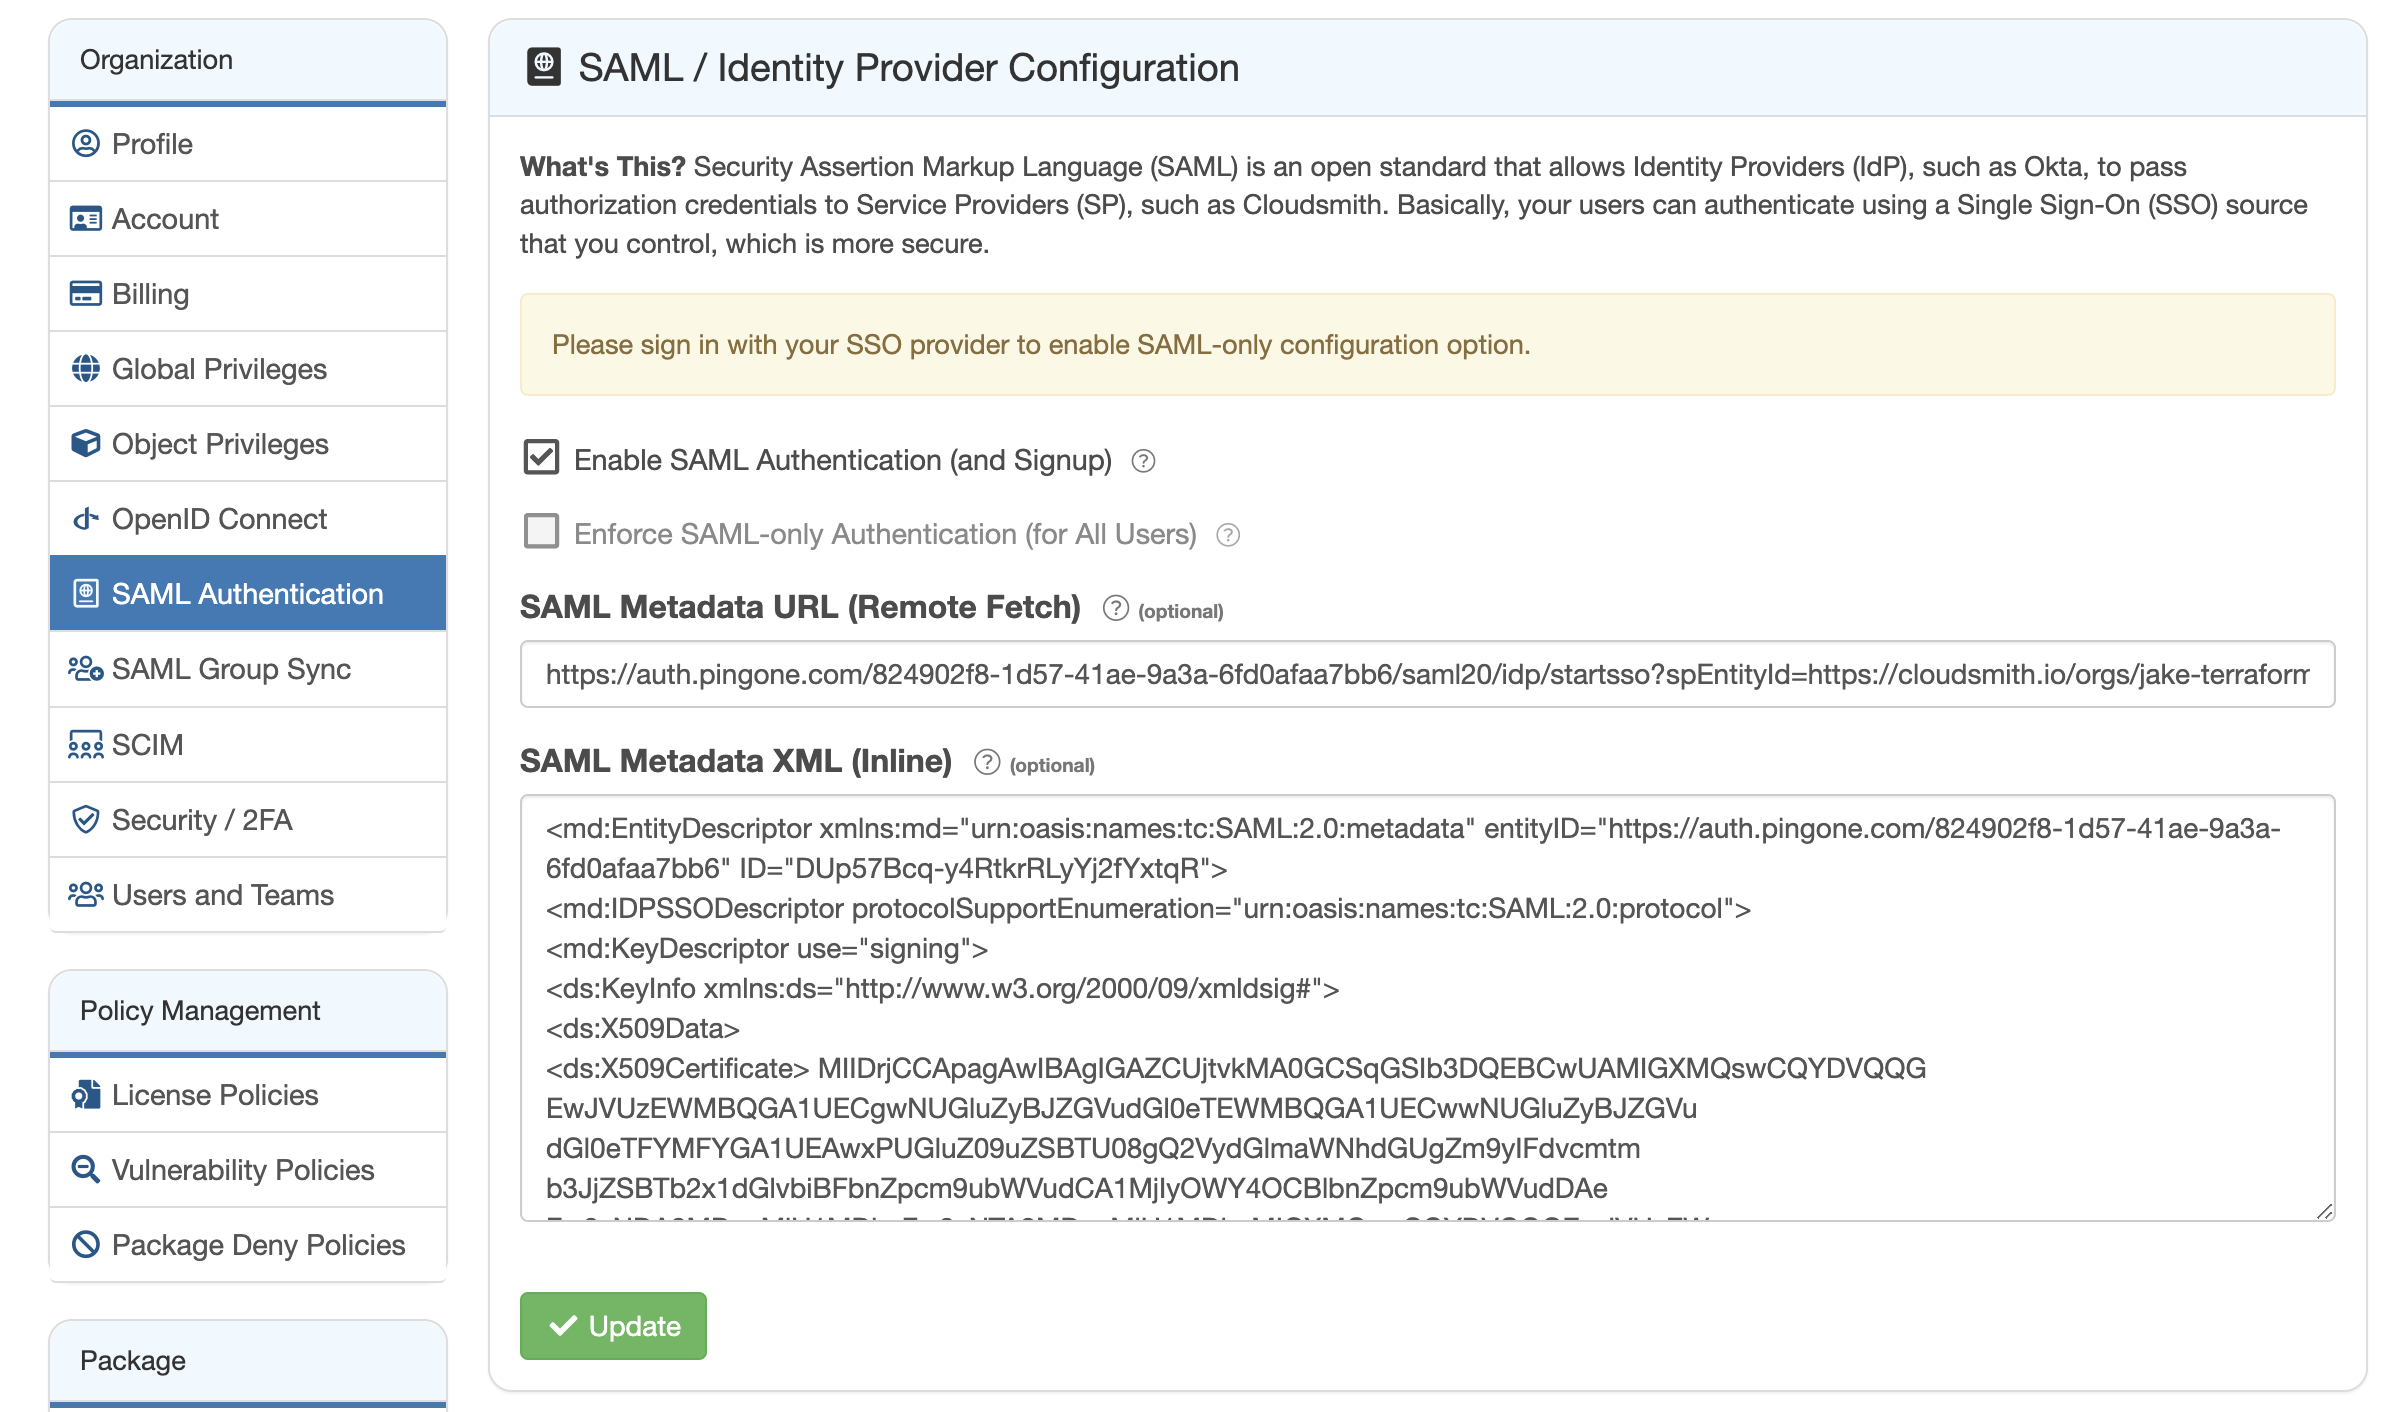
Under the SAML Authentication setup in your Cloudsmith organization settings, you will need to configure SAML Metadata URL and SAML Metadata XML. The values for these can be found in your Cloudsmith application in PingIdentity.
Under the Applications heading in the left hand menu of PingIdentity, choose "Applications" and then click on your application, then select the Configuration tab.
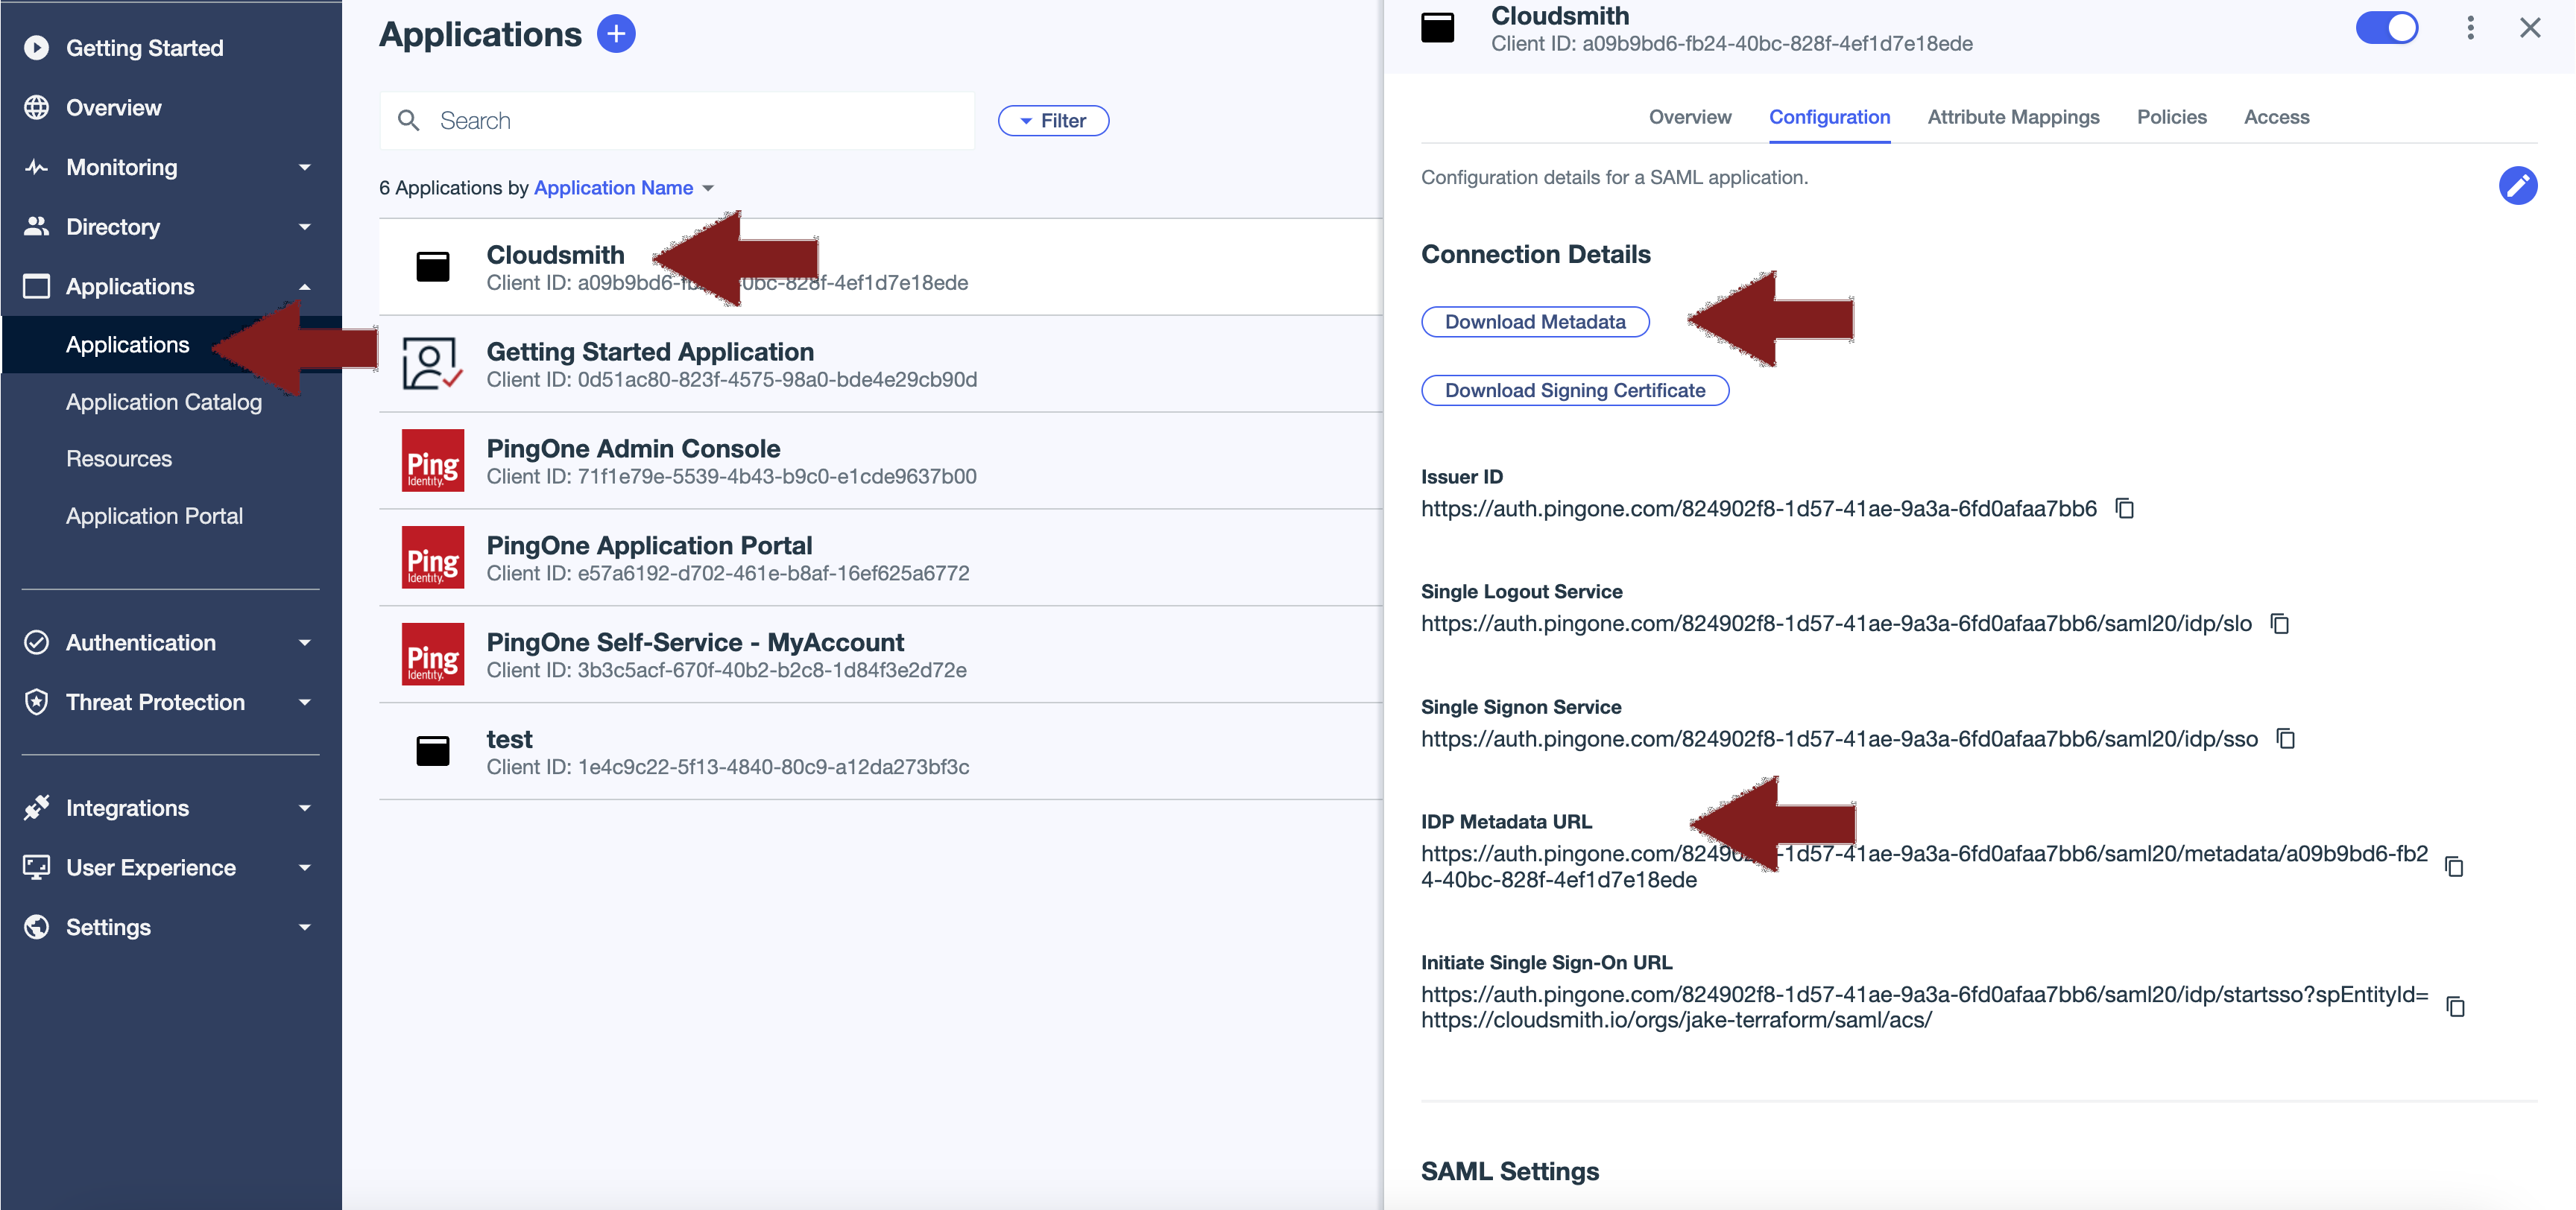
Copy the IDP Metadata URL and paste that into the SAML Metadata URL field in the SAML authentication configuration page of Cloudsmith.
Click the Download Metadata button to download an XML file containing details of the application. Save this file somewhere and open it up in a text editor (or other application like Firefox that will allow you to copy the text within). Copy all of the text and paste that into the SAML Metadata XML field in Cloudsmith. Ensure the Enable SAML Authentication (and Signup) checkbox is ticked and save the configuration.
SAML Group Sync
Under the SAML Group Sync setup in your Cloudsmith organization settings, click on the Create Group Sync Mapping button. You will need to provide the Attribute Key, Attribute value and the team that this configuration will act against.
The Attribute Key will be what was mapped for the Group IDs attribute in your applications attribute mappings within PingIdentity. In the example above, this is groups, but can be found by navigating to your application and checking the Attribute mappings tab.
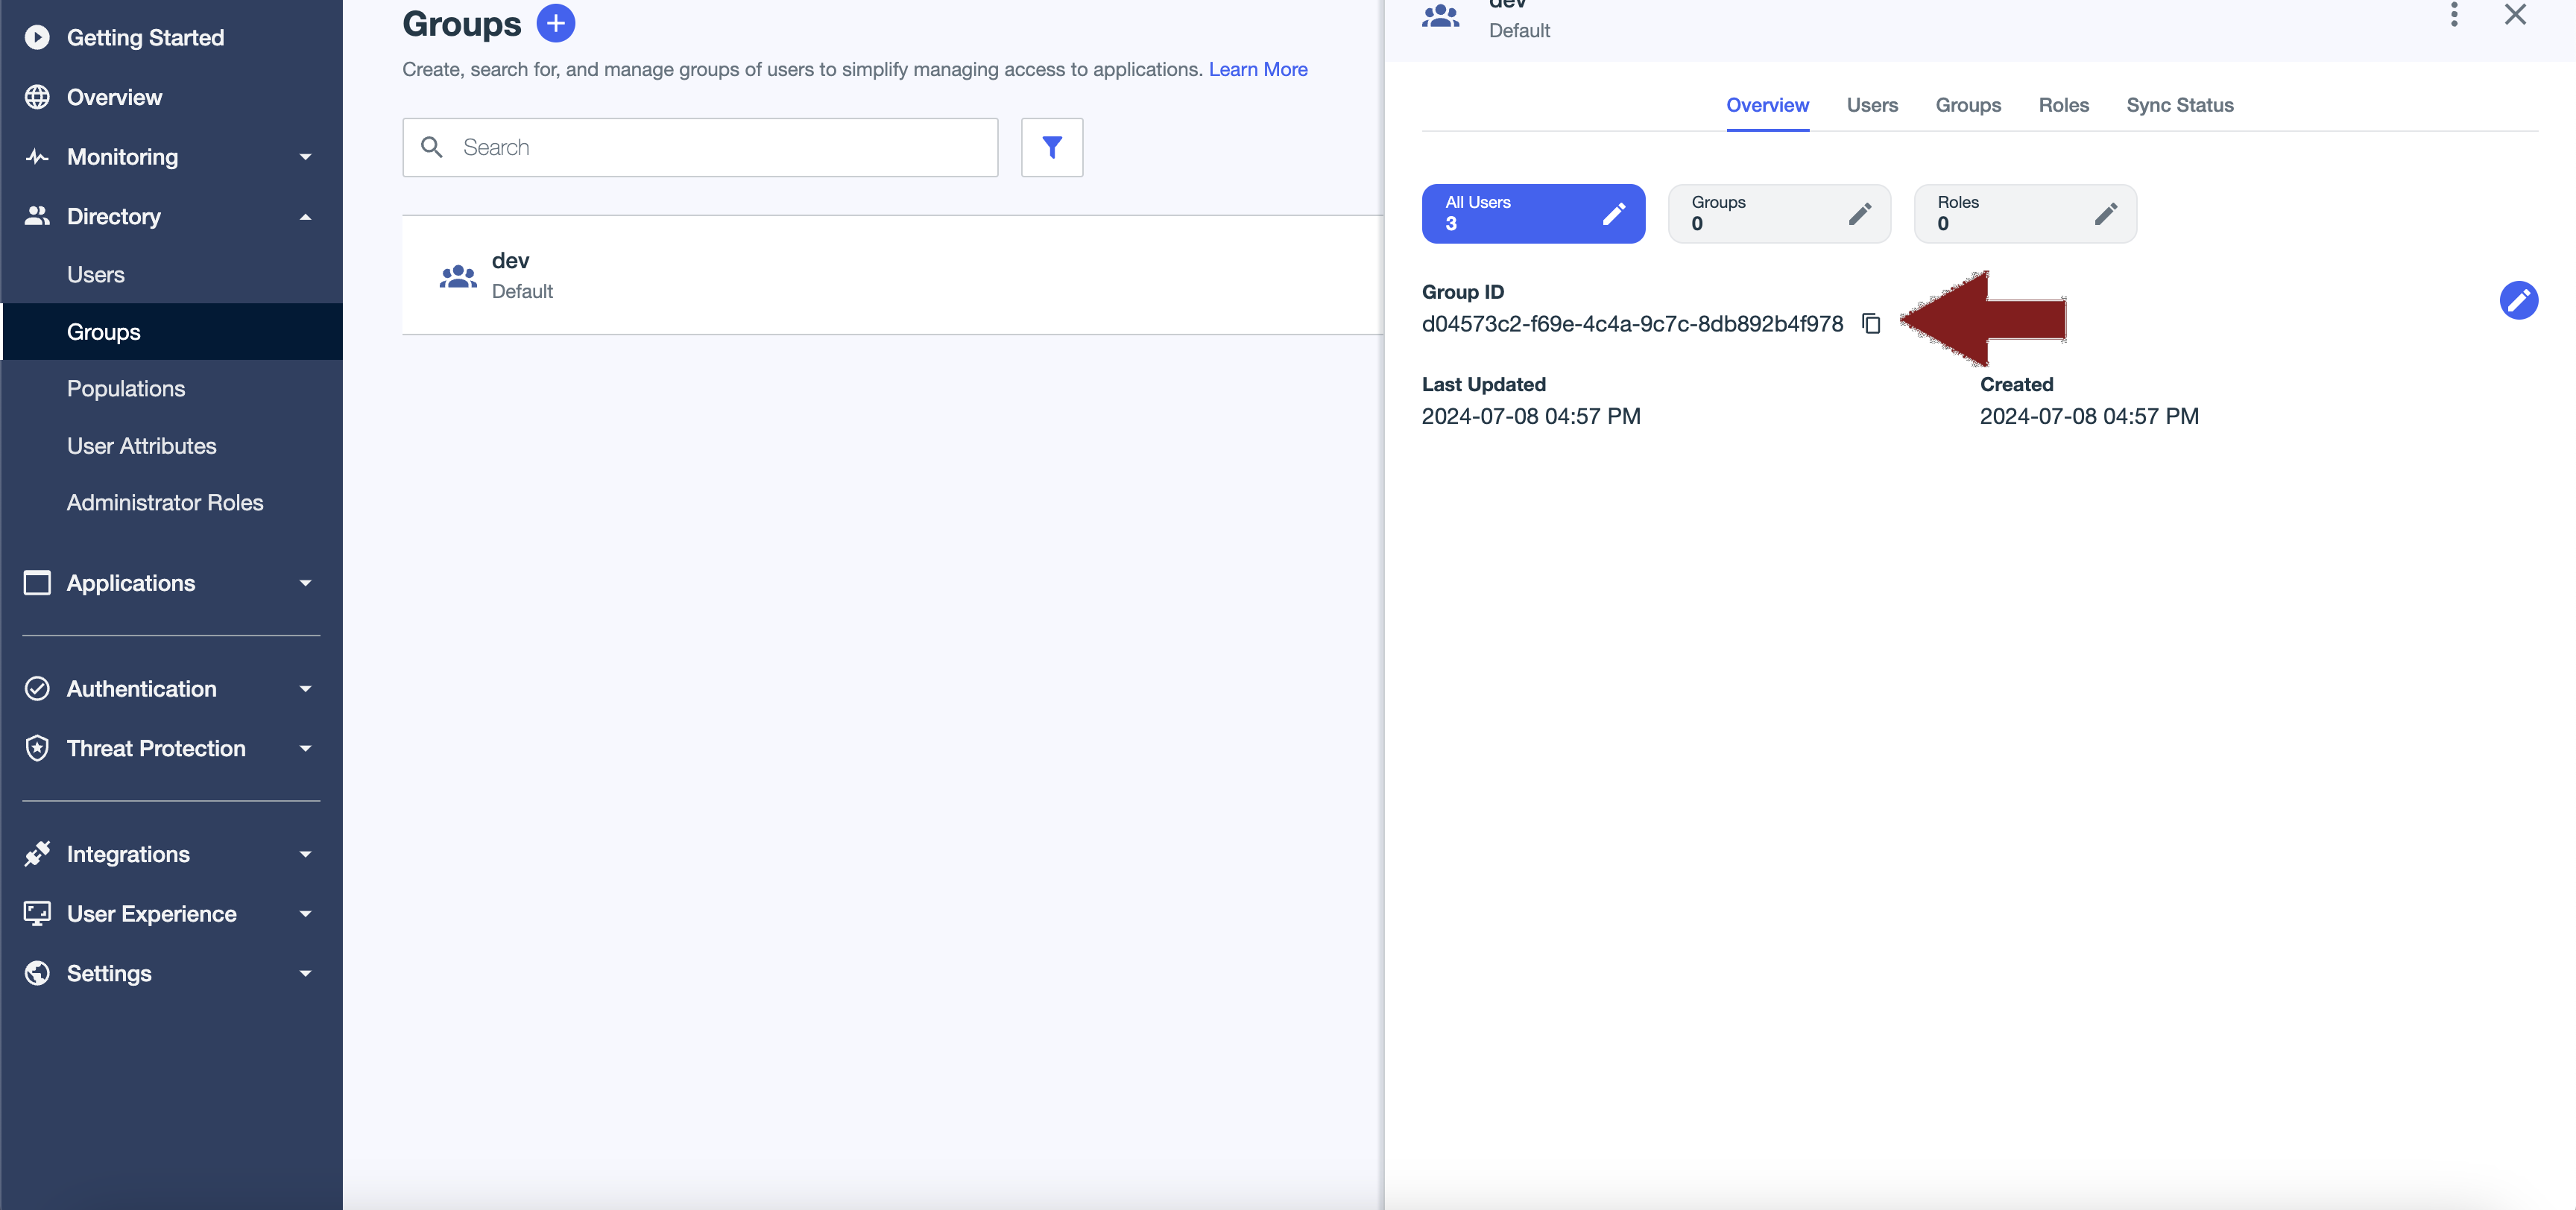
The Attribute value will be the Group ID of the group within PingIdentity. This can be found by navigating to your group and checking the Overview tab.
Once this is configured, select the Role within Cloudsmith that this will apply to (either Member or Manager) and click save. The next time a user logs in to Cloudsmith and is attached to this group within PingIdentity, they should be automatically provisioned for the selected teams within Cloudsmith.
Updated 5 months ago
