Package Resynchronization
What is Package Synchronization?
Synchronization is where we extract the metadata and files withing a package, process them and make the package available for download.
Why would I need to Resynchronize?
You would usually try a resync if a package has failed, and you want to manually try again.
Resynchronization is, at its core, a retry mechanism. A resynchronization is equivalent to delete and add again for the same package.
Also, if we enhance support or add new functionality for a package format (e.g. better/improved metadata processing on a package), any packages of that format may require a resync.
Resync via Cloudsmith CLI
Identify a Package
To resync a package using the Cloudsmith CLI, you first need to identify the package. See Package Identification for instructions to do this.
Resync a Package
Once you have identified the package, you use the cloudsmith resync command to resync it:
cloudsmith resync OWNER/REPO/UNIQUE_IDFor example:
cloudsmith resync demo/examples-repo/7jvagMH9vk7uIn this example, we identified that the package we want to resync has the Unique ID "7jvagMH9vk7u" and is in the "examples-repo" repository:

cloudsmith resync CLI example
Resync via Website UI
You can resync a package via the Website UI:
- Via the repository packages list
- Via the package detail page
Resync via Repository Packages List
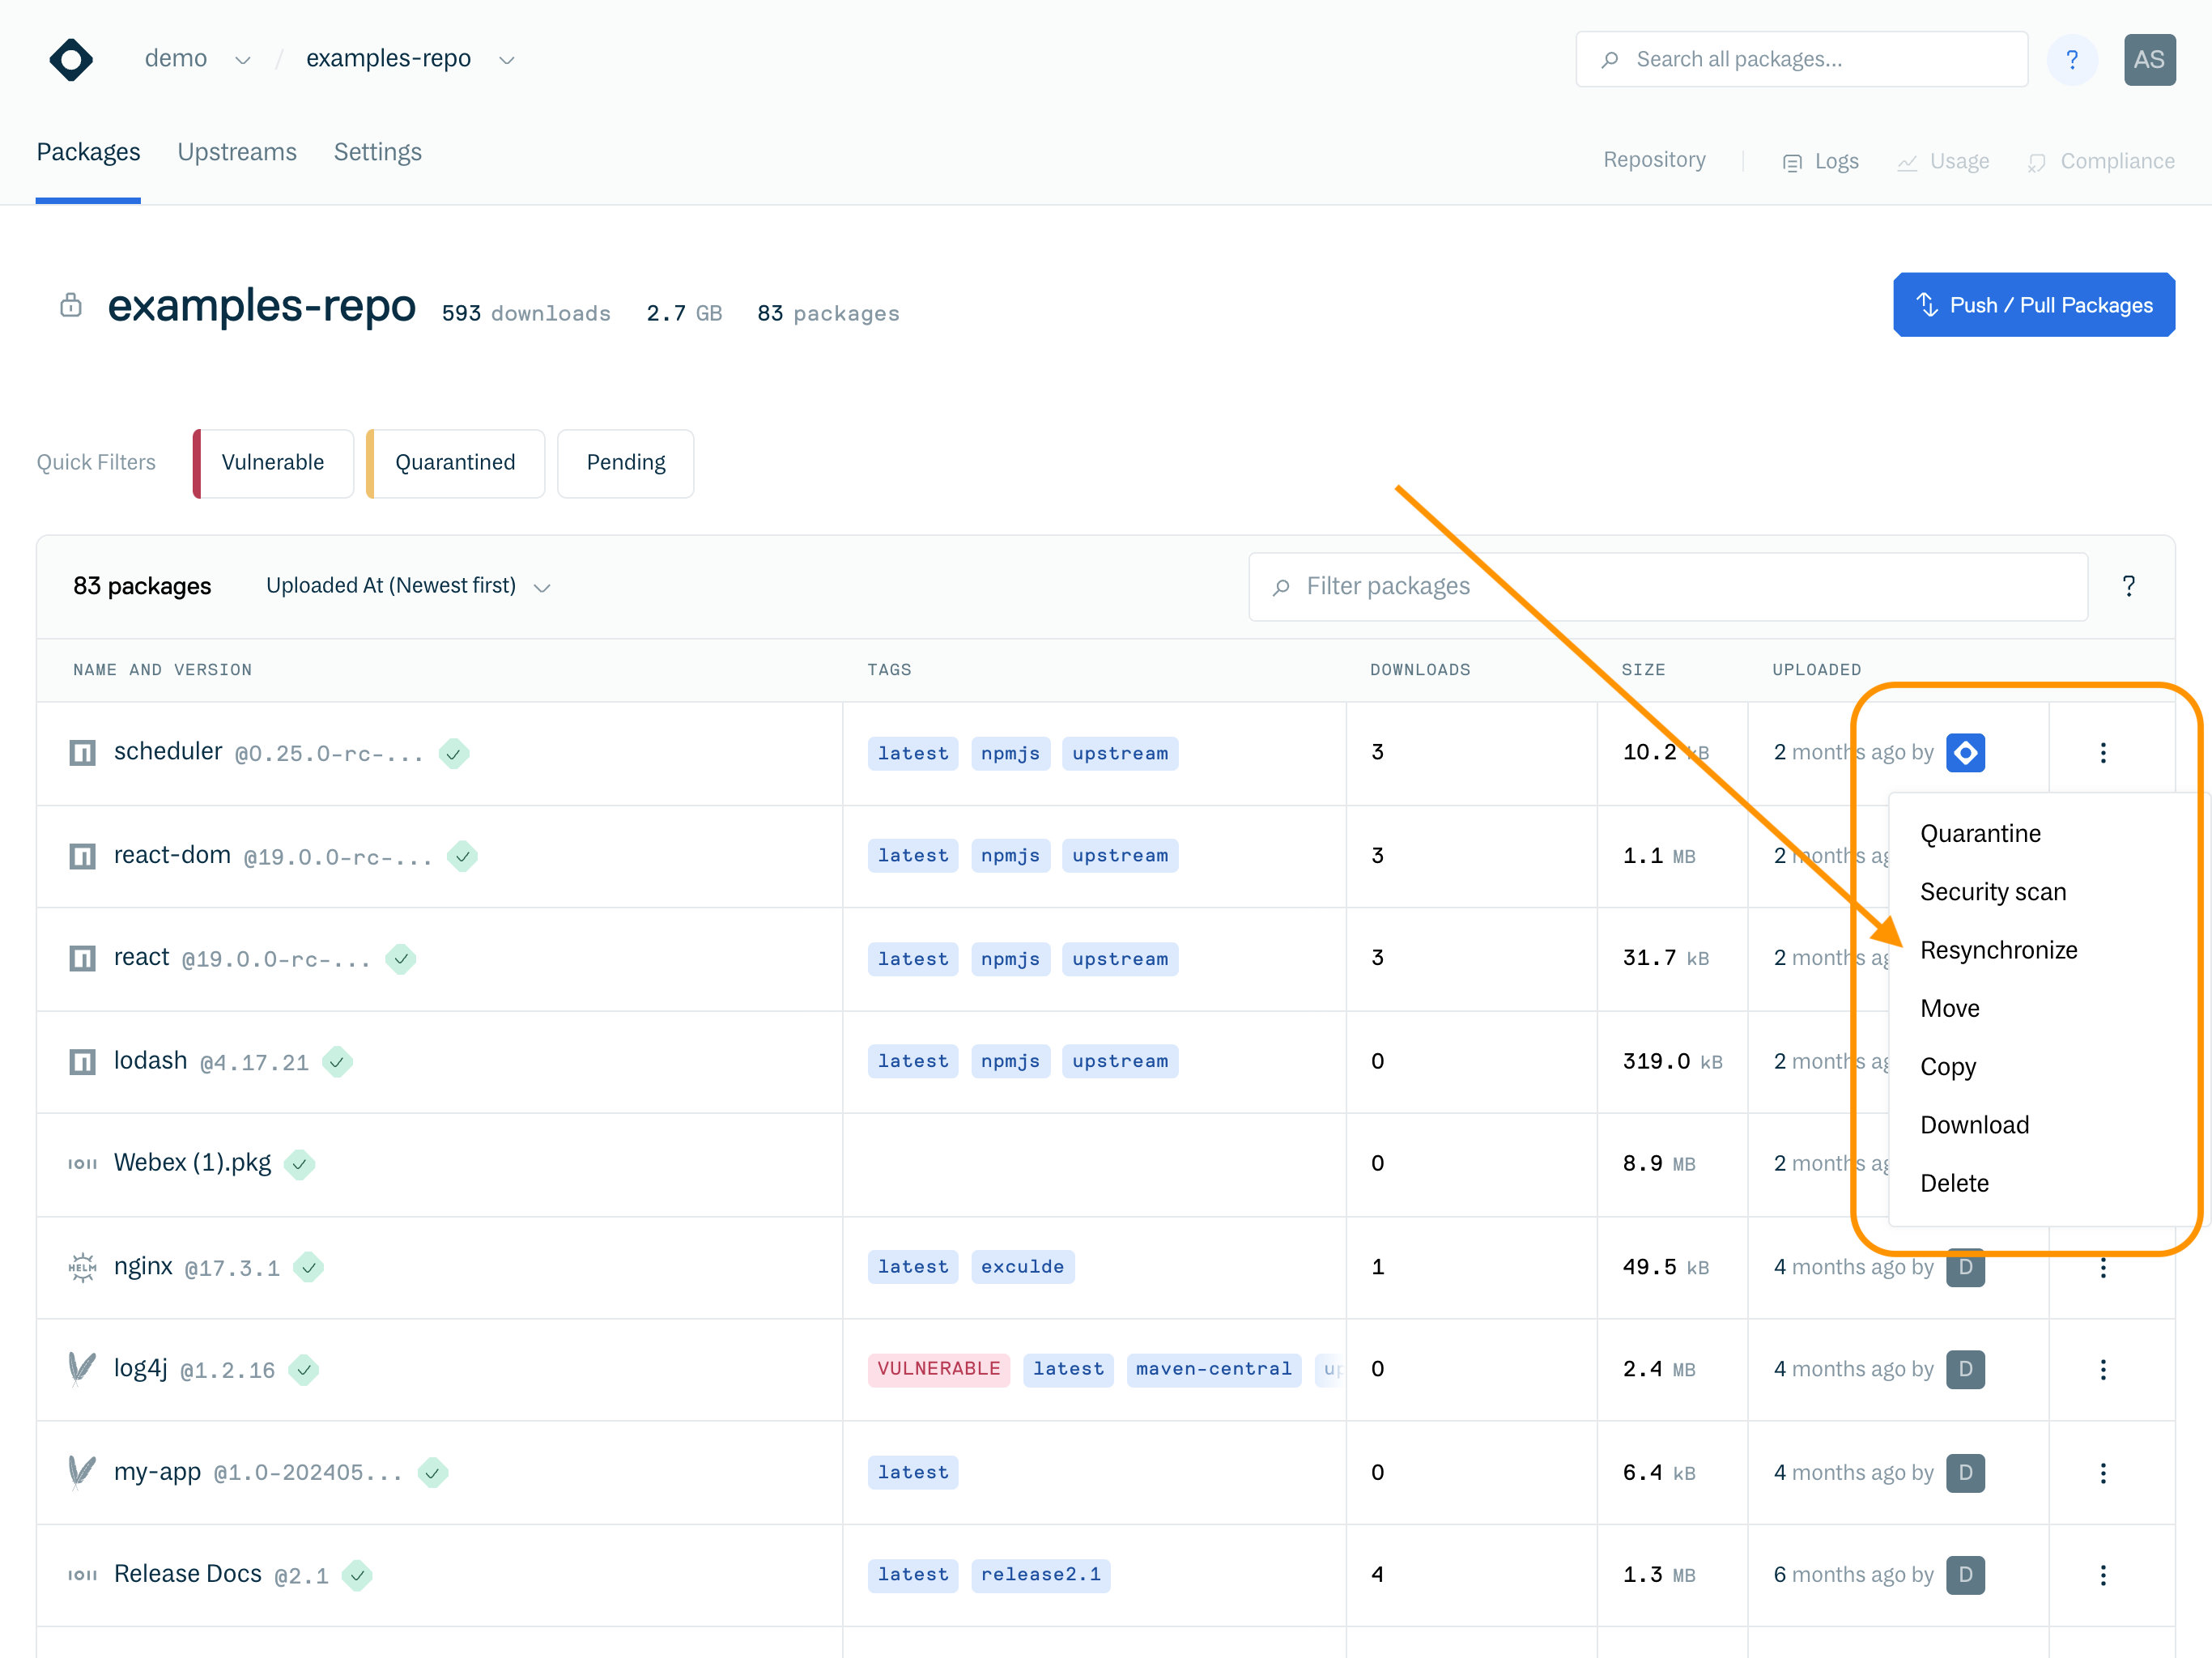
To resync a package via the repository packages list, click the Action menu to the right of the package name, then select "Resynchronize":

Resync via the Package Detail page
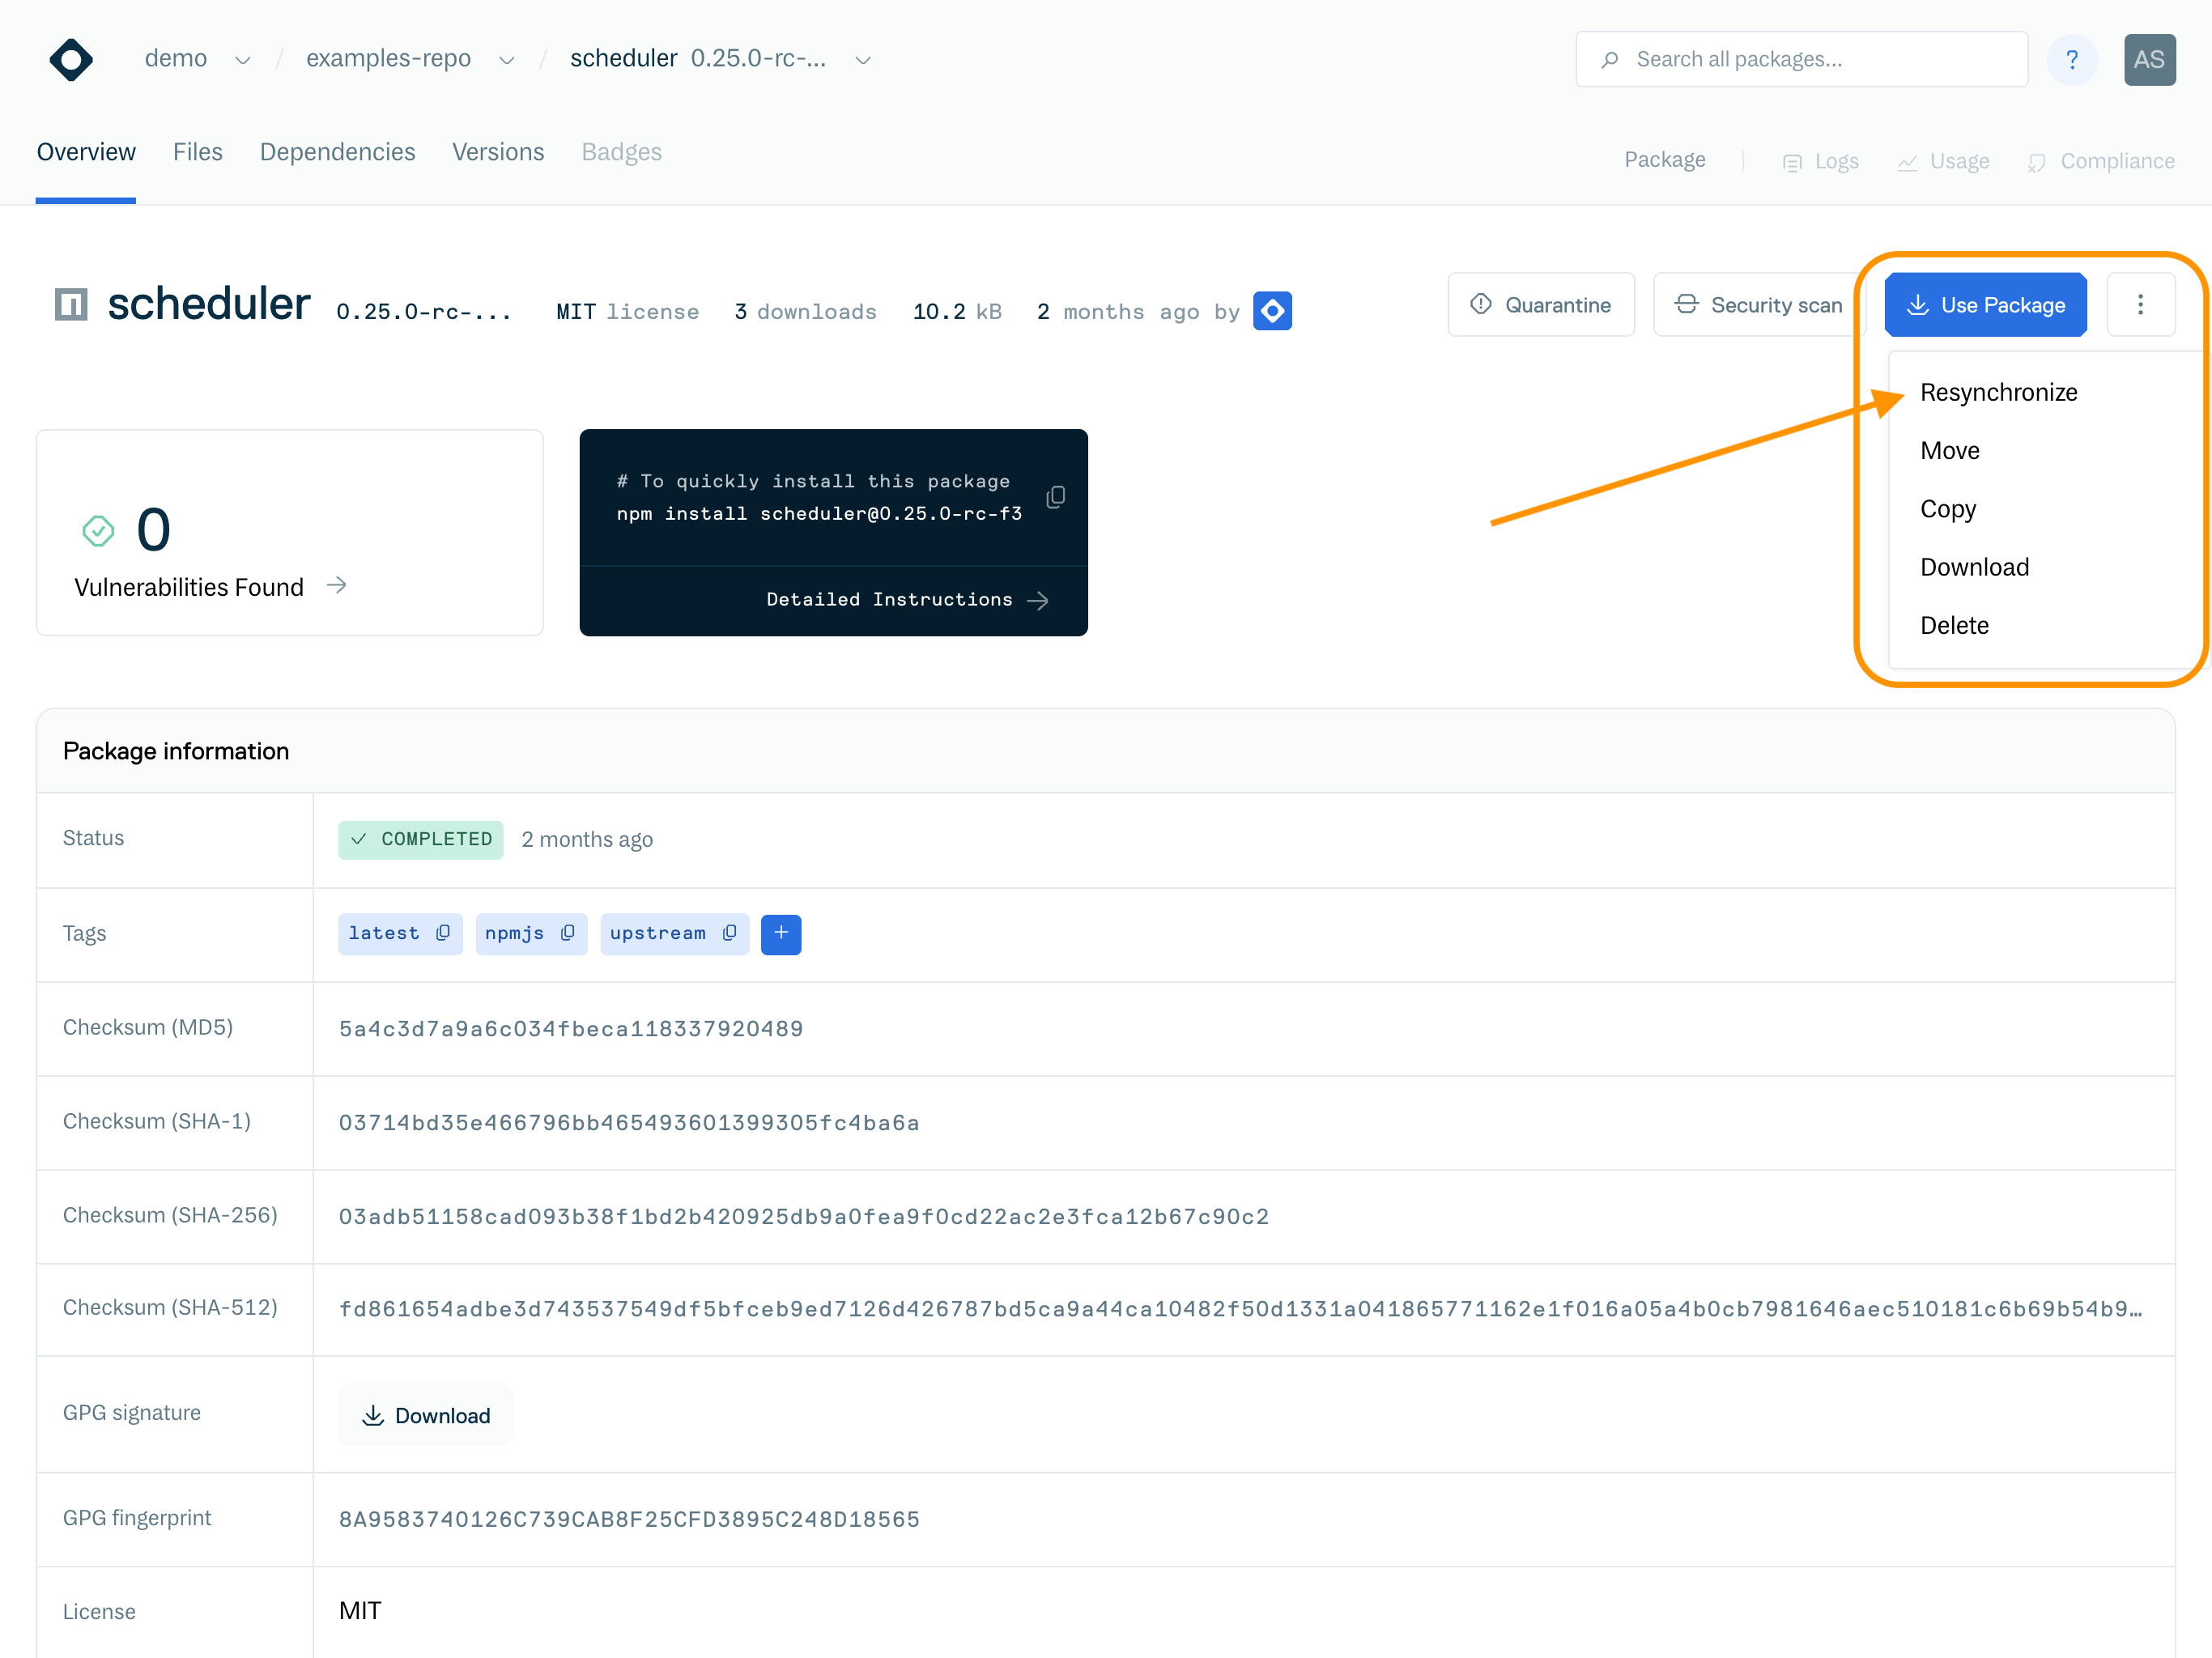
To resync a package via the package detail page, click the Action menu to the right of the "Use Package" button and select "Resynchronize":

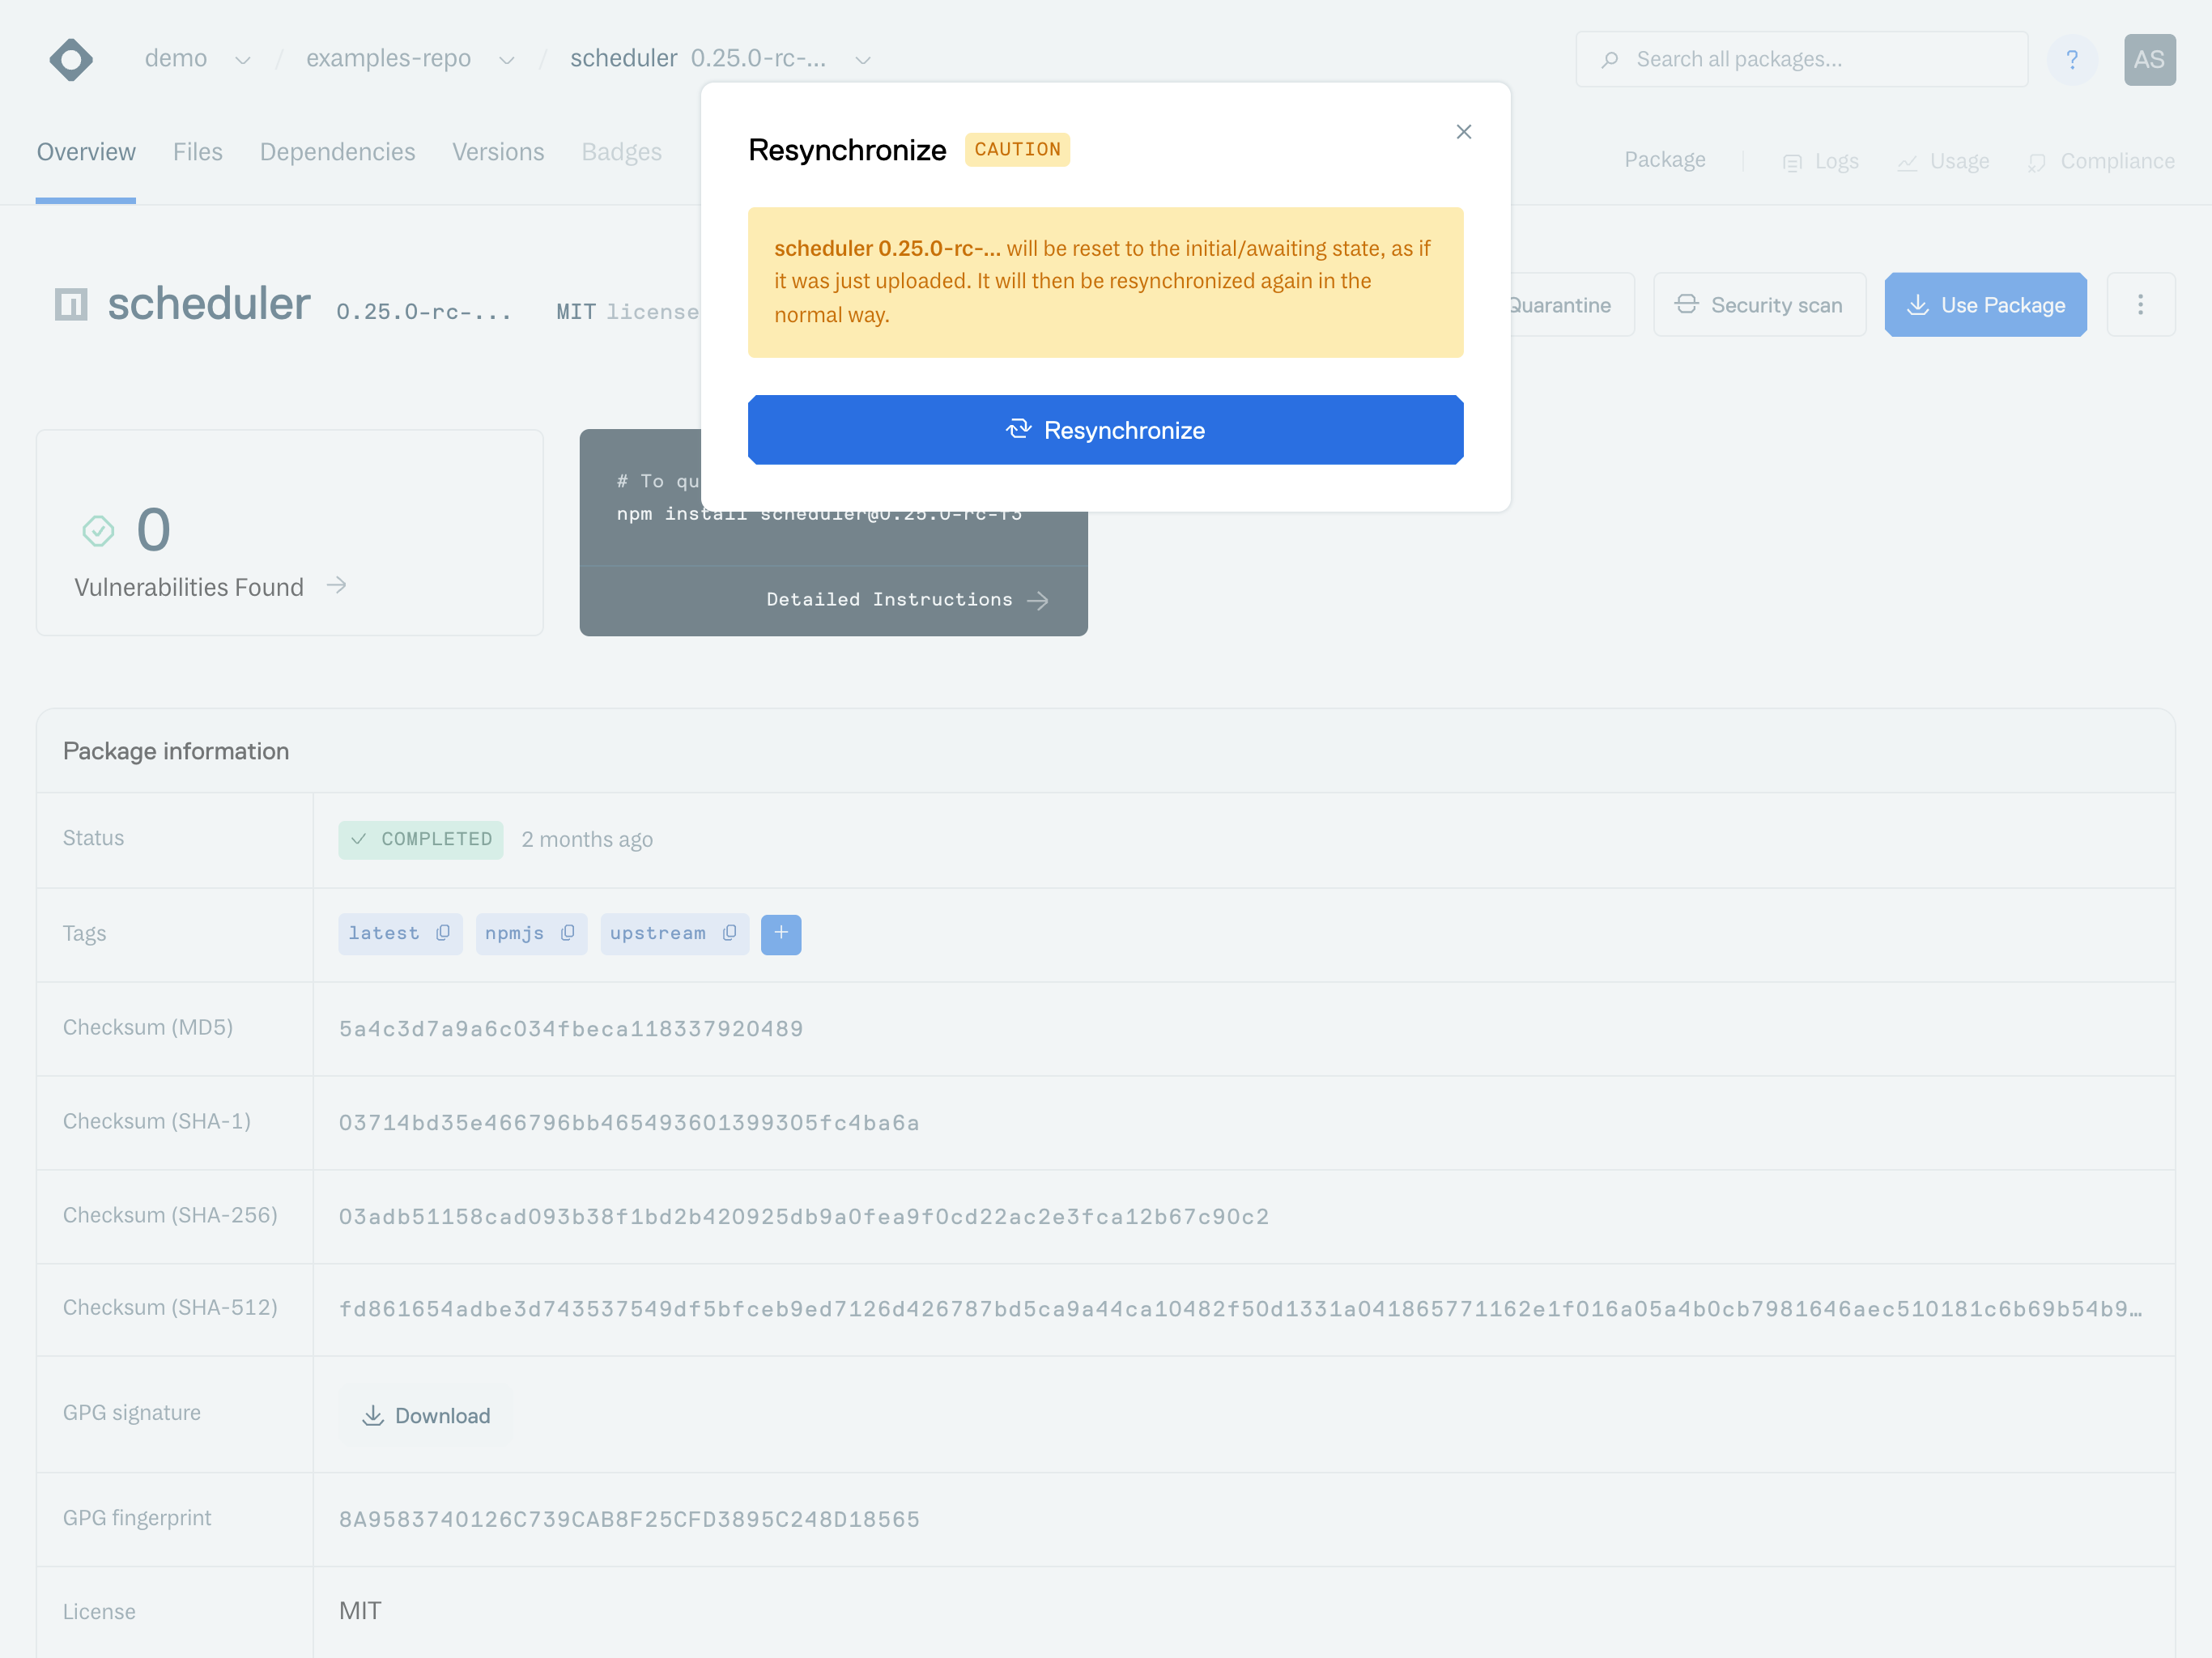
After clicking a "Resync" button, you will then be presented with a confirmation form. Click "Resync" again to confirm resynchronization of the package:

You will then get an on-screen message confirming that the package has been scheduled for resynchronization.
Updated 5 months ago
