Dependabot
How to integrate Github Dependabot with Cloudsmith

Github Dependabot can be used to automatically check for newer versions of your dependencies and update vulnerable dependencies. This guide will walk you through the process of integrating Github Dependabot with Cloudsmith.
For this example, we will set it up for a Maven project, but the instructions will work for all supported formats.
Add Cloudsmith API Token to GitHub Secrets
- Copy your API key from Cloudsmith using the instructions here.
- Navigate to your repository on GitHub.
- Select
Settings. - Select
Secrets and variables. - Select
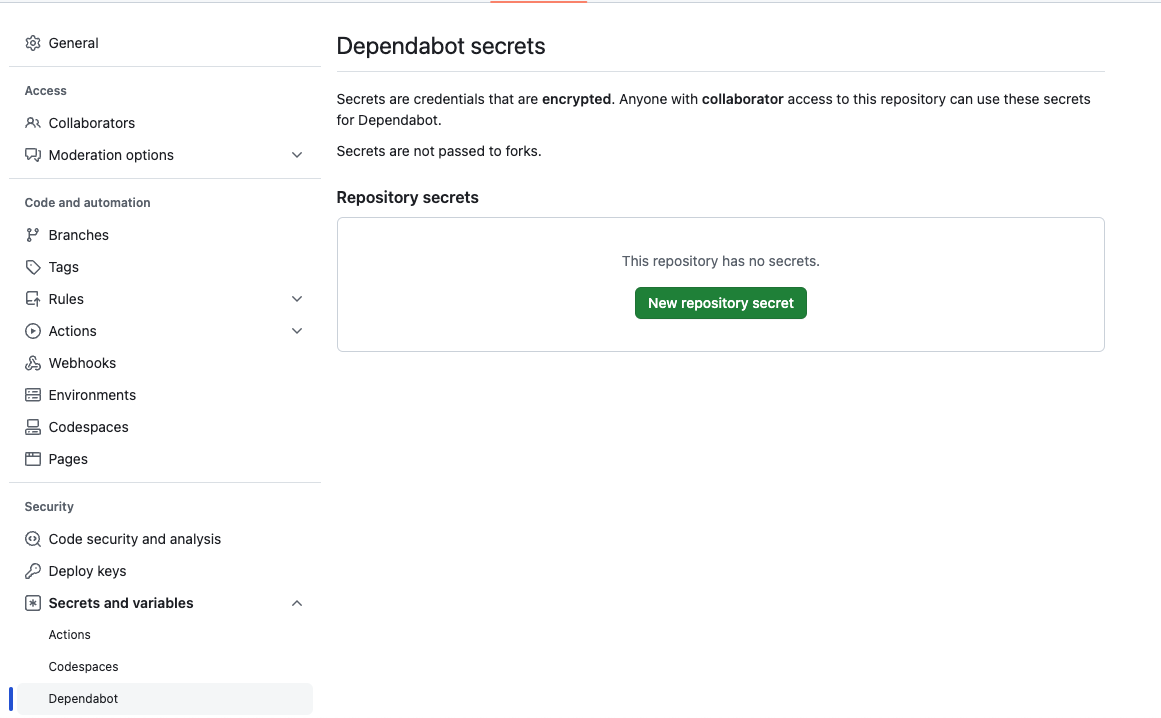
Dependabot. You will see the UI below. - Add your Cloudsmith API key details here:
Cloudsmith API Key. For this example we useCLOUDSMITH_API_KEY.Cloudsmith Username. For this example we useCLOUDSMITH_USER_NAME.

Enable Dependabot in GitHub
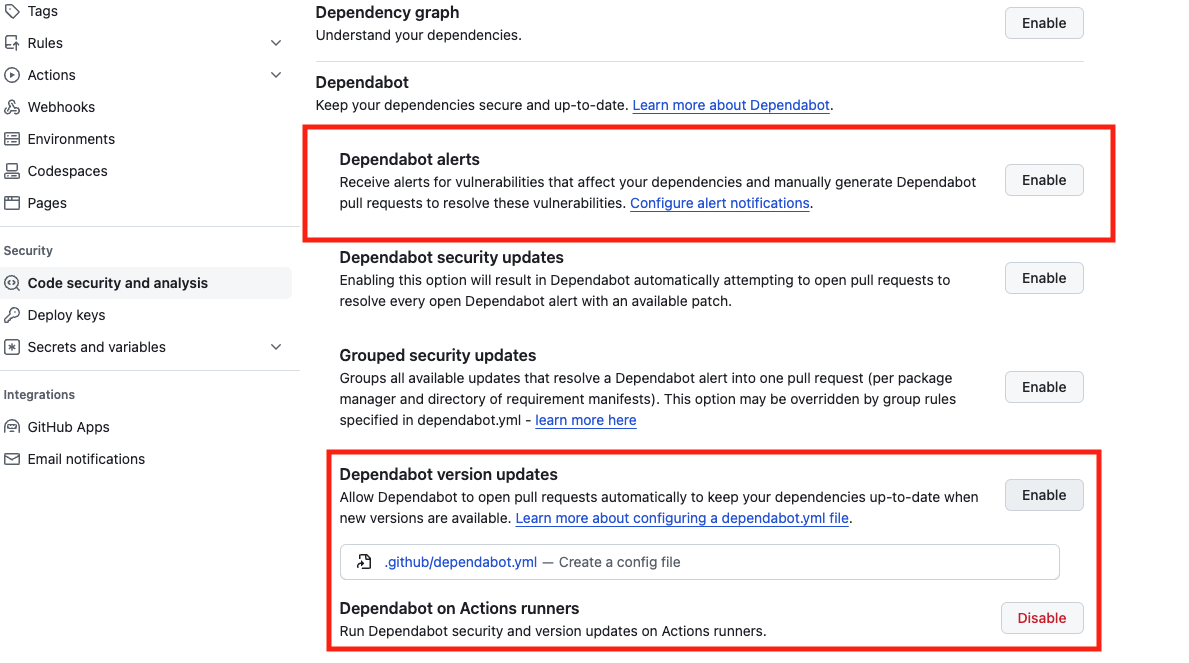
To receive Dependabot alerts, you must first enable Dependabot alerts in this repository’s settings.
-
Navigate to your repository on GitHub.
-
Click on
Securityfrom the repository menu. -
Select the
Enablebutton in theDependabot alertssection. -
Once Dependabot has been enabled, click on
Create a config file. This will create a./github/dependabot.ymlfor your repository (Learn more about configuring a Dependabot configuration file here).
Configure the Dependabot Configuration file
For Dependabot to connect to Cloudsmith, you will need to specify the Cloudsmith connection details in ./github/dependabot.yml.
Open the ./github/dependabot.yml file and configure it as follows:
package-ecosystemSpecify the package ecosystem you are using. For example, if you are using Maven, set thepackage-ecosystemtomaven.registriesYou will need to include theregistriessetting in 2 places in thedependabot.yml file.- At the top level, add the
registriessection to define the Cloudsmith repository you are using. This section should include the following:type: The type of repository e.g. maven-repository orurlThe URL of the Cloudsmith repository.usernameandpassword: Cloudsmith supports authentication using username and password. These credentials should be stored in theDependabottab of your repositoriesSecrets and variablessettings (see above for more details).replaces-base. This setting is optional and works hand in hand with Cloudsmith upstream Upstream Proxying. If thereplaces-basesetting is set totrue, Dependabot will use the specified Cloudsmith URL as the primary source for dependencies instead of the default public repository for that package ecosystem. This means you should configure a corresponding Cloudsmith upstream to ensure Dependabot checks Cloudsmith first for dependencies.
- Within the updates blocks, where you can use
registries: "*"to tell Dependabot to use any or all of the registries you defined at the top level.
- At the top level, add the
directoryspecify the directory where your package manifest is located. This is usually the root directory of your project.scheduleConfigure the schedule to define how often Dependabot should check for updates. You can set the interval to daily, weekly, or monthly.
Here is a complete example with a maven project:
Replace YOUR-ORG/YOUR-REPO with the name of your organization and repository.
version: 2
registries:
  cloudsmith:
    type: maven-repository
    url: https://dl.cloudsmith.io/basic/YOUR-ORG/YOUR-REPO/maven/
    username: "${{ secrets.CLOUDSMITH_USER_NAME }}"
    password: "${{ secrets.CLOUDSMITH_API_KEY }}"
    replaces-base: true

updates:
  - package-ecosystem: "maven"
    directory: "/"
    schedule:
      interval: "daily"
    registries:
      - cloudsmith
    commit-message:
      prefix: "deps"
    open-pull-requests-limit: 10
More detailed information on the Dependabot configuration file can be found here.
Verify the Connection
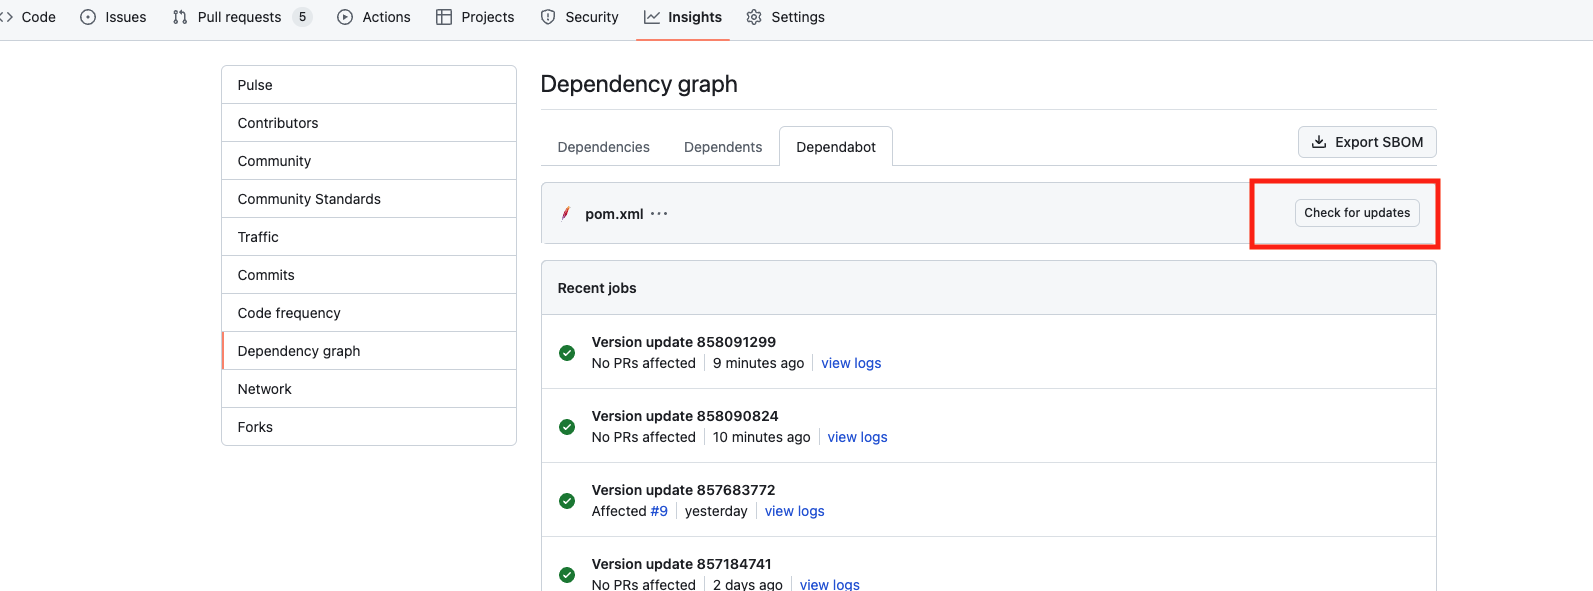
To verify that Dependabot can successfully connect to Cloudsmith:
- Navigate to your repository’s settings.
- Go to
Insights->Dependency Graph -> Dependabot - Check for updates. You will find any errors here.

By following these steps, you can ensure that Dependabot will check for and update dependencies via Cloudsmith, ensuring your dependencies are always up-to-date and secure.
Updated 5 months ago
