
Single Sign-On with Azure AD
This guide provides step-by-step instructions on setting up Azure AD as a SAML IdP for your Cloudsmith Organization.
Adding Cloudsmith to Azure AD
Cloudsmith is not (yet) an integrated application in Azure AD. You'll have to add Cloudsmith manually so you can configure SSO.
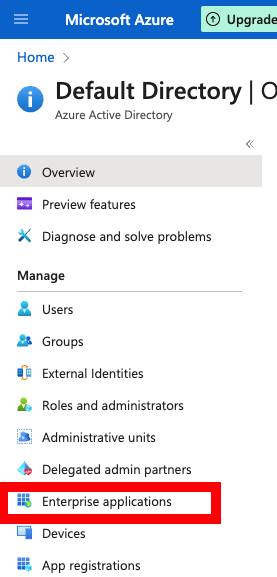
Log into the Azure portal as an admin and click Azure Active Directory in the left menu, then Enterprise Applications in the menu that appears:

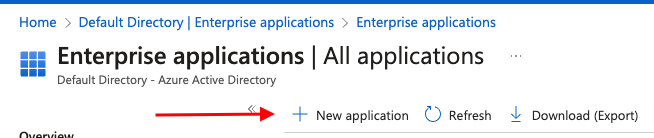
Choose + New application from the top menu:

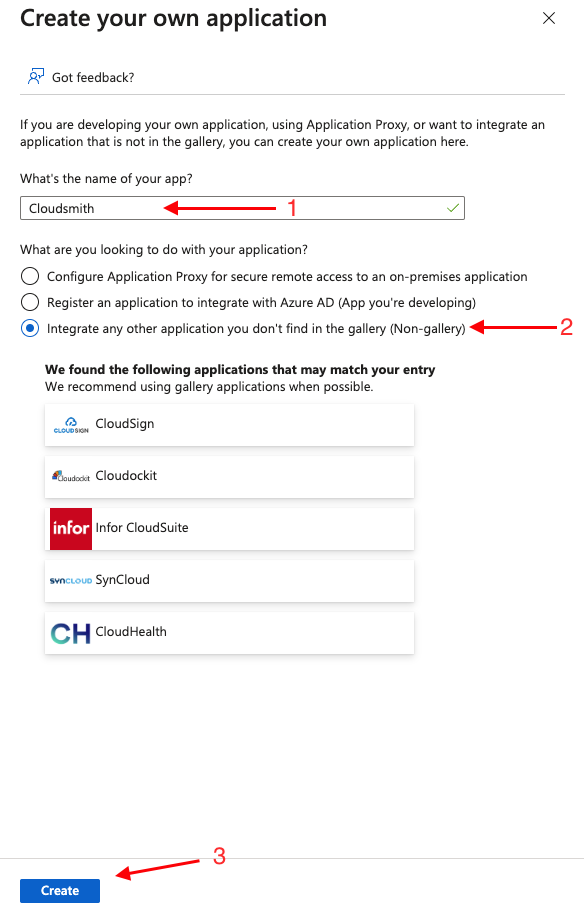
Click Non-gallery application and enter "Cloudsmith" in the "Name" box:

Click the blue Add button at the bottom of the page. After a short processing delay, you'll be redirected to the overview page for your new application.
Select Single sign-on from the left menu and choose SAML:

Next, we'll configure SAML settings. Click the pencil symbol beside Basic SAML Configuration to begin editing:

To determine your Identifier and Reply URL (we use the same value for both) we use the following format: "https://cloudsmith.io/orgs/MY_ORG_NAME/saml/acs/", where "MY_ORG_NAME" is replaced with your organization's slug.

Hit the Save button at the top of the page.
Next, we'll configure Azure to also send the user's first and last names during sign-in. Click the pencil icon on the User Attributes & Claims section:

Remove all attributes except the Name identifier value, the screen should look as below:

Next, we'll add first and last names to the attributes sent to Cloudsmith. Click + Add new claim at the top of the page, and add FirstName as follows:

Repeat the process for LastName and hit Save. The attributes screen should now look as below:

Finally, we'll need to add any users that need to be able to access the application. Click Users and groups in the left sidebar and then +Add user. You can add as many users or groups as needed:

Providing configuration to Cloudsmith
Once configured as above, you'll need to provide metadata to Cloudsmith to connect to your newly configured IdP.
Go back to the Single sign-on tab in the sidebar, you should see, in section 3 (SAML Signing Certificate) a link that provides metadata for dynamic configuration, it is labelled App Federation Metadata Url.
Copy this link and add it to your SAML configuration in your Cloudsmith organization settings

SAML Group Sync
Once SAML has been setup, you can then use Azure AD and Cloudsmith's group mapping in order to import your teams into Cloudsmith.
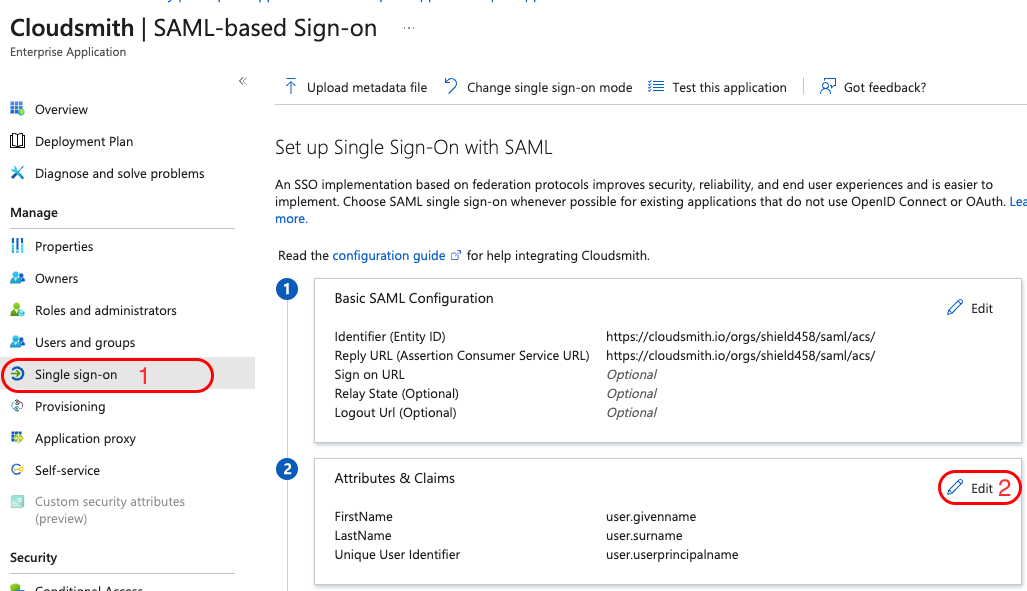
To get started, head into your Cloudsmith Enterprise applicaiton on Azure and select "Single sign-on", then click on "Edit" under "Attributes & Claims":
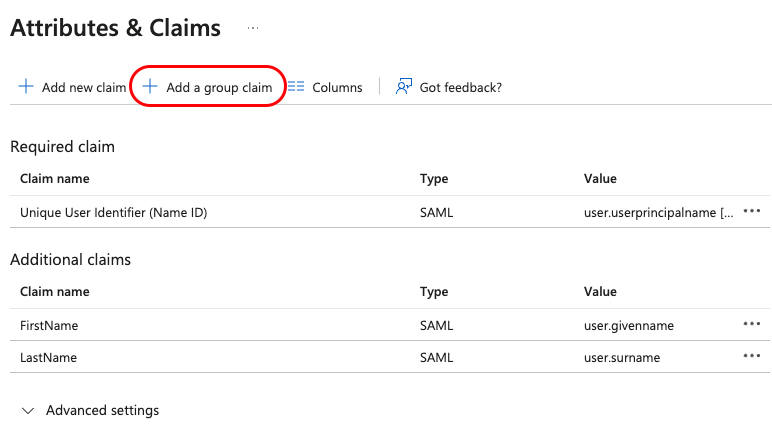
Select "Add a group claim":
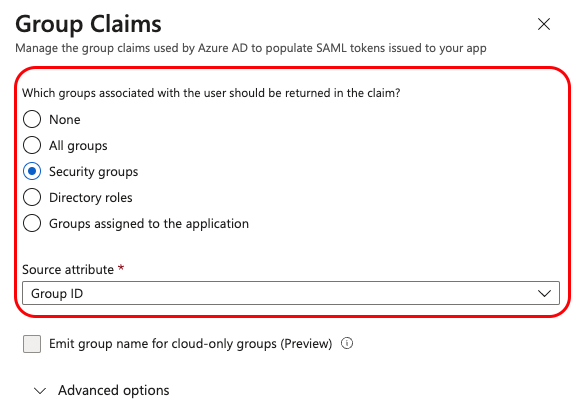
Select "Security Groups" from the sidebar menu and click "Save", if your AD grouping is setup in a different way, you may choose the relevant fields that suit your infrastructure.
You should now see a new entry in the table under "Additional Claims" called user.groups:
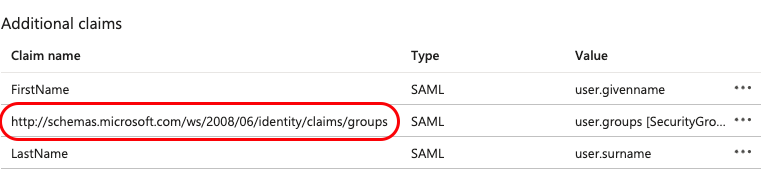
Save the URL for later: http://schemas.microsoft.com/ws/2008/06/identity/claims/groups
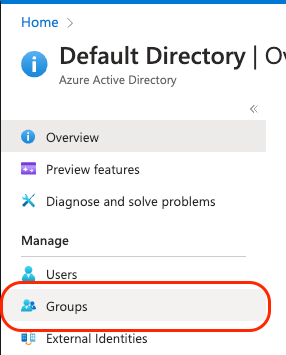
Now go back to your main Active Directory view and select "Groups" tab:
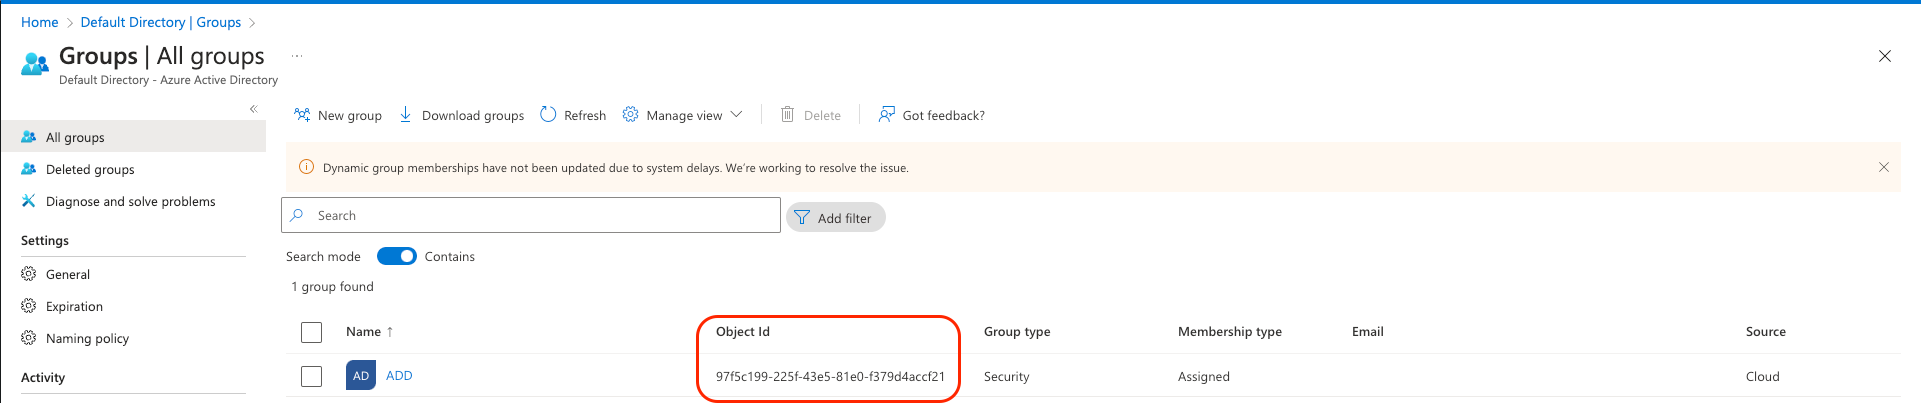
Copy the relevant "Object ID" for the group that you wish to sync Cloudsmith with:
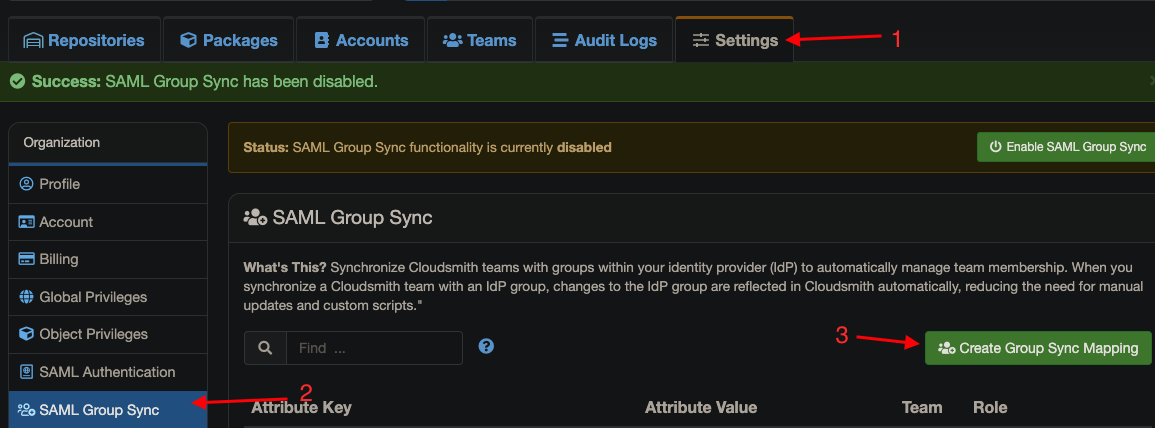
In Cloudsmith, go to "Settings" -> "SAML Group Sync", click "Enable SAML Group Sync" then "Create Group Sync Mapping":
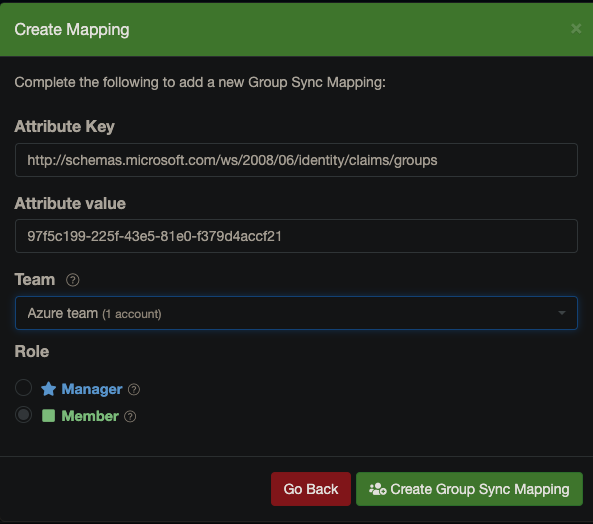
On the pop-up form, fill in the previously saved URL as the "Attribute Key" and the Object ID of the group as the value, click on "Create Group Sync Mapping":
Now when a user re-logs with SAML, they will be placed in the assigned group based on the mapping.
SCIM De-provisioning
You can use SCIM to automatically de-provision users from your Cloudsmith organization whenever you remove a user assignment for the Cloudsmith application in Azure AD.
General documentation on how SAML group sync works can be found here.
To set this up, you need to add an "Enterprise application" to your Active Directory on Azure:
Click on "New Application":
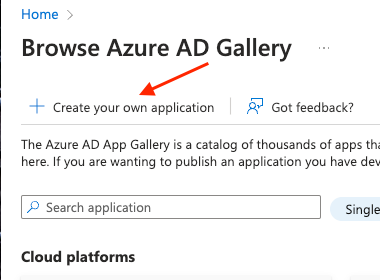
Click on "Create your own application":
On the right side, a new tab should appear, fill in the details of the name and select the "...(Non-galler)" option and click "Create":
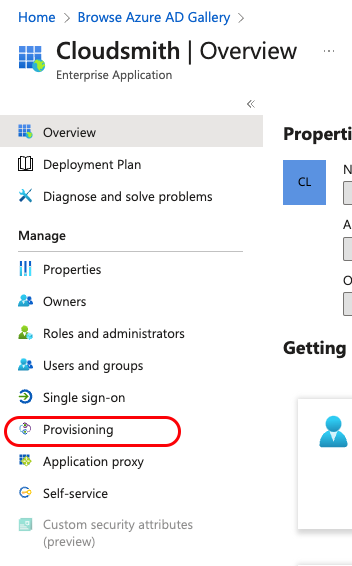
Once the application is created, select "Provisioning":
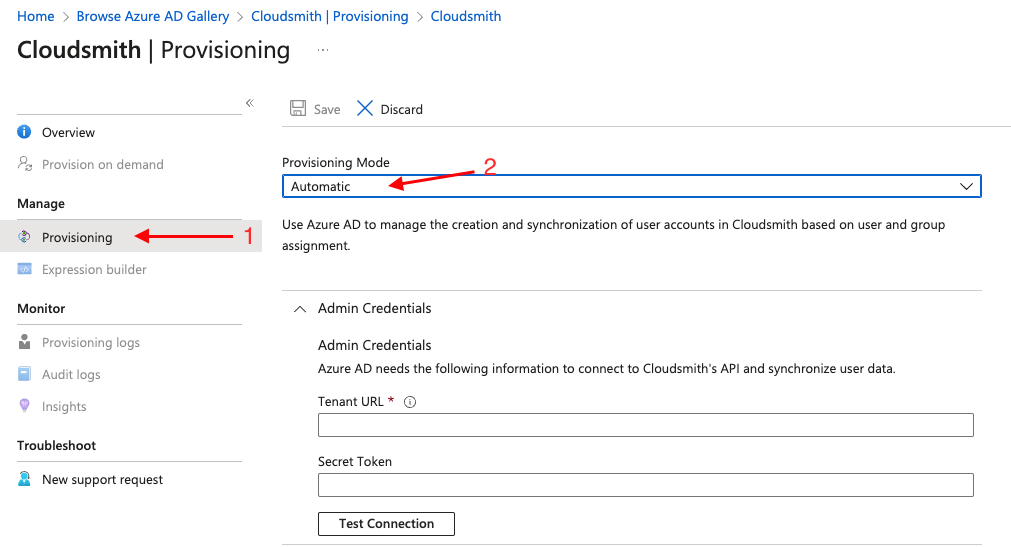
Once the page loads, select "Provisioning" again, and select "Provisioning Mode" to "Automatic":
In Cloudsmith navigate to the following link: https://cloudsmith.io/orgs/<you_org_name>/settings/scim/
Enable SCIM if it's not enabled and copy your SCIM Authentication token.
Go back to Azure AD and set the Tenatn URL to: https://api.cloudsmith.io/scim/v2 and the "Secret token" to the copied token from Cloudsmith, click "Save" and "Test connection"
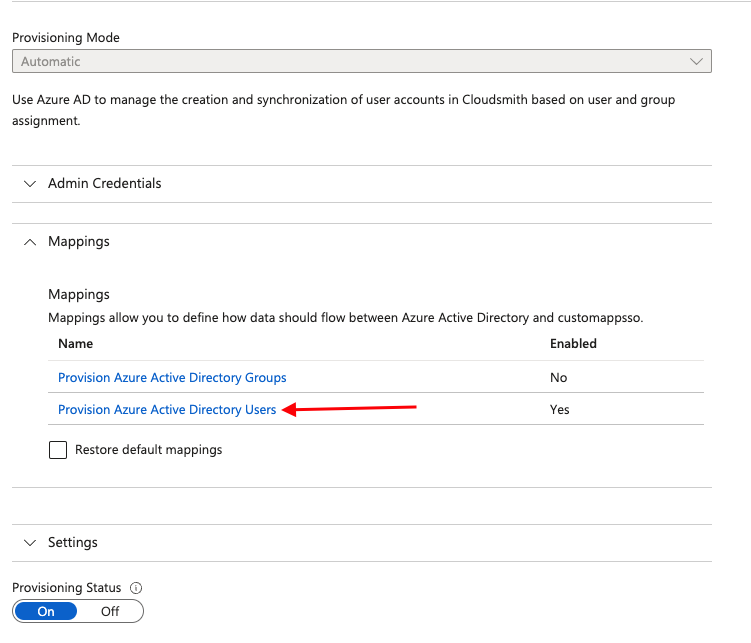
Now under the same "Provisioning tab", select "Mappings" dropdown and select "Provision Azure Active Directory Users"
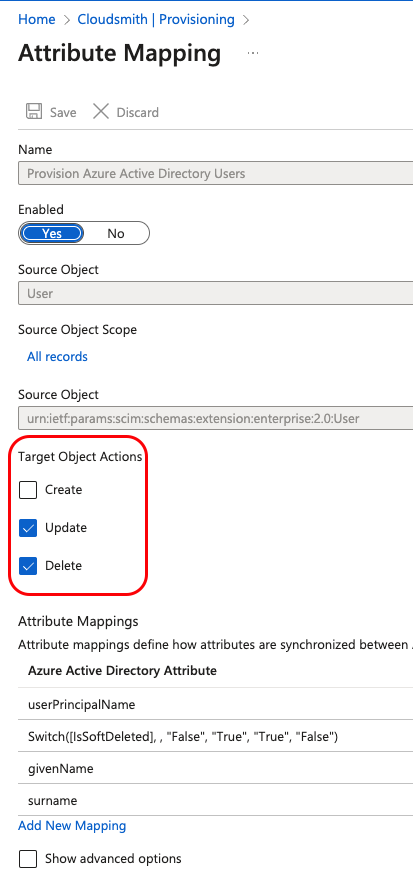
Under "Target Object Actions", select only "Updated, Delete" and click "Save":
Azure AD should now have the necessary information to de-provision users from Cloudsmith
All wrapped up!
Once you've added the link to your App Federation Metadata, and enabled SAML in your Cloudsmith organization settings, you will be able to access the landing page of your organization at the following URL:
https://cloudsmith.io/orgs/ORG/saml/login/
Where ORG is your organization's slug/identifier (what you would normally see in the URL when accessing your organization within Cloudsmith).
Updated 8 months ago
