Entitlements via the UI
Viewing Entitlement Tokens
To view Entitlement Tokens for a repository, click "Entitlement Tokens" from the left side menu on a repository detail page:
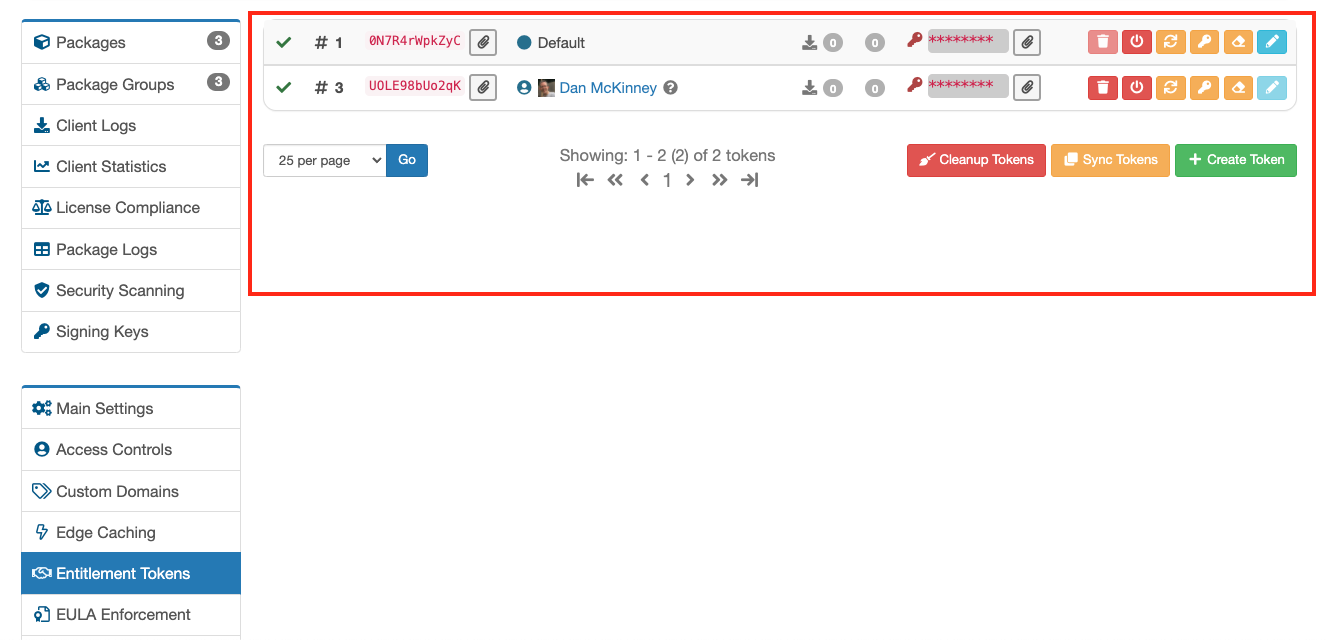
Viewing Entitlement Tokens
By default, this view does not show tokens that have been deleted, disabled or user tokens created by other users in your org. This view can be changed using the view toggles at the bottom of the left hand menu:
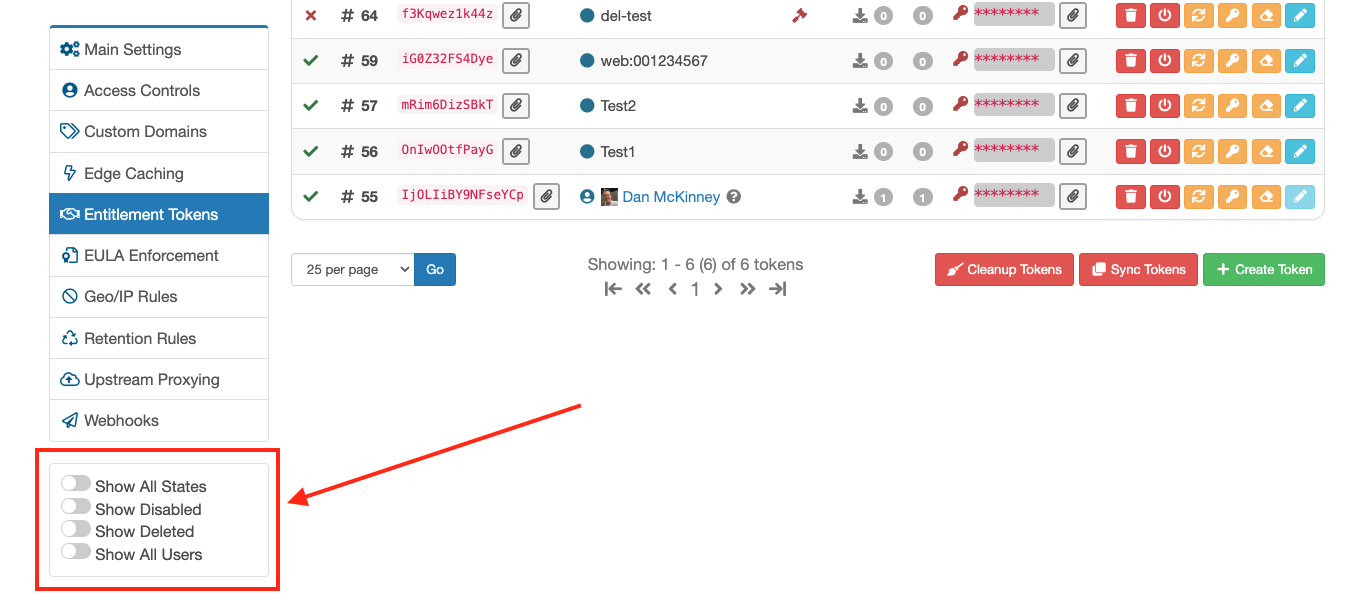
Entitlement Tokens View Toggles
| Toggle | Description |
|---|---|
| Show All States | Enable this to see Enabled, Disabled, Deleted and All User Tokens |
| Show Disabled | Enable this to see Enabled and Disabled Entitlement Tokens |
| Show Deleted | Enable this to see Enabled and Deleted Entitlement Tokens |
| Show All Users | Enable this to see Enabled and All User Entitlement Tokens |
Searching Entitlement Tokens
You can search for Entitlement Tokens in a repository using the search box at the top of the Entitlement Token List:

Entitlement Token Search
When searching Entitlement Tokens, you can use the following search criteria with boolean logic (e.g. AND/OR/NOT) for complex search queries:
| Search Query | Description |
|---|---|
| name | Token Name. For Example: name:some-name |
| user | User Name, for user-based tokens. For Example: user:foo |
| token_type | Token Type (Standard Token or User Token). For Example: token_type:standard (standard)token_type:user (user) |
Creating Entitlement Tokens
You can create and configure Entitlement Tokens via the Website UI by clicking the green "Create Token" button:
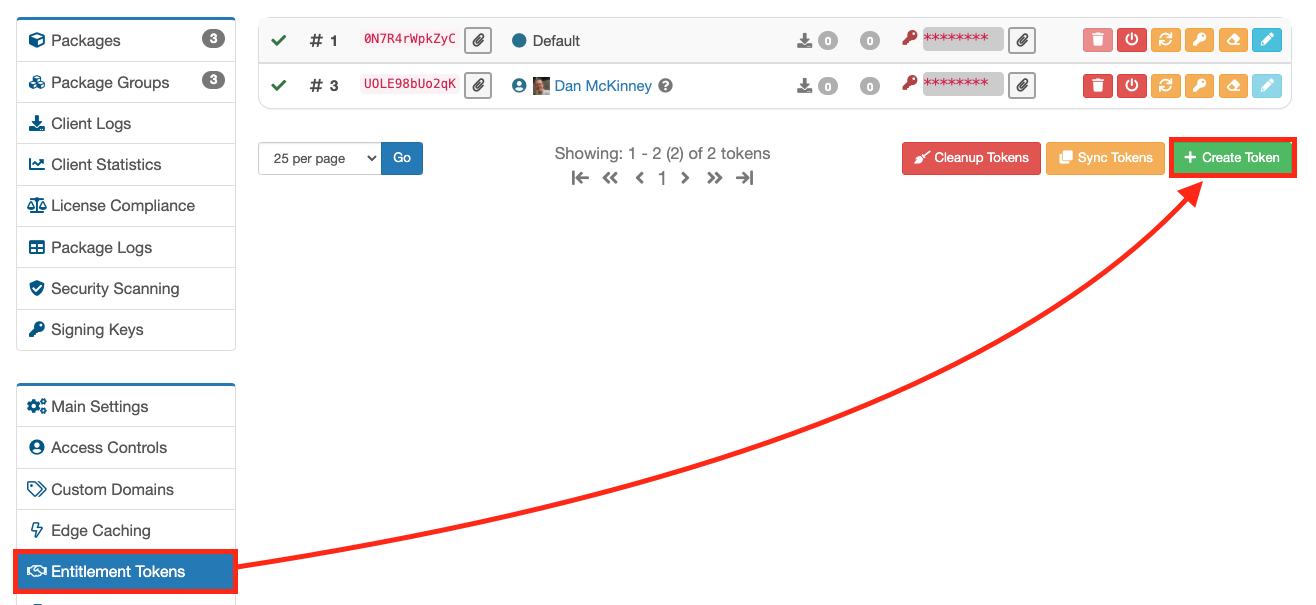
Create Token Button
You will then be presented with a form where you can name the token and configure permissions/restrictions that the token grants on the repository:
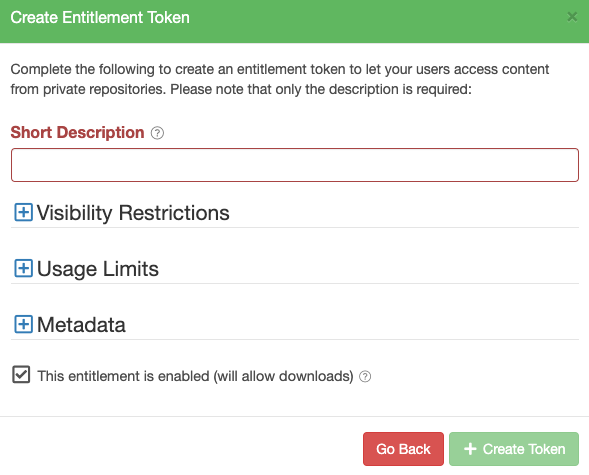
Create Token Form
Visibility Restrictions
You can add visibility restrictions to a token which will control what packages the token has access to:

Visibility Restrictions
| Restriction | Description |
|---|---|
| Restrict by Search | The package-based search query to apply to restrict downloads to. This uses the same syntax as the standard search used for repositories (see Searching / Filtering for more details). This will still allow access to non-package files, such as metadata. For package formats that support dynamic metadata indexes, the contents of the metadata will also be filtered. |
Usage Limits
You can add usage limits restrictions to a token which will control how the token can be used. The configurable restrictions are:
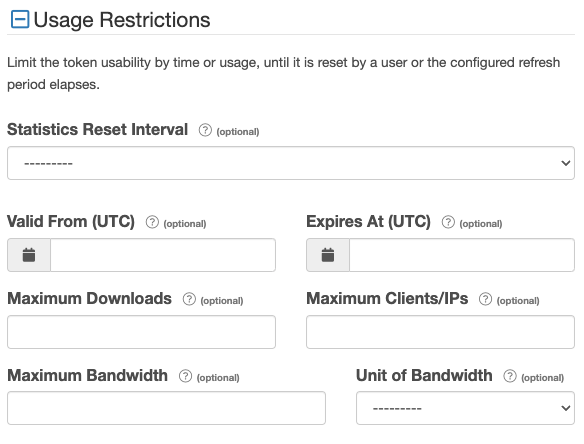
Usage Limits
| Limit | Description |
|---|---|
| Statistics Reset Interval | A token reset refreshes the maximum downloads, clients/IPs, and bandwidth restrictions to zero and maintains the existing limits. The reset period used will be used to automatically trigger a reset of the token limits during the configured period. |
| Valid From (UTC) | The starting date/time the token is allowed to be used from. |
| Expires at (UTC) | The ending date/time the token is allowed to be used until. |
| Maximum Downloads | The maximum number of downloads allowed for the token. Please note that since downloads are calculated asynchronously (after the download happens), the limit may not be imposed immediately but at a later point." |
| Maximum Clients/IPs | The maximum number of unique clients allowed for the token. Please note that since clients are calculated asynchronously (after the download happens), the limit may not be imposed immediately but at a later point. |
| Maximum Bandwidth | The maximum download bandwidth usage allowed for the token. Please note that since downloads are calculated asynchronously (after the download happens), the limit may not be imposed immediately but at a later point. |
| Unit of Bandwidth | The selected unit of bandwidth to apply to the Maximum Bandwidth restriction. Please Note 1GB = 1000000000 (1000^3) Bytes, not 1073741824 (1024^3) Bytes. |
Please see Sharing a Private Package for an example of configuring an Entitlement Token using the Website UI.
Additional Metadata
In addition, you can optionally add metadata to the token that is specific to your use case. This could be used to store information such as licensing information, but the format and contents are defined by you. You add this metadata as JSON into the "Token Metadata (JSON)" field:

Token Metadata JSON field
EULA Acceptance
EULA for Entitlement Tokens is currently in Early Access. If you'd like to be included in early access to this feature please contact us.
You can specify that a EULA must be accepted before an Entitlement is enabled:
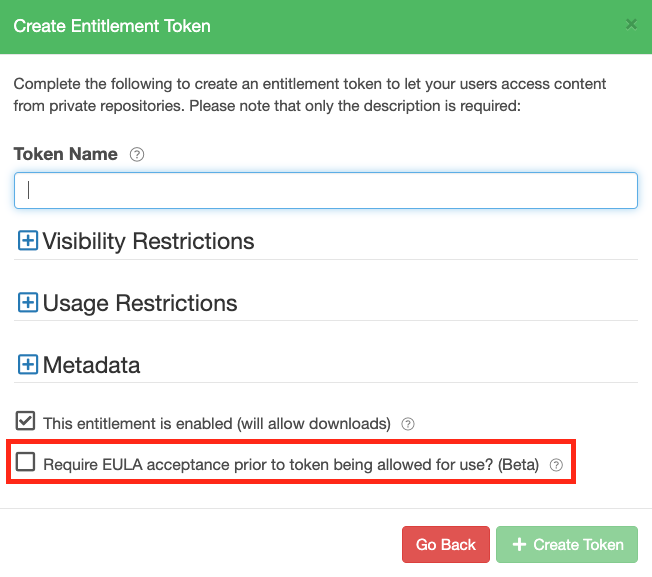
Entitlement Token EULA
If checked, then a client will be compelled to go to the token-based URL for EULA acceptance, before they are able to use the token to download files. Note that this also requires EULA enforcement to be enabled on the repository.
Editing Entitlement Tokens
Editing an Entitlement Token allows you to change the token name, modify any permissions/restrictions associated with the token or change the token's metadata.
You edit an Entitlement Token via by clicking the blue "Edit Token" button:

Edit Token Button
NOTE
User Entitlement Tokens cannot be edited
You are then presented with the Edit Entitlement Token form where you can make any changes and click the green "Edit" button to apply them:
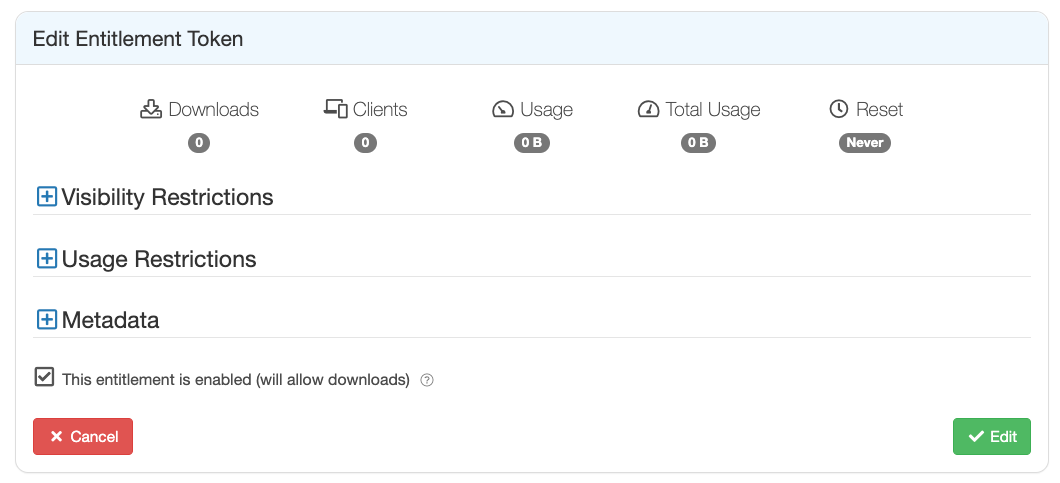
Edit Token Form
Setting an Entitlement Token
When you create an Entitlement Token, we generate a random string for the token itself, and it is this random string that will appear in URLs or other configuration files that use the token. The token is not displayed in the Website UI until you click on the token field:

Token Field
Setting an Entitlement Token allows you to use your own custom string for an Entitlement Token. Please note, setting a custom string for a token will not change the token name or any permissions/restrictions associated with the token, but it will have the effect of invalidating any users/clients using the current token.
You set an Entitlement Token by clicking the orange "Set Token" button:

Set Token Button
You will then be presented with the Set Token form, where you have to confirm the repository slug/identifier (to prevent the accidental setting of a token) and enter the new string for the token:
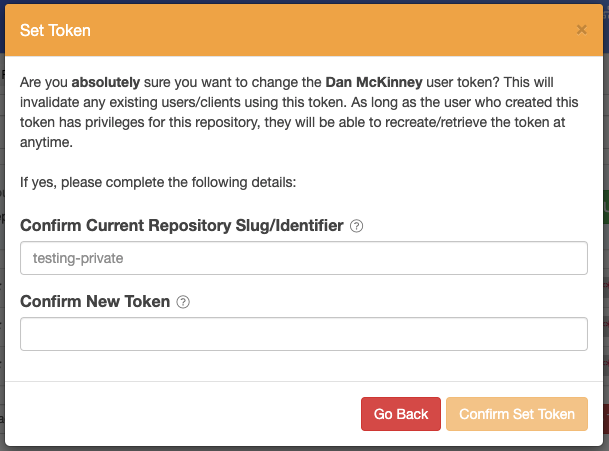
Set Token Form
If you specify a custom string for a token, it must be between 8 - 48 characters in length. It must only contain alphanumerics, dashes, dots or underscores and it must begin with an alphanumeric.
Resetting Entitlement Token Statistics
Resetting Entitlement Token Statistics will reset the download and client counts to zero. You can reset the statistics associated with an Entitlement Token by clicking the orange "Reset Token Statistics" button:

Reset Token Statistics Button
You will then be presented with the Reset Token Statistics form where you must confirm the current repository slug/identifier (to prevent accidental resets of statistics) and then click the orange "Confirm Reset" button:
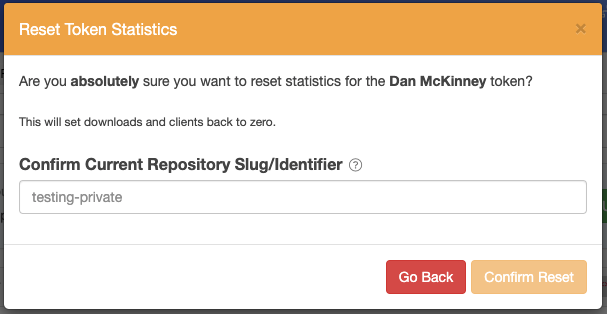
Reset Token Statistics Form
Refreshing Entitlement Tokens
Refreshing will generate a new Entitlement Token and this will invalidate the current token in use by existing users/clients. Refreshing an Entitlement Token will not change the token name, or any restrictions/permissions associated with the token, it just generates a new token itself. As long as the user who created this token has privileges for this repository, they are able to recreate/retrieve the token at anytime
To refresh an Entitlement Token, click the orange "Refresh Token" button:

Refresh Token Button
You will then be presented with a form that will ask you to enter the repository slug/identifier (this is to prevent accidental token refreshes), and then click the orange "Confirm Refresh" button:
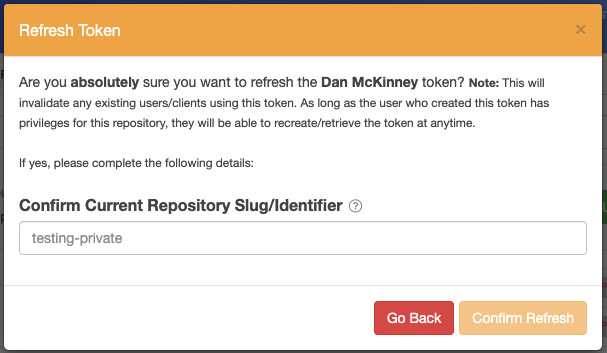
Refresh Token Confirmation Form
A refreshed token will still be able to be used for static assets (that are cached at the Package Delivery Network) for approximately 10 minutes until the PDN has to re-authenticate once its cache expires.
Synchronising Entitlement Tokens
Synchronising Entitlement Tokens replaces all the tokens currently associated with a repository with those from another repository. This will invalidate any current tokens in use by existing users/clients.
You can synchronise Entitlement Tokens between repositories by clicking the orange "Sync Tokens" button below the list of Entitlement Tokens:

Sync Tokens Button
You will then be presented with the Sync Tokens form, that requires you to confirm the current repository slug/identifier (to prevent the accidental synchronisation of tokens) and chose the source repository from a drop-down list:
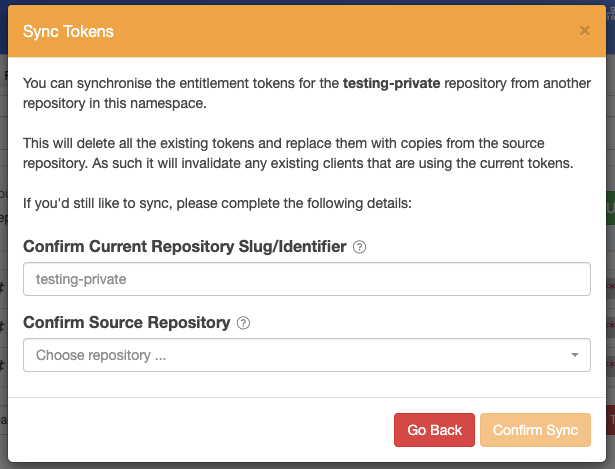
Sync Tokens Confirmation Form
When you have confirmed the current repository slug/identifier and selected the source repository for the tokens you wish to synchronise, click the orange "Confirm Sync" button to synchronise the tokens.
Disabling Entitlement Tokens
You can disable an Entitlement Token via the Website UI by clicking the red "Disable Token" button:

Disable Token Button
The disabled token will be removed from the list and will no longer be visible. You can re-enable the token by setting the view toggle "Show Everything" or "Show Disabled" to "Yes" ( see Viewing Entitlement Tokens ) and then clicking the green "Enable Token" button:

Enable Token Button
A deleted token will still be able to be used for static assets (that are cached at the Package Delivery Network) for approximately 10 minutes until the PDN has to re-authenticate once its cache expires.
Deleting Entitlement Tokens
You can delete an Entitlement Token via the Website UI. This is a soft-delete, in that the token will no longer be available for use but the history of the token will be retained for logging/auditing purposes.
To delete an Entitlement Token via the Website UI, click the red "Delete Token" button on the token you want to delete:

Delete Token Button
You will be presented with a form that will ask you to enter the current repository slug/identifier (this is to prevent accidental deletion of a token), and then click the red "Confirm Delete" button:
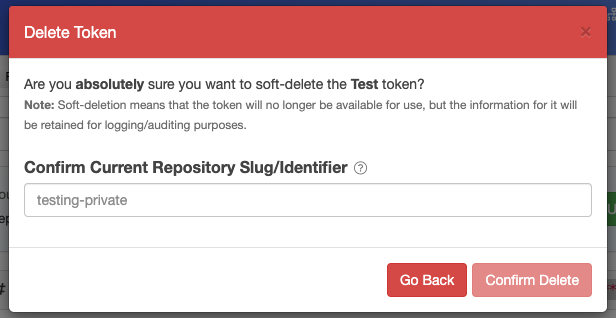
Delete Token Confirmation Form
A deleted token will still be able to be used for static assets (that are cached at the Package Delivery Network) for approximately 10 minutes until the PDN has to re-authenticate once its cache expires.
Deleted Entitlement Tokens cannot be re-enabled.
Entitlement Tokens Cleanup
To clean up old/invalid user tokens, such as where the user no longer has permission for the repository, click the red "Cleanup Tokens" button:
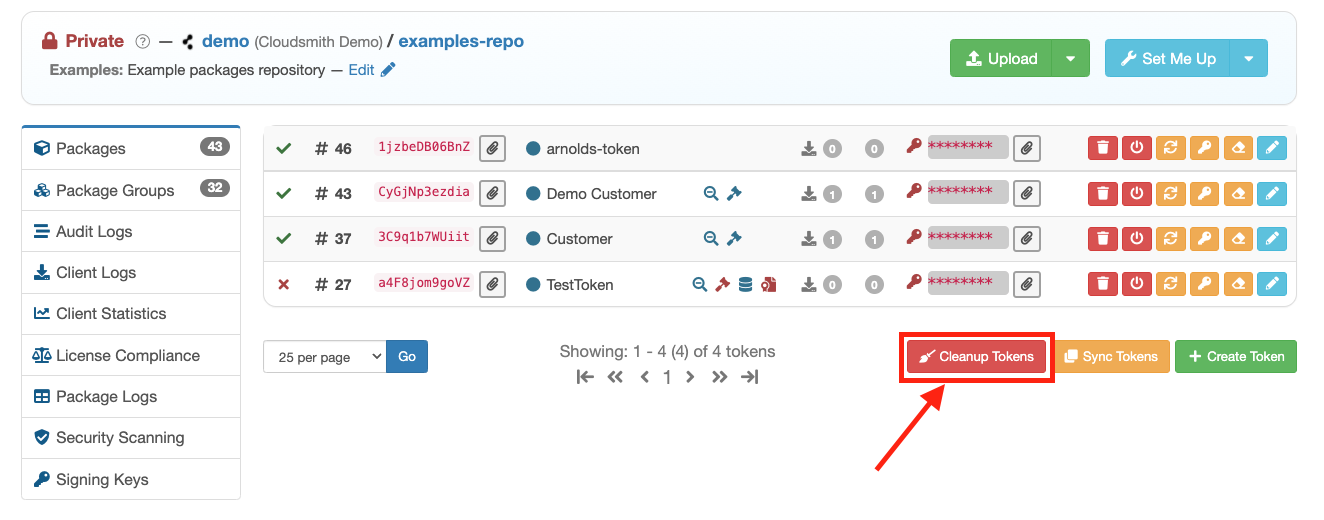
Cleanup Tokens Button
This is a safe operation as the tokens would already not be usable.
Updated 6 months ago
