Permissions
Setting up an Organization in Cloudsmith allows you to set up clear access to teams, individuals and machines that map to your company's organizational structure.
Building security and resilience into managing teams and workflows is essential in today's ecosystem. Below is a quick start guide to the powerful permission system within Cloudsmith.
Permissions are divided into three levels: Organization, Team and Repository-specific.
The best way to see what the permissions can do (at a broad level) is to select the permission level dropdown in the views (described/shown below).
Organization Permissions
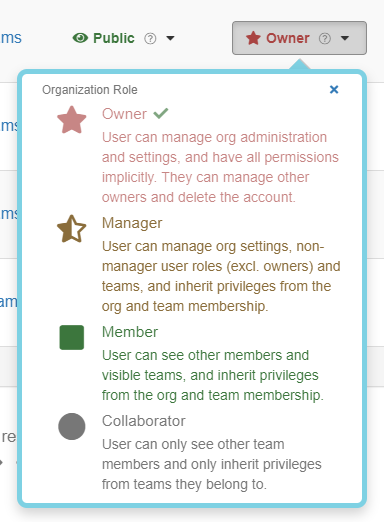
Privileges for a member within an Organization:

An "Owner" is the "root" of the organization, and is the only user that can manage other users or delete the organization.
All members inherit some permissions from the Organization that determine what they can and can't do (e.g. create repositories).
In addition to that, you can give a "standard" level of repository privilege to members (this is "None" by default).
Team Permissions
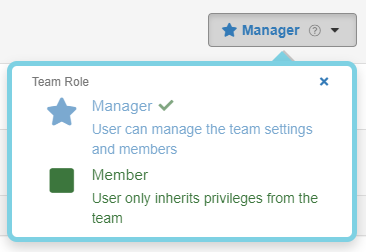
Privileges for a member of a team:

Repository Permissions
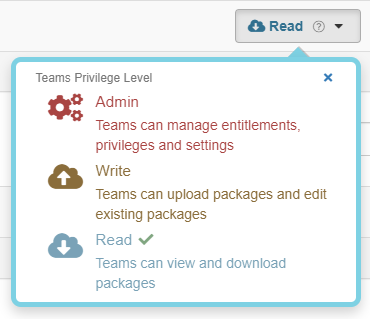
Privileges on repositories, given to teams or users:

Getting Started!
The normal setup for customers is to invite all employees/staff as members to the Organization.
Then add them to teams based on their roles/function/software (e.g. "operations", or maybe "frontend").
Then add teams to the repositories with the relevant permissions depending on what they need (e.g. "operations" might have "Admin" access on the "production" repository).
Updated 8 months ago
