Setup Jenkins to Authenticate to Cloudsmith using OIDC
Cloudsmith establishes a trust relationship with Jenkins to allow authentication via OIDC tokens for secure access to Cloudsmith's services.
Using OIDC with Jenkins and Cloudsmith
This guide provides a setup process for configuring Jenkins to authenticate with Cloudsmith using OpenID Connect (OIDC). By using OIDC, Jenkins can issue short-lived tokens for secure access to Cloudsmith resources.
Prerequisites
-
Jenkins OIDC Plugins
Install the following plugins in Jenkins:- OpenID Connect Provider Plugin - The OIDC Provider plugin allows Jenkins to act as an OpenID Connect Provider, issuing tokens that can be consumed by Cloudsmith for authentication.
- Credentials Binding Plugin - Allows secure injection of credentials (e.g., OIDC tokens) into Jenkins jobs.
-
Service Account in Cloudsmith
Create a Service Account in Cloudsmith for OIDC access. This will act as a proxy identity for Jenkins jobs.
Step-by-Step Setup
1. Install Required Plugins
- Go to Manage Jenkins → Manage Plugins.
- Under the Available tab, search for:
- OIDC Connect Provider https://plugins.jenkins.io/oidc-provider/
- Credentials Binding https://plugins.jenkins.io/credentials-binding/
- Install both plugins and restart Jenkins if prompted.
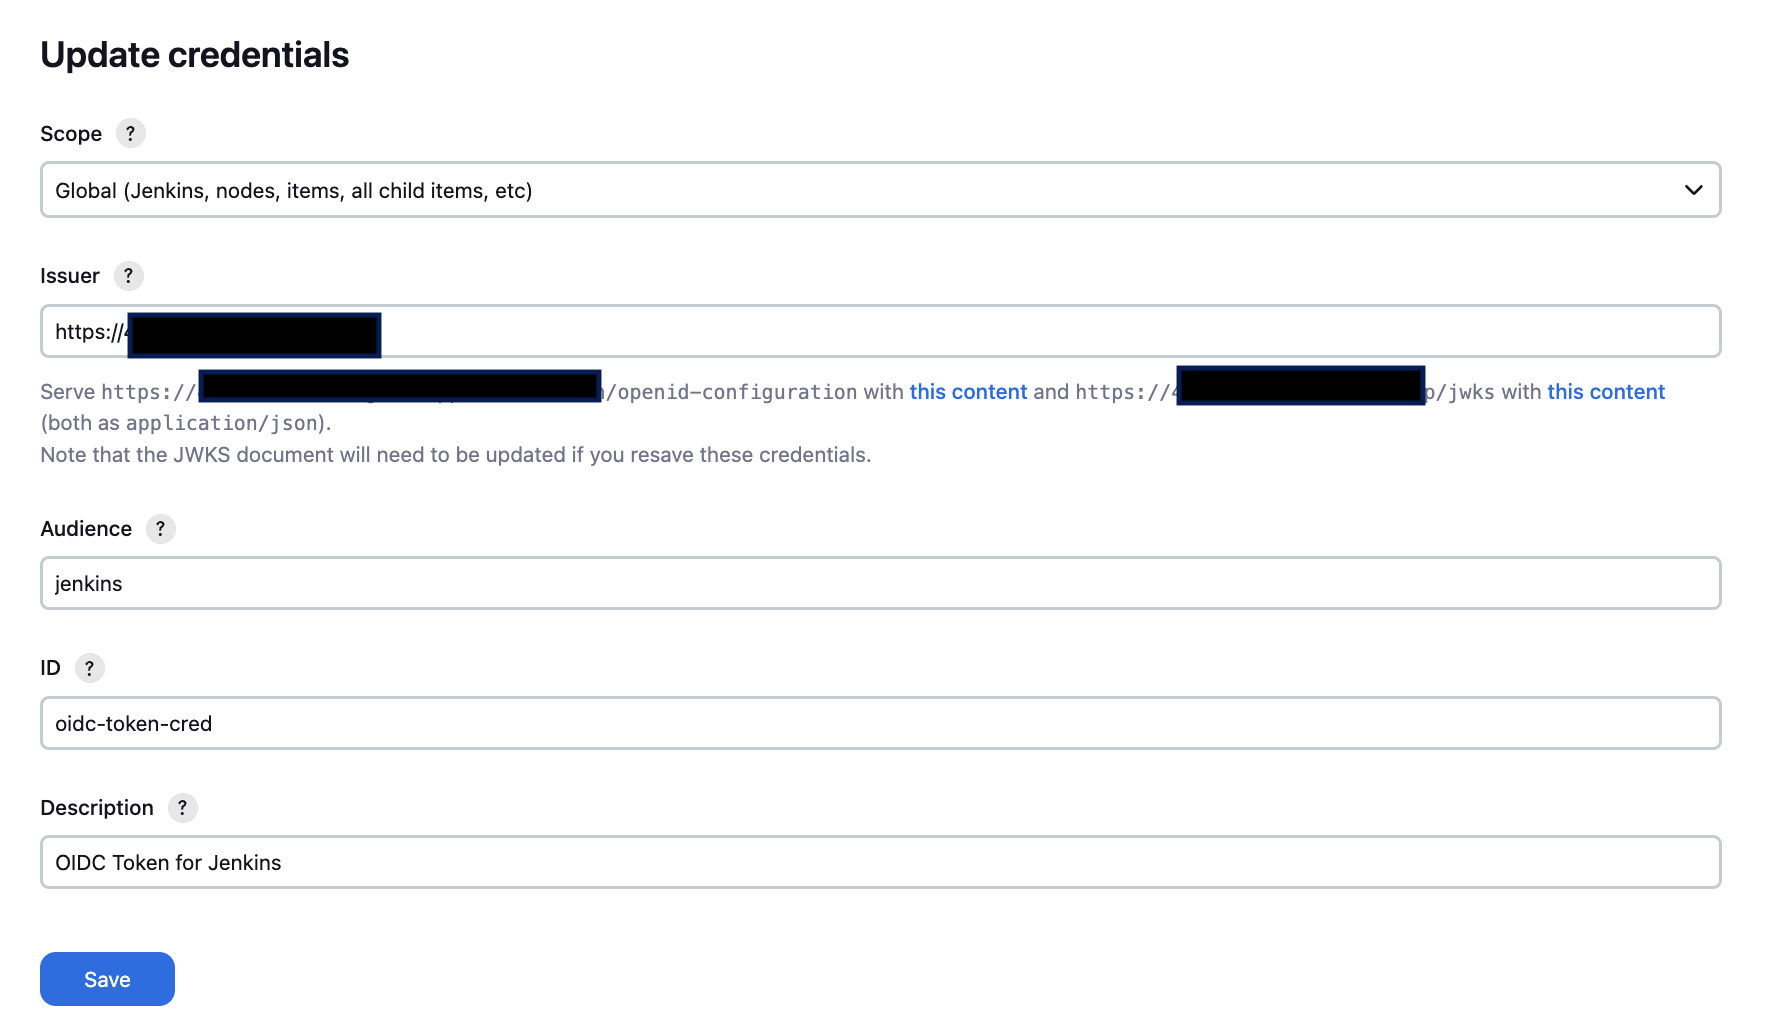
2. Create OIDC Credential in Jenkins
- Go to "Manage Jenkins" → "Credentials" → "System" → "Global credentials"
- Click "Add Credentials"
- Select "Kind" → "OpenID Connect ID Token"
- Fill in:
- Scope: "Global"
- ID: "oidc-token-cred"
- Audience: jenkins
- Description: "OIDC Token for Jenkins"
- Issuer URL: Your publically assessible URL
- Click "OK"

3. Host OIDC Configuration Files
After creating the credential, Jenkins will show you two URLs where you can get the configuration files:
- OpenID Configuration URL:
http://your-jenkins-instance/manage/descriptorByName/io.jenkins.plugins.oidc_provider.IdTokenStringCredentials/wellKnownOpenidConfiguration?issuer=your-public-url - JWKS URL:
http://your-jenkins-instance/manage/descriptorByName/io.jenkins.plugins.oidc_provider.IdTokenStringCredentials/jwks?id=oidc-token-cred&issuer=your-public-url
Requirements for hosting these files:
- Put the OpenID configuration at /.well-known/openid-configuration
- Put the JWKS at /jwks
- Host domain must match the issuer URL in Jenkins
4. Create a Service Account in Cloudsmith
- Navigate to your Cloudsmith Organization.
- Go to Services under Account Settings and click Create Service.
- Provide:
- A name and optional description.
- Select any teams for access control if needed.
- Save your service account.
- Assign the service account appropriate permissions for your repository..
5. Configure OIDC Provider in Cloudsmith
- Go to OIDC Provider Settings at:
https://cloudsmith.io/orgs/{ACCOUNT}/settings/openid-connect/ - Click Create to open the provider form and configure:
- Provider Name: Enter a unique name for Jenkins.
- Provider URL: Enter the Jenkins OIDC endpoint- this should match the URL in Step 2, Issuer.
- Required OpenID Token Claims:Configure at least one claim, such as
aud: jenkins. - Service Accounts: Select the Cloudsmith service accounts to authenticate with the provider.
- Save the configuration.
6. Configure a Jenkins Job
-
Create a new Freestyle Project in Jenkins.
-
In the project configuration::
- Under "Build Environment" → "Use secret text(s) or file(s)"
- Add → "Secret text"
- Variable: "OIDC_TOKEN"
- Credentials: Select your OIDC token
-
Add build step "Shell":
# Get Cloudsmith token
response=$(curl -X POST -H "Content-Type: application/json" \
    -d "{\"oidc_token\":$OIDC_TOKEN, \"service_slug\": $CLOUDSMITH_SERVICE_ACCOUNT_SLUG}" \
    https://api.cloudsmith.io/openid/${CLOUDSMITH_ORG}/)

# Get token from response
token=$(echo "$response" | jq -r ".token")

# Install packages using token
python -m venv jenkins
source ./jenkins/bin/activate
PIP_INDEX_URL="https://token:[email protected]/basic/${CLOUDSMITH_ORG}/${CLOUDSMITH_REPO}/python/simple/"
pip install package-name --index-url $PIP_INDEX_URL
7. Test the Setup
- Trigger the Jenkins job.
- Monitor the console output:
- Ensure the OIDC token is successfully retrieved.
- Verify the Cloudsmith token is exchanged and used for authentication.
- Confirm packages are pushed/pulled to/from the specified Cloudsmith repository.
Example Jenkins Pipeline
You can find an example Jenkins Pipeline that integrates with Cloudsmith via OIDC here: https://github.com/cloudsmith-iduffy/jenkins-oidc-poc
Troubleshooting
- Make sure the Cloudsmith service account has permissions to access the Cloudsmith repository.
- Invalid Claims or Tokens: Ensure the claims in Jenkins and Cloudsmith match.
- Plugin or Credential Issues: Verify plugin installations and credential configurations.
- Network Errors: Confirm Jenkins can reach Cloudsmith APIs and vice versa.
4. Handle Errors
If the job fails, common errors might include:
- Invalid Claims or OIDC Token: Ensure your Jenkins OIDC provider claims match Cloudsmith’s settings.
- Missing Plugins or Credentials: Double-check plugin installation and credential configuration.
- Network Issues: Verify connectivity between Jenkins and Cloudsmith.
Updated about 1 month ago
